• Steel Soldiers now has a few new forums, read more about it at: New Munitions Forums!

  • Microsoft MSN, Live, Hotmail, Outlook email users may not be receiving emails. We are working to resolve this issue. Please add support@steelsoldiers.com to your trusted contacts.

Jobsite Assault Vehicle

Reworked LMTV

Expedition Campers Limited, LLC
Supporting Vendor
1,511
1,178
113
Location
TN
Looks very nice! My mother had colon cancer and beat it. Nothing but blue skies after she had the resection : ) People mean well, but yes you sometimes have to do what you want to do!

What size square tubing did you use?
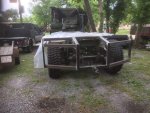
 

Strong50

Member
98
3
8
Location
Cape Girardeau MO
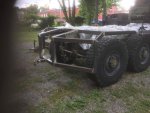
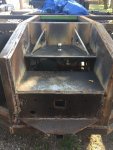
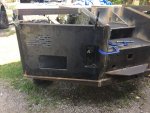
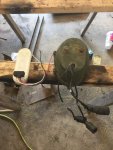
IMG_2054.jpgIMG_2056.jpgI finished the "frame" of the flatbed in between rain storms, hope it looks like at least have an idea of what I'm doing? I bought some cheap "Blazer" brand 1200 lumen LED lights and wired 4 of them up to the existing backup light wiring and they seem to all light up just fine.
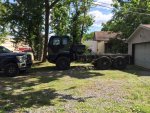
I ordered the 3/4" steel plate and 1/2" steel plate for the gooseneck and pintle hitches. I ordered a 30K gooseneck ball that i will inset between the frame rails and the ball will end up 12" behind the rear axle and 40" from the ground. Most of my flat bed 1 ton trucks have a bed height of 39" so i think i'll be able to fit under all stock gooseneck trailers. at least i'll be able to fit under all of mine. I've seen several examples of people on the forum mounting gooseneck hitches behind the axles, but does anyone of you have an idea of the tongue weight? The heaviest piece of equipment I have is 23k and my 3 axle trailer is 6k so I hope I'm ok.

I ordered a 45 ton air compensated pintle hitch that will be mounted on a 3/4" piece of plate. The hitch is a "Holland" brand with 10 tons of vertical force so I should be fine.

Thanks for looking. If anyone sees anything they would do differently, feel free to let me know. I build houses and buildings for a living, this is all foreign to me.
 

someoldmoose

New member
583
2
0
Location
Lancaster, PA
Looks amazing so far. As long as your welds are solid that thing should be "bulletproof" if not "bombproof". Bravo and Kudos to you Sir. Hoping all the best for your health also. I effing hate Cancer.
 

Strong50

Member
98
3
8
Location
Cape Girardeau MO
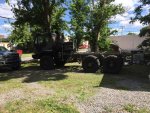
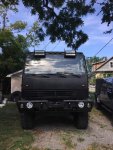
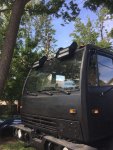
View attachment 684095IMG_2071.jpgIMG_2072.jpgHey guys. Here is a side profile.

This week we dissembled, and had bedliner applied to the the frame, bumber, air intake, controlls, basically everything except the cab.

Next project is to move the air tanks. is there a reason I cannot mount the airtanks vertically with the drain bib pointed down?

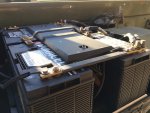
I also will be mounting the batteries in one of the under mount tool boxes and attempting to do this wiring planM1088 Batteries 2.jpg ordered some 1"x.25" silver plated copper buss bar.
I'll be mounting four 5' tool boxes, two 30" tool boxes, and a 30" Mechanics box. Looks like i'll end up with 60" between the tool boxes on the flatbed.

thanks for looking.
 

someoldmoose

New member
583
2
0
Location
Lancaster, PA
The air tanks MAY be mounted in whatever position you desire, as long as water can get from all the tanks to the lowest point in the lowest tank and you have your drain valve at that lowest point (or have a drain on each tank at the lowest point of each tank).

Am I correct in understanding that the buss bar is for connecting the batteries together and then tapping off the bar instead of a cable end going directly to the batts ? Interesting.
 
Last edited:

coachgeo

Well-known member
5,150
3,466
113
Location
North of Cincy OH
Just make sure you follow the OEM battery wiring schematic with your Bus Bars....... this truck is wired Series/Parallel unlike a good number of 24v trucks.
 

Strong50

Member
98
3
8
Location
Cape Girardeau MO
I found that picture of the wiring on a post on SS about 6 months ago, i've searched for it several times and cannot find it. I would like to give who ever it was credit.

Yes, I think it would be easier to pull accessories off of the buss bar.
 

Strong50

Member
98
3
8
Location
Cape Girardeau MO
If you were curious on how to ruin your LMTV, just have two high school kids spray on Lizardskin sound deadener on your cab. They are working for me and they actually sprayed their own trucks which look good, but they used rustoleum rattle cans. Apparently a paint sprayer is beyond their expertise.

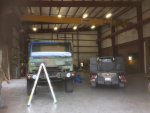
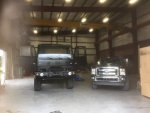
I got cleared from my Doctor to resume normal activities so I moved the M1088 Project to the big shop because now no one can tell me to take it easy. Used the gantry crane to remove the bed frame I built so we could clean up some welds and so these knuckleheads could paint the cab. The prep work was spot on, but for some reason it just didn't turn out very well. The Lizardskin was acting like it had been frozen, which we deal with time to time on conventional building paint. The first picture is of the Lizardskin on the underbelly of the cab. the second ws during prep work, and the third id the finished product. I'll keep you posted on the condition of the Lizardskin once it fully cures. In the third pick is my daily driver which is an F-250 lifted, with 36" tires. I was pleased to see that the headlight bulb was 2" lower on the LMTV, now I won't feel so bad at night after putting in the new head lights. I bought h4 7" housings and Hyper white Bulbs. I debated the LED lights, but with LED tech developing so fast I wanted the option to replace my bulbs. IMG_2110.jpgIMG_2112.jpgIMG_2113.jpg
 

Strong50

Member
98
3
8
Location
Cape Girardeau MO
So... Slowly, but surly I've been working on the Jobsite Assult vehicle.

Main Focus is putting the Gooseneck/Pintle/Receiver hitch together. Please don't make fun of my welds, i'm still learning. IMG_2272.jpg

I made a couple light bar brackets for the 14" LED light bars and waiting on my 14" amber beacon lights to come in.IMG_2261.jpgIMG_2262.jpg

So the rear tail lights are a bit different. I'm "trying" to figure out how to illuminate the laser cut American Flag that will hopefully be my break light. IMG_2248.jpg

Here is my problem. I want to use 3 wire LED break lights behind the American flag in the previous picture. There are obviously 4 wires coming out of the back of the Stock FMTV break light. Is there anyone who might be able to suggest how to connect the wires from the truck to the wires on the back of the LED break lights?IMG_2285.jpg
The LED "3 wire" have
White = Ground
Red = stop/blinker
Black = Runing lights.

The stock wiring as i can tell
21 = Running light
22 = Hazard/Break
23 = Blinker
24 = goes from one light to the other light?


If anyone needs the stock break lights and stock reverse light, let me know. I'll can send them to you if you pay for shipping.

Any help would be much appreciated.
 

Attachments

Last edited:

gimpyrobb

dumpsterlandingfromorbit!
27,786
757
113
Location
Cincy Ohio
You only need 2 of the wires, the other 2 are for black out mode.

I'll see if I can find which ones to use...
 

gimpyrobb

dumpsterlandingfromorbit!
27,786
757
113
Location
Cincy Ohio
No, those are both + leads. Without seeing what light you are hooking up its hard to say. One is for marker lights, the other is for brake lights. Sounds like you need to run the black lead to ground.
 
Top
AdBlock Detected

We get it, advertisements are annoying!

Sure, ad-blocking software does a great job at blocking ads, but it also blocks useful features of our website like our supporting vendors. Their ads help keep Steel Soldiers going. Please consider disabling your ad blockers for the site. Thanks!

I've Disabled AdBlock
No Thanks