• Steel Soldiers now has a few new forums, read more about it at: New Munitions Forums!

  • Microsoft MSN, Live, Hotmail, Outlook email users may not be receiving emails. We are working to resolve this issue. Please add support@steelsoldiers.com to your trusted contacts.

MEP-803 install with automatic transfer & remote monitoring

dschoolxlt

New member
5
8
3
Location
Youngstown, Ohio
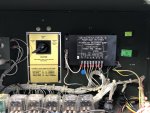
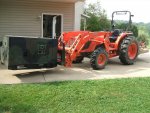
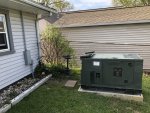
Hey Folks, long time lurker, but new MEP owner. I picked up a new to me MEP-803. This ones been tier 1 reset and had the Tobyhanna remote monitor modification. Fortunately it had the loop back plug and fired right up.

After reading the forums, I did the standard onceovers, replacing bad fuel lines. Fluid changes and new batteries. It didn’t have the quad winding fuse, so that was added also. I have the parts for the ultimate wellnut update. So that’s on the agenda for the next decent day I have off. Otherwise So far no issues. I’m pretty much able to run the entire house on it with no issues.

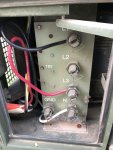
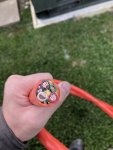
I poured a pad for it and used Generac control cabling for it. This has three #4 hots/neutral. one #8 Ground & six #18 control wires. I figured this was best since I’m roughly 100feet from my main panel. This is currently set up with an interlock and back feed 60amp breaker. I also added a disconnect inline at the set itself as the “fixed” sets need a disconnect within sight and the next closest would be in the house panel.

The bonding strap was removed as it is bonded in the main panel. I did drive a grounding rod at the set and wired it to the genset frame itself. I still have some conduit items to sort out yet. But all is functional.

I’m likely going to go with the Klopp controller for it to get the two wire start.

Is there a specific outdoor rated 100amp automatic transfer switch that’s recommended? I’m in northeast Ohio. So I believe we follow 2017 NEC as far as regs

Here’s the set up so far
CF4BA96E-5D4D-460C-BAD0-D44D616FD4B6.jpeg
 

Attachments

Zed254

Well-known member
866
466
63
Location
S. Hampton Roads, VA
You might want to provide a place for neighbors to plug in unless they all have their own generators.

I've got a manual set up and have a spider box/power distribution box in the circuit that I run to my house breaker box. The neighbors really appreciate the opportunity to keep their refrigerators / TVs / lights on during our outages and the additional power consumption helps my generator.
 

gatorbob

Member
120
21
18
Location
Saint Augustine, FL
Nice setup! Thanks for sharing the details.

ASCO makes great automatic transfer switches but they sure are expensive, even the residential 185 series. Not sure when the home was built, but making the ATS your service entrance can be a bit of a pain. You'll have to separate the neutral conductors from the ground conductors in your current main panel. It gets worse if you have 3 wire 240V receptacles with a bare ground conductor. I think the NEC wants you to run a new 4 wire circuit or insulate the old bare conductor in the old main panel. It's so complicated I already forget the logic behind all of it.

IMHO after a year or two to reflect, the best solution for somewhat automated operation is the wifi remote start kit offered by a member here. Plus, the monitoring capabilities end up being important if the weather is bad outside. Sounds like your main panel is outside so I imagine flipping a backfed breaker might require a trip potentially through the snow.

I think a member on here (Daybreak?) has a meter fed solution but my power company wouldn't allow/support it. I don't recall seeing a manual switch on that solution so perhaps the switchover is automatic. I liked this solution the most.
 

fosgittr

New member
23
14
3
Location
Midland, MI
Hey Folks, long time lurker, but new MEP owner. I picked up a new to me MEP-803. This ones been tier 1 reset and had the Tobyhanna remote monitor modification. Fortunately it had the loop back plug and fired right up.

After reading the forums, I did the standard onceovers, replacing bad fuel lines. Fluid changes and new batteries. It didn’t have the quad winding fuse, so that was added also. I have the parts for the ultimate wellnut update. So that’s on the agenda for the next decent day I have off. Otherwise So far no issues. I’m pretty much able to run the entire house on it with no issues.

I poured a pad for it and used Generac control cabling for it. This has three #4 hots/neutral. one #8 Ground & six #18 control wires. I figured this was best since I’m roughly 100feet from my main panel. This is currently set up with an interlock and back feed 60amp breaker. I also added a disconnect inline at the set itself as the “fixed” sets need a disconnect within sight and the next closest would be in the house panel.

The bonding strap was removed as it is bonded in the main panel. I did drive a grounding rod at the set and wired it to the genset frame itself. I still have some conduit items to sort out yet. But all is functional.

I’m likely going to go with the Klopp controller for it to get the two wire start.

Is there a specific outdoor rated 100amp automatic transfer switch that’s recommended? I’m in northeast Ohio. So I believe we follow 2017 NEC as far as regs

Here’s the set up so far

View attachment 799030
Just curious, how did you move that thing into your back yard? I am trying to do something similar and I am stumped on how to get it there without it being a major pain. Looking for ideas. Thanks!
 

gatorbob

Member
120
21
18
Location
Saint Augustine, FL
Just curious, how did you move that thing into your back yard? I am trying to do something similar and I am stumped on how to get it there without it being a major pain. Looking for ideas. Thanks!
I put wheels on mine before loading it. Used a pallet jack to get it off the U-haul rental trailer and down the ramp. I put 3/4" plywood pieces overlapping on the grass. Still had to rent a walk behind skid steer to lift it on the concrete pad. The rental guys called it a "dingo". It was only rated for 1,000 lbs but the MEP was already next to the concrete pad. I cut a deal with the equipment rental guys to just place it for me. That cut down on the total time their gear was out of commission because the whole thing took them 15 minutes.

Using the plywood and pallet jack was a PITA because it was so hard to maneuver. If the gate to my fence was wider I would have rented a bigger skid steer with forks to handle the entire placement so I could take my time.

One big mistake: I did not pre-drill holes in the concrete. It's now impossible to use my rotary hammer to access the bolt holes in the skid without drilling at an angle. I need to go back and find a different way to mount it now.
 

BobbyT

Member
65
37
18
Location
Little Rock, Arkansas
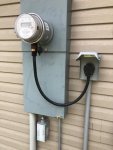
I use a Generlink meter base transfer switch connected to my 002a. The Generlink can handle up to 10kw continuous. It was the cheapest and easiest way to put a transfer switch on my house, plus i own it so it can be removed and taken to another house. I piped #6 from the generator to the meter and then cut the cord that came with the Generlink down to go from the piped plug to the collar. I used all 50 amp capable plugs and wire. Just fire up the genny and when you close the breaker on it, the collar automatically switches transferring power to emergency input. It will stay on gen power until you stop supplying power to it. They do offer a wireless module that will let you know when commercial power is restored, but i can just look around at the other houses in my neighborhood so i didn't get that option.

The 002a is all manual, but i will be replacing it with one of the 802a's i have and adding @kloppk 's controller so i don't have to go out and do everything manually.

So the Generlink may be an option for you if you keep the load at 10KW or less. I purchased it through my power company and they let me add it to my utility bill for 12 months no interest so that was nice. It was around $850 if i recall, its been 5 years or so.
 

Attachments

Guyfang

Moderator
Staff member
Moderator
16,760
24,065
113
Location
Burgkunstadt, Germany
One big mistake: I did not pre-drill holes in the concrete. It's now impossible to use my rotary hammer to access the bolt holes in the skid without drilling at an angle. I need to go back and find a different way to mount it now.
[/QUOTE]

The thing is not that heavy. I am old, and tired. But two of us could move it, (read that shove it) an inch or two and then you can drill, Then move it back in the other direction to drill again.
 

America

Member
75
35
18
Location
USA
I put wheels on mine before loading it. Used a pallet jack to get it off the U-haul rental trailer and down the ramp. I put 3/4" plywood pieces overlapping on the grass. Still had to rent a walk behind skid steer to lift it on the concrete pad. The rental guys called it a "dingo". It was only rated for 1,000 lbs but the MEP was already next to the concrete pad. I cut a deal with the equipment rental guys to just place it for me. That cut down on the total time their gear was out of commission because the whole thing took them 15 minutes.

Using the plywood and pallet jack was a PITA because it was so hard to maneuver. If the gate to my fence was wider I would have rented a bigger skid steer with forks to handle the entire placement so I could take my time.

One big mistake: I did not pre-drill holes in the concrete. It's now impossible to use my rotary hammer to access the bolt holes in the skid without drilling at an angle. I need to go back and find a different way to mount it now.
You can move it over a bit with a 2byfour as a lever. That’s how I place these the final few feet. Just don’t put pressure on any of the weak points underneath.
 

Scoobyshep

Well-known member
1,137
1,510
113
Location
Florida
You can move it over a bit with a 2byfour as a lever. That’s how I place these the final few feet. Just don’t put pressure on any of the weak points underneath.
We moved a 005 into a back yard with 2 2x6 boards and a small track hoe

Sent from my SM-G950U using Tapatalk
 

dschoolxlt

New member
5
8
3
Location
Youngstown, Ohio
Just curious, how did you move that thing into your back yard? I am trying to do something similar and I am stumped on how to get it there without it being a major pain. Looking for ideas. Thanks!
I had the unit delivered to the driveway.. We used the small aluminum harbor freight floor jack and spare paver bricks bricks to get some height under it & made space to get a pallet jack under them to roll off the truck and up the driveway, We put the bricks back under it and set the unit on the bricks to get the pallet jack out once it was on the patio. The delvery guy's pallet jack was too wide for the holes in the skid, so we didn't have much choice.. They loaded it on his truck in Chambersburg with the forklift.. I had originally planned on picking it up myself, but with the PA < - > Ohio restrictions now, i didn't want to get stuck in a 14 day quarantine.. Chambersburg is about 4hrs from me.

I made a wheeled wood dolly with heavy duty metal casters from Tractor Supply like one of those typical wood mover dollies.. I rolled the dolly under the set supported by the paver bricks, then used the floor jack on each side to lower it down on the dolly. It rolled pretty easy after that..

From there, i have a paver based ramp that is attached to my patio that just happened to be wide enough to roll the gen to the yard. We put a few leftover 1" thick heavy full plywood sheets down over the grass, and layered it so that the path from the drive/patio was all over the plywood.. We then got one side on the pad, jacked up the other side, slid out the dolly & the three of us just slid the gen on the pad.. It was a bit of man handling to get it there.. but in the end, it's now where it needs to be.. All in total it probably took the 3 of us about half hour to get it rolled into place and on the pad. It wasn't too horrible..
 

dschoolxlt

New member
5
8
3
Location
Youngstown, Ohio
The main panel is actually in the house in one of the closets.. its a 50's cape cod. The main panel was replaced/updated in 2008 before i got the place. They luckily already have the neutral & ground bus bars separate and the panel is pretty clean. I would need to put the new transfer switch on the exterior next to the meter, then feed the main panel as a sub.. I'm working with one of the local sparky's to get that worked out. Not sure yet of what permits are required or any other changes. So that will be forthcomming. But in the short term, its all manual with an interlock at the main panel.. I put the disconnect at the set because it was required by code & it also helped make running the cabling easier.. #4 copper is a pain to work with.. That generac cable in the sheath is about an inch in diameter with the power and control cables.

I went with that cable because it was rated for pretty much everything.. Here's what The specs are:

Generator 12kW - 16kW Generac Generator Wire Technical / Specs:

Wire Outer Diameter = .92"

Wire Jacket Print Legend
(UL) E60544 POWER AND CONTROL TRAY CABLE TYPE TC-ER-JP 4 AWG (21,2 mm2) 3/C + 8 AWG (8,37 mm2)
1/C GROUND THWN CONDS & 18 AWG (0,82 mm2) 6/C TFFN CONDS 600V 75C DRY/75C WET OIL RES I
SUNLIGHT RESISTANCE DIRECT BURIAL JOIST PULL GENERAC P/N 1216 "sequential footage print"

Components A: (3) - #4 AWG Class C stranded, soft drawn, bare copper circuit conductors w/40 mils (1.02 mm) heat and moisture resistant, polyvinyl chloride (PVC) insulation and jacketed w/ 6 mils (0.15 mm) nylon applied directly to the surface of the insulation. B: (6) - #18 AWG Class K stranded, soft drawn, bare copper conductors w/15 mils (0.38 mm) heat and moisture resistant, polyvinyl chloride (PVC) insulation and jacketed w/ 4 mils (0.10 mm) nylon applied directly to the surface of the insulation. C: (1) - #8 AWG Class C stranded, soft drawn, bare copper grounding conductor w/30 mils (0.76 mm) heat and moisture resistant, polyvinyl chloride (PVC) insulation and jacketed w/ 5 mils (0.13 mm) nylon applied directly to the surface of the insulation D: Mylar binder tape. E: 80 mils (2.03 mm) of heat and moisture resistant, polyvinyl chloride (PVC) jacket. Print Legend (UL) E60544 POWER AND CONTROL TRAY CABLE TYPE TC-ER-JP 3 AWG (26,7 mm2) 3/C + 8 AWG (8,37 mm2) 1/C GROUND THWN CONDS & 18 AWG (0,82 mm2) 6/C TFFN CONDS 600V 75C DRY/75C WET OIL RES I SUNLIGHT RESISTANCE DIRECT BURIAL JOIST PULL GENERAC P/N TCERJP1216-250 "sequential footage print"

Electrical / Optical Characteristics Voltage: 600V Specifications Conductors: ASTM B 3, ASTM B 8, ASTM B174 Insulation: ICEA S-95-658 (NEMA WC 70), ICEA S-73-532 (NEMA WC 57), UL 83 for Type THWN wires Jacket: ICEA S-95-658 (NEMA WC 70), ICEA S-73-532 (NEMA WC 57), UL 1277 Ratings UL THWN 600V UL Type TC-ER-JP 600V The insulation is acceptable for use in locations at 75 °C dry and 75 °C wet. The cable is suitable for use in cable trays, aerial or direct burial installations.
 
Top
AdBlock Detected

We get it, advertisements are annoying!

Sure, ad-blocking software does a great job at blocking ads, but it also blocks useful features of our website like our supporting vendors. Their ads help keep Steel Soldiers going. Please consider disabling your ad blockers for the site. Thanks!

I've Disabled AdBlock
No Thanks