• Steel Soldiers now has a few new forums, read more about it at: New Munitions Forums!

  • Microsoft MSN, Live, Hotmail, Outlook email users may not be receiving emails. We are working to resolve this issue. Please add support@steelsoldiers.com to your trusted contacts.

armament for MV's...

teletech

Active member
426
209
43
Location
santa cruz,ca
anybody know what a complete demilled real 50 cal is worth with the pedestal mount for m-151 ???
If it's mostly GI parts used in a demill, I've seen them sell for north of $2K. If the parts are somewhat nice and including the pedestal it could easily be $3k based on prices from about a year back when I was shopping.
 

blisters13

Active member
461
78
28
Location
Beaumont in SoCal
OP emmado22: I'm not trying to hijack the thread, but would like to share the progress of the kit assembly. If you would prefer that I don't, please PM me or state here, and I will delete my posts.

Best,
-Ken

DISCLAIMER: I AM NOT ADVERTISING NOR PROMOTING FOR SANTAN FABWORKS, I don't receive any compensation for discussing this product, and if the way I am posting violates the rules, moderators please delete ALL THE POSTS. All I'm trying to do is discuss one option for MV armament, for display only. I researched replicas for hours, and this was what I considered my best option. If I could have gotten an M2 Airsoft, I would have.

* * * * * * * * * * * * * * * * * * * * * * * *
IMG_9612_web.gif
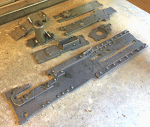
The kit as received (without the printed instructions, which I produced). Purchased in May 2020, price was under $1,000.

IMG_9880_web.gif
Outside of left side of receiver. I used a 5 1/2" grinder flap disc to break/smooth all the edges.

IMG_9883_web.gif
Inside: note welded rivets

IMG_9884_edit.gif
First thirty steps (or so) completed. My 17-year-old daughter calls this "Legos for adults":cool:

IMG_0259_web.gif
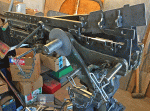
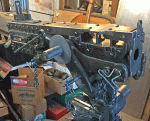
Around Step 66. The instructions require either a cradle with pins, or Santan's holding fixture (jig).
IMG_0263_web.gif

IMG_0325_web.gif
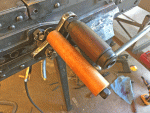
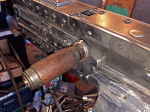
Original M2 charging handle. I had to weld-up the plate and drill and tap for 7/16" fine thread;
also a split lock washer was used as a spacer because the inside bore of the "skeleton" plate
was not big enough to pass the handle hub.
IMG_0326_web.gif
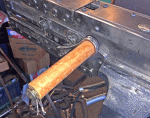
Charging handle as provided in the kit. It's longer, smaller diameter, and not ovalled. It looks
great from a distance (read: by civilians curbside at a parade), but I desired greater authentic
appearance.
 

Attachments

blisters13

Active member
461
78
28
Location
Beaumont in SoCal
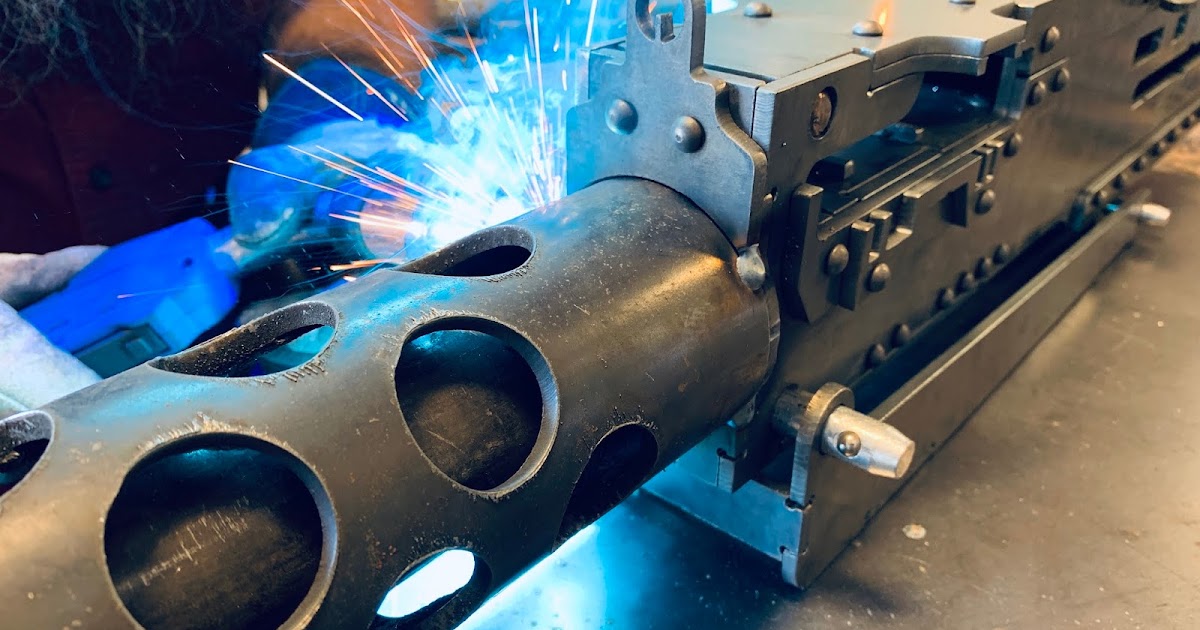
I finished the assembly today. Next is parkerizing, including sandblasting.

IMG_0420_web.gif
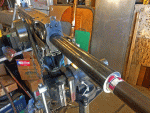
The barrel is designed to be removed for easier storage. I wrapped each end of it inside the
support tube, with aluminum can, to keep the support tube centered while it is welded to
the body.

IMG_0423_web.gif
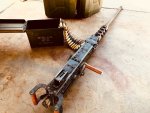
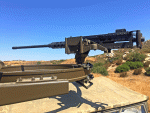
Finished with the barrel removed.

IMG_0427_web.gif

IMG_0428_web.gif
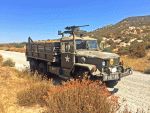
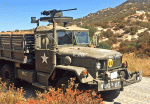
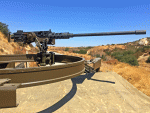
It should look decent to people sitting on the curbs during parades!

I used correct handles instead of the ones supplied with the kit.
 

cattlerepairman

Well-known member
Steel Soldiers Supporter
3,256
3,355
113
Location
NORTH (Canada)
Looks great, blisters13!
In fact...up here....it would look way TOO great. I cannot even imagine the hassle I would go through if I had a gun ring and that good of a replica MaDeuce mounted. I do like looking at them, though. Reminds me of the many events where "stale ammo" "absolutely had to be used up" before leaving the live fire range. So much fun walking the tracers right into target.
 

blisters13

Active member
461
78
28
Location
Beaumont in SoCal
Looks great, blisters13!
In fact...up here....it would look way TOO great. I cannot even imagine the hassle I would go through if I had a gun ring and that good of a replica MaDeuce mounted. I do like looking at them, though. Reminds me of the many events where "stale ammo" "absolutely had to be used up" before leaving the live fire range. So much fun walking the tracers right into target.
So, when I'm done, I will have to add a "blaze" orange cap to show police that it's a dummy.
 

blisters13

Active member
461
78
28
Location
Beaumont in SoCal
IMG_0998_web.gif

IMG_0998_web_2.gif

IMG_1006_web.gif

IMG_1007_web.gif
This was after the Parkerizing process

IMG_0988_web.gif

IMG_0982_web.gif
The assembly was bead-blasted to "white" metal finish beforehand.


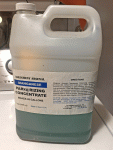
The compound I used:

IMG_1126_web.gif
NOTE: I am NOT advertising for, promoting, nor giving a review for this
specific product. I am only stating that this is what i used.

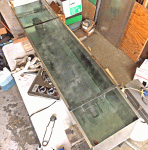
The stainless tank required 14 gallons of distilled water and 1/2 gallon
of the Parkerizing compound solution. It took three hours to heat from
72 F to 200 F because I used the wrong frickin heating equipment.

A propane or natural gas burner would have been more appropriate.

I also left the replica in the summer sun to help reduce fluid cooling at
immersion.

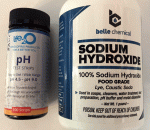
I neutralized the gallons of solution with this:
IMG_1098_web.gif

IMG_1096_web.gif
Before neutralizing

IMG_1097_web.gif
After.

I plan to dispose of the waste at the next city neighborhood chemical collection date.

I am REALLY HAPPY with this project. I showed it to a Vietnam vet, and he got all excited.

I will finish with the lame, blaze orange plug in the muzzle.

NOTE: I found a company selling completed M2 replicas on ePay for less than I spent on this,
but there's no way to judge the appearance nor quality by listing pics.
 

blisters13

Active member
461
78
28
Location
Beaumont in SoCal
Thanks for the kudos

Yeah, it’s not perfect but I’m pretty sure if I drove around town (in southern Kalifornia) with it mounted, I’d be on the pavement in handcuffs in short order.

One of my mil truck club buddies is a combat Marine and he’s all excited about it, and wants one.
 

teletech

Active member
426
209
43
Location
santa cruz,ca
Dang it- now I go back and look at the pics, and the untapered barrel bugs me
Darn, I'm sorry about opening my mouth. Like I said, if you aren't *very* familiar with the real deal you are unlikely to notice. You did a great job on the park (where did you even find that tank?) and a 'better' replica would be at least 2x what you paid. so I'd say don't sweat it.

If it does continue to bother you, the tapered portion of the bbl is only 21" long, so really it might be that it's not the taper that's missing but that that section of the barrel is a bit too long. If you were to heavy up the section protruding from the barrel shroud, add the missing second cylindrical step forward of that, and welded a fillet behind the muzzle swell, the straight section would be a lot less pronounced I think. Wait, that muzzle swell looks a bit big already... it should be about 2-3/4" long by 1-9/16" dia.
FWIW shot-out barrels can still be had for not too much money, or could a couple years back anyway.
I'd offer to turn a tapered shroud but my lathe is down just now.
Perhaps whoever got you those nice grips and charging handle can set you up.
Biggerhammer used to have decorator grade barrels, don't know if they are still around but: aalbert@biggerhammer.net
 
Last edited:

blisters13

Active member
461
78
28
Location
Beaumont in SoCal
Very much appreciate your concern👍

I sent biggerhammer a message.

But if it doesn’t work out, it won’t keep me up at night. I’m just at 90% satisfied now, from 100%!! 🤪
 

SETOYOTA

Well-known member
Steel Soldiers Supporter
2,407
450
83
Location
georgia
Save money until you can buy one made from real parts or at least metal. Best place to purchase is a large mv rally like Aberdeen or MVPA National . Resin guns are cheap and you get what you pay for. That’s my 2 cents
 

blisters13

Active member
461
78
28
Location
Beaumont in SoCal
Darn, I'm sorry about opening my mouth. Like I said, if you aren't *very* familiar with the real deal you are unlikely to notice. You did a great job on the park (where did you even find that tank?) and a 'better' replica would be at least 2x what you paid. so I'd say don't sweat it.

If it does continue to bother you, the tapered portion of the bbl is only 21" long, so really it might be that it's not the taper that's missing but that that section of the barrel is a bit too long. If you were to heavy up the section protruding from the barrel shroud, add the missing second cylindrical step forward of that, and welded a fillet behind the muzzle swell, the straight section would be a lot less pronounced I think. Wait, that muzzle swell looks a bit big already... it should be about 2-3/4" long by 1-9/16" dia.
FWIW shot-out barrels can still be had for not too much money, or could a couple years back anyway.
I'd offer to turn a tapered shroud but my lathe is down just now.
Perhaps whoever got you those nice grips and charging handle can set you up.
Biggerhammer used to have decorator grade barrels, don't know if they are still around but: aalbert@biggerhammer.net
I never noted that I made the tank.

It’s 18 gg stainless (not sure of the alloy); we have a shear and brake at work that I used.

Instead of trying to TIG the end cap seams, I drilled holes in the flanges, plug-welded them on, then sealed with Super Black RTV gasket sealer.
 

teletech

Active member
426
209
43
Location
santa cruz,ca
I never noted that I made the tank.

It’s 18 gg stainless (not sure of the alloy); we have a shear and brake at work that I used.

Instead of trying to TIG the end cap seams, I drilled holes in the flanges, plug-welded them on, then sealed with Super Black RTV gasket sealer.
Classier than my setup, I slit a SS tube lengthwise, stretched it open as best I could, and welded ends on. It's pretty lumpy but worked for the 1919 I needed done.
 
Top
AdBlock Detected

We get it, advertisements are annoying!

Sure, ad-blocking software does a great job at blocking ads, but it also blocks useful features of our website like our supporting vendors. Their ads help keep Steel Soldiers going. Please consider disabling your ad blockers for the site. Thanks!

I've Disabled AdBlock
No Thanks