- 1,814
- 1,522
- 113
- Location
- Orlando, FL
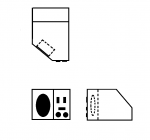
I've been working on a new tach pod, that can also hold the winch switches. This will probably (eventually) get more revisions, because it's big, ugly, hangs over the front of the heater a little, etc., and I don't like it. There were a couple iterations to get to this one, and the reason for the large size and ugly shape is that the winch panel wiring harness is big, with a lot of unused connectors that all need to be stuffed inside this housing. I tried to keep it to where it's blocking a minimum of the driver's vision (you can see on the right side, it basically only covers up the area of the defroster deflector that was already opaque).
 - 3.jpg")
 - 2.jpg")
 - 1.jpg")
 - 5.jpg")
Last edited:
")