• Steel Soldiers now has a few new forums, read more about it at: New Munitions Forums!

  • Microsoft MSN, Live, Hotmail, Outlook email users may not be receiving emails. We are working to resolve this issue. Please add support@steelsoldiers.com to your trusted contacts.

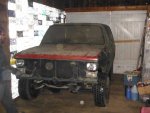
M1009 Little Red Riding Hood.

cucvrus

Well-known member
11,473
10,432
113
Location
Jonestown Pennsylvania
Where should I start? I came home from work last night with all good intentions. I did a multitude of projects and made great headway. Finished and few and will not start anymore projects was the goal. The Wife called and had a flat tire on the Honda Scooter. Off to get that and begin the repair. I called a dealer and they wanted $125. to replace the tire. They said that included the tire. I was about to bite and thought I can do that job. If I can frame off rebuild a CUCV I can change a Honda scooter tire. I YouTubed it and it was off in 15 minutes. The key was the 4 bolts holding the exhaust system on. I am currently waiting for a tire. I moved onto wood cutting. Remember I am by myself most of the time. I cut all the wood that was to long for the splitter and went on to sifting my goal of 2 - 5 gallon buckets of top soil. That is how I take care of my back. a little at a time. I went in the center bay and moved the 5 tires and wheels from Little Red into the back room. If I was still running an M1009 I would take them 1983 Goodyear Wrangler AT's up to Rausch Creek and send them out in a blaze of glory. Nothing finds the weakness in tires like hot highways and off road in rocky terrain. It would at least make them look like the belong on the scrap pile. They still have over 1/2 tread and are looking good. However only safe when parked. I moved onto getting the rear area sanded a bit and before I knew it, it was 8PM. Enough for 1 day that begins at 0400 dark. Chickens all away and into shower and rest. And here I am again today. It all works out. everything can not be completed in 1 day and don't need to be. Like an all you can eat buffet. 1 bite at a time gets it done. the main rule to learn is quit going back for more. It's there but keep focused on what is on your plate now. Good Luck and Be Safe. It's going to happen.
 

Sezzo

Well-known member
141
296
63
Location
Bamberg (Germany)
Maybe one of the very original 1983 Goodyear Wrangler tires should be honored as spare tire in the M1009. One original tire the CUCV was born with back in 1983. This could be a unique item - just for historical reasons, not recommended for driving.
 

cucvrus

Well-known member
11,473
10,432
113
Location
Jonestown Pennsylvania
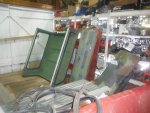
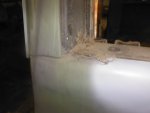
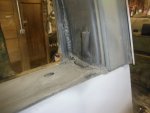
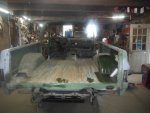
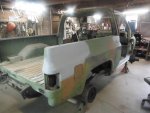
I was away from the homestead working a few days on wood cutting and mountain land. I am beat and can tell I was busy. I came home today and played catch-up a few hours and am now done for today. I had the help I needed to get the roof removed yesterday and quickly had that off and stored inside the center bay. The best way to store one is upright. Takes up less room and makes picking it back up easier than flat on the floor. DSCF7650.JPG I looked at how the factory used the strip caulk on the roof to cab seal. Not sure I could duplicate that sealing method. DSCF7651.JPG DSCF7655.JPG I was also checking out where the antenna brackets were bolted thru both the inner and outer panels. I truly hate the antenna brackets. I fixed a lot of damaged bedsides and 1/4 panels from that mounting. DSCF7644.JPGDSCF7645.JPGDSCF7646.JPG I also wanted to show the thickness of the brushed on CARC paint in the floor area. I don't trust coating over it because it has poor adhesion at spots. So I will continue the mindless sanding. DSCF7647.JPG That is where the rear seat prop fastens. They may have spilled the paint in the rear cargo area. The left 1/4 panel looks great. DSCF7652.JPG The right has a few smaller dents I am going to fix the dents before painting the vehicle. Not worried about minor ones but these I can see and feel easily. DSCF7653.JPG DSCF7654.JPGNo point in painting over dents on purpose. Thank you for looking. I am showing my M1009 topless. Take Care and Be Safe.
 

cucvrus

Well-known member
11,473
10,432
113
Location
Jonestown Pennsylvania
I sure do hope that getting the transmission back in place counts as progress. I had help tonight and was able to get it back up in place and bolted to the engine block. That was the goal. I also have the fill tube installed. That is all I done tonight. My Wife ran the jack and I had a friend help he get it in place. It always helps to have helpers when getting the transmission back in. Getting it out is a one man job. I have put many in by myself but it takes longer and makes for a bit of excitement when things don't go as planned. Take Care. No pictures tonight. I was outside working and I went right at it. Be Safe.
 

cucvrus

Well-known member
11,473
10,432
113
Location
Jonestown Pennsylvania
On another note I seen a Quadrasteer in a truck at the YOUPULLIT 2 weeks ago. https://www.motorbiscuit.com/gm-quadrasteer-the-great-invention-no-one-wanted/
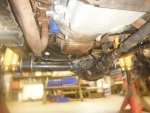
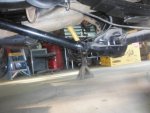
That is a Dana 60 rear axle from a pick up. It was gone in a few days. I am not sure how that would be an advantage in a truck that wasn't equipped from the factory with one. But I know they were nice in trucks when new. My friend had one and it was easy to get around in a tight spot. Take Care. It is raining here in PA. Time to do some more work on the M1009 after work.
 

cucvrus

Well-known member
11,473
10,432
113
Location
Jonestown Pennsylvania
I know I haven't posted any progress lately. Spring time brings many projects that need attention here at the compound. I do make slight progress on many things daily. One of my goals is to complete projects and stay on them till they are completed. The outside work is very important. I had a large, very large reserve pile of hardwood unsplit piled on my property. I already have 10+ cords split. stacked, racked and under tarp. I was offered a fair price for the wood pile split and delivered and I jumped on it. That wood pile has become a big dead spot on my property that the Marmots are taking up refuge under. As of Friday the entire pile is gone. Yesterday I repaired 2 Honda mowers that have plagued me for 2 years. The total cost was less than $100. I am at a loss of how replacing the carburetor can make a mower run like brand new again. These carburetors have no adjustment and I kept them spotless. I was told ethanol gas ruins them. How? I run them out of gas every time and use clean fuel. I do loan them out so that may be the issue. But I fixed both mowers and now I have my Kubota mower to repair. It threw a belt and I had to buy a $70. Land Pride belt. I tried every $30. brand out there and the original Land pride lasted 20 years. The off brands last 1 season and dust black and blue belt particles all over the deck. I can't explain it. I did more CARC sanding on the floor and hate every minute of it. I will get it done but it is my hobby and I have other issues at the moment. My scrap pile is going to be hauled off as I am having trouble getting turned around at the barn. It is strange how the CUCV's flock back to me for repairs. I have a Built in a barn M1009 from 7 years ago here. And Mr. Rusty has returned for his annual check up. I also wanted to report back that after 2 winters of plowing snow and hard use the hydraulic hoses I had fabricated were still holding up well and have no signs of leakage or fatigue. Meet Mr Rusty | Page 13 | SteelSoldiers
I know I had some doubters out there, This is my tested results and it made a nice job with out having them twisted steel transmission lines hanging underneath the truck. These are P clamped up above the transmission and clamped to the left inner fender. They held up well. Have a Great Day and Be Safe. I have work to do. No time for chit chat at the moment.
 
Last edited:

cucvrus

Well-known member
11,473
10,432
113
Location
Jonestown Pennsylvania
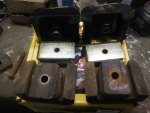
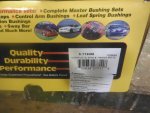
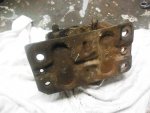
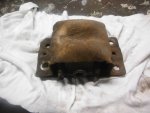
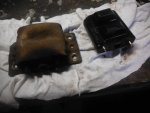
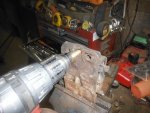
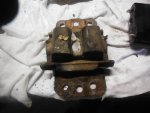
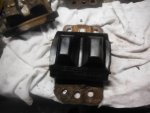
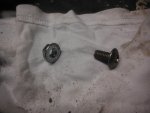
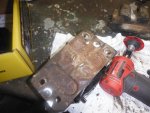
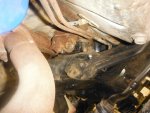
Today with the cold and rain I worked inside the barn. I have lots of outside work but the unseasonal weather had me inside. I made some progress. I replaced the transmission mounts DSCF7707.JPG and the motor mounts with the Energy Suspension set. DSCF7708.JPG The motor mounts just give you the insert and you must reuse the steel shell. DSCF7709.JPG DSCF7710.JPG DSCF7711.JPG Drill the crimps out with a step drill. DSCF7712.JPG Spilt the steel shellDSCF7713.JPG Check the metal side supports. Match them up. They are different for each side. DSCF7714.JPG They supply wire ties to hold the shell together. I used 2 5/16 bolts with a button head. DSCF7715.JPG I ground them flush so they were seated evenly to the frame engine perch. DSCF7716.JPG It took about 3 hours. I also have the torque converter and the shifter bell crank hooked up again. I am happy with the progress. Took a little longer then I wanted but I'm not in a hurry and I had some issues with alignment. Thank you for looking. Have a Great Memorial Day and keep the meaning in mind.
 
Last edited:

cucvrus

Well-known member
11,473
10,432
113
Location
Jonestown Pennsylvania
Parting shots of todays progress. New transmission mounts. DSCF7717.JPG And the newly installed Energy Suspension motor mounts. DSCF7718.JPG DSCF7719.JPG That ends another day of production. I finished my Honda tractor in the rain and that was a Great big mess to deal with. Runs like new again. The glued in bearings worked well. I mowed grass in the rain just to check it out. On a confidence scale I am 98.6% confident in my repair. Other then that I worked with what I had and spent money on spark plugs, fuel filter, and bearings. Couldn't find any of them in my stash. Enjoy the Holiday.
 

cucvrus

Well-known member
11,473
10,432
113
Location
Jonestown Pennsylvania
WOW what an accomplishment. I was able to beat the heat and have all the grass mowed, trimmed and all the equipment in top running order for now. And all before 11AM. Now I am going to get the transfer case and complete the transmission and transfer case install on the M1009. I will post pictures of my progress. It is 88* here and I am feeling fine and alive. I am on my second dry shirt so time to get some work done. Later. Have Fun.
 

cucvrus

Well-known member
11,473
10,432
113
Location
Jonestown Pennsylvania
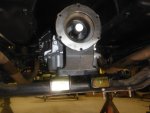
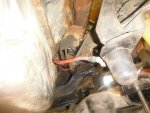
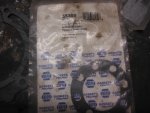
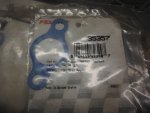
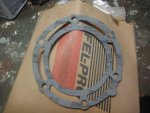
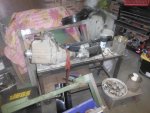
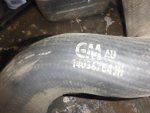
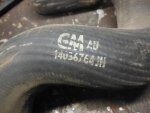
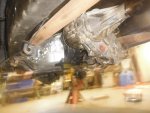
Today I started out with great speed and here I am at the end of the day tired but feeling accomplished. I have the transfer case back and the entire driveline is assembled again. I just found out today i can no longer lift the transfer cases in place by myself. I felt a bit sad at first but help arrived quickly and it was in in 10 minutes. I have a few pictures with part numbers if anyone is interested. This is the CUCV 1 ton pick up rear axle flange gasket 2 per unit. DSCF7720.JPG This is the coolant cross over manifold to head gaskets part number 4 per engine 2 on each head. DSCF7721.JPG This is the transfer case to spacer gasket. No part number available but I have many of them. DSCF7722.JPG DSCF7723.JPG This is the operating table with all the components I removed to get the TH400 transmission overhauled. I also found this new GM lower hose DSCF7724.JPGDSCF7725.JPG I think that is just the stock GM M1028/M1008 hose. DSCF7726.JPG All back together except for the fluids. I am going to purchase a 5 gallon pail of ATF Dexron. DSCF7727.JPG DSCF7728.JPG And when it was time to close shop I heard a Marmot barking outside. Danger Will Robertson Danger. DSCF7729.JPG
 

dougco1

Well-known member
Steel Soldiers Supporter
867
647
93
Location
Cooperstown NY
Today I started out with great speed and here I am at the end of the day tired but feeling accomplished. I have the transfer case back and the entire driveline is assembled again. I just found out today i can no longer lift the transfer cases in place by myself. I felt a bit sad at first but help arrived quickly and it was in in 10 minutes. I have a few pictures with part numbers if anyone is interested. This is the CUCV 1 ton pick up rear axle flange gasket 2 per unit. View attachment 836247 This is the coolant cross over manifold to head gaskets part number 4 per engine 2 on each head. View attachment 836248 This is the transfer case to spacer gasket. No part number available but I have many of them. View attachment 836249 View attachment 836250 This is the operating table with all the components I removed to get the TH400 transmission overhauled. I also found this new GM lower hose View attachment 836251View attachment 836252 I think that is just the stock GM M1028/M1008 hose. View attachment 836253 All back together except for the fluids. I am going to purchase a 5 gallon pail of ATF Dexron. View attachment 836254 View attachment 836255 And when it was time to close shop I heard a Marmot barking outside. Danger Will Robertson Danger. View attachment 836256
So, rule number 1: Not all marmots are groundhogs, but all groundhogs are marmots


I still think that your friend Will Robertson is a Woodchuck
1623068038932.png
 
Last edited:

cucvrus

Well-known member
11,473
10,432
113
Location
Jonestown Pennsylvania
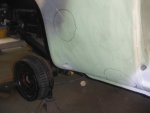
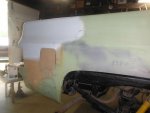
I began the evening with my hammer and dolly. I found 1 small dent on the left 1/4 panel and a few on the right. No rust. I was able to dolly most of the dents as they were reachable from both sides. I have a few paint less dent remover pry bars I borrowed and they work really well in the areas that are difficult to access. I didn't have my camera with me tonight but will get some pictures next time I get at it. I sanded a while on the 1/4 panels. I am happy to see the body has very little damage that needs repaired. I actually think the dents happened since being in my barn the past 20 years. The barn is dusty dry. Take Care and Be safe. Thank you for all of the positive supporters. I hope I am helpful. I appreciate the PM's and the support. I was inspired by a few members to ignore the negativity. I mean at 62 I can do it. Lots of projects in the works and happily moving forward daily.
20140713_114025.jpg20140713_114925.jpg Still have time for family fun. Grand Pa's do that.
 

cucvrus

Well-known member
11,473
10,432
113
Location
Jonestown Pennsylvania
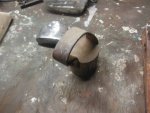
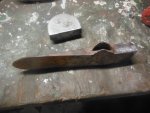
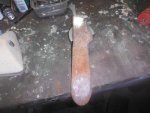
After I finished washing the Mr. Rusty plow truck I was tired so I ventured into the barn and cleaned up. I also located a few of my tools that I was looking for. Glad I located them The old heel and palm dollies. Many guys don't know how to use these old tools and just replace a dented panel. DSCF7745.JPGDSCF7744.JPG DSCF7743.JPG DSCF7742.JPGI have had that mortis axe for years and use it in tight corners to tap out small dents. I welded a pipe to the end several times before I realized it was an antique. I am going to get a handle for it and make a wall hanger out of it. The right side has the most damage. All minor but still dents I want to repair before repainting. DSCF7739.JPG DSCF7740.JPG The left side I only found 1 that I couldn't live with. DSCF7741.JPG Take Care. Next week I want to get some filler in them dents and get rolling a little at a time. I have a few other vehicles here for repairs as usual.
 

cucvrus

Well-known member
11,473
10,432
113
Location
Jonestown Pennsylvania
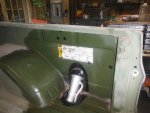
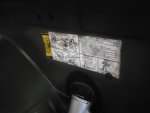
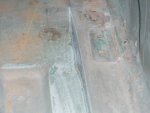
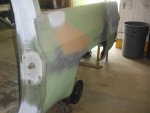
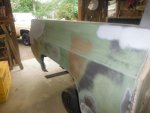
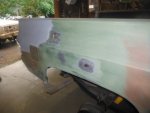
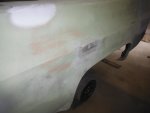
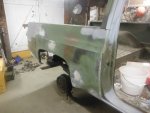
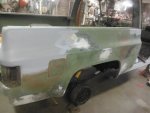
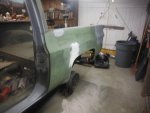
Today I started out like a rocket. I was outside getting my Honda lawn tractor back together and hit another snag. The engine is not producing electric to keep the battery charged. I will need to pull the engine and flywheel to get to that thingy under the flywheel. I see a wire is cut off or chewed off. Probably a 10 minute repair that takes 2 hours to reach. I took a break from that project and went wild on the 1/4 panels of the M1009 Little Red. They are ready for prime. Next the doors. 1 day at a time. Everything is slow and people are not working. that makes more work for me and longer wait times. The transmission shop has newer vehicles apart and cannot get the parts to reassemble them. And My job has GM shut down for electronic parts shortages. We had 2 days without one truck chassis arrival. WOW. I went to a few outdoor events and the people are happy to be outside and gathering again. Rain cut my day short and I could use some rest. Take care. These were just minor dents. Probably done in my care after setting in the barn sine 1995. A little progress is better than no progress. take Care and enjoy the weekend. I hope to complete my Honda tomorrow. I have an M1009 fuel tank to pull out next. that is another CUCV that is here for work. Thank you. DSCF7751.JPG DSCF7752.JPG DSCF7753.JPG The back section is where the antenna brackets were mounted and ripped off. That is another story. Them holes are fixed now.
 

marchplumber

Well-known member
Steel Soldiers Supporter
3,800
2,828
113
Location
Peoria, Illinois
Thanks Rick for ALL the pics of truck and family!! Work and play!! You've been a HUGE inspiration to me as I endeavor to work on my own M1009. Seems like it's one step forward and two back......Like ya say, it won't be done in a day. Keep up the great work! Appreciate ya sharing what is happening in the "Barn".
 
Top
AdBlock Detected

We get it, advertisements are annoying!

Sure, ad-blocking software does a great job at blocking ads, but it also blocks useful features of our website like our supporting vendors. Their ads help keep Steel Soldiers going. Please consider disabling your ad blockers for the site. Thanks!

I've Disabled AdBlock
No Thanks