• Steel Soldiers now has a few new forums, read more about it at: New Munitions Forums!

  • Microsoft MSN, Live, Hotmail, Outlook email users may not be receiving emails. We are working to resolve this issue. Please add support@steelsoldiers.com to your trusted contacts.

M1008 Build

cucvrus

Well-known member
11,473
10,433
113
Location
Jonestown Pennsylvania
I had rusted thru exhaust manifolds on Mr. Rusty. I torched the heads of the bolts off and the shoulders of the bolt under the hex would not allow the manifolds to be removed. Since the manifolds were junk, I melted them back further and used a cam style bolt extractor with no problems. I have pictures but cannot locate them at this time.
 

DIVE DIVE

Well-known member
217
778
93
Location
Chesapeake, VA
Just grind the heads off the bolts. The won't be tight anymore and you can unscrew the remains with pliers once the manifold is removed.
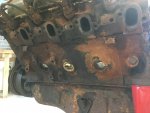
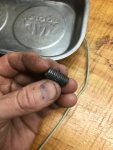
Yeah I figured that out! They don’t get stuck in the heads; they rust to the manifolds. I was pleasantly surprised and all the glow plugs came out easy as well! I cut off all the bolt heads and then made a relief cut down the manifold and got the passenger side off. All the bolts came out of the driver side normally.
 

Attachments

DIVE DIVE

Well-known member
217
778
93
Location
Chesapeake, VA
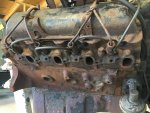
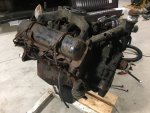
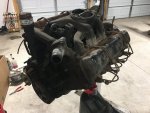
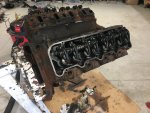
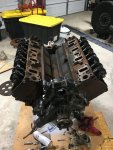
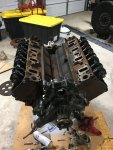
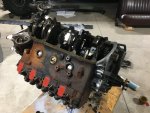
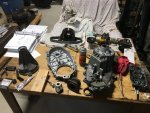
Got a descent amount done today. Tomorrow I’ll get the rest of the things off that I will need to remove before I can clean and reassemble which will be time consuming. So far everything looks pretty good. I can see oil running down a few of the exhaust valve stems when looking in the exhaust ports but it’s not concerning enough to pull the heads. I’m probably going to end up removing most of the front of the motor and valve covers, oil pan, and injection pump and replacing them with the already cleaned stuff from the other motor that I had. Sure glad I saved all those parts because this oil pan is almost completely rusted through. Looks like the front lifting point near the driver alternator is a common failure point. I noticed that it is totally sheared off on this motor and the other on I have is badly cracked.
 

Attachments

87cr250r

Well-known member
1,267
1,988
113
Location
Rodeo, Ca
Honestly, the 6.2 heads will have cracks and the shop will want to repair them. The cracks are usually superficial.

But, I have noticed that the fire rings wear into the cylinder block and a head gasket replacement will snowball into a full teardown. These head gaskets don't have any elastomer seals. Nothing ages with time on the head gaskets. Open at your own risk.
 

DIVE DIVE

Well-known member
217
778
93
Location
Chesapeake, VA
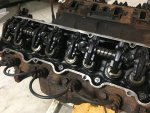
It’s always a tough decision with how far to go. At this point I don’t plan on removing the heads for many reasons. Like @87cr250r stated it can (and likely will) result in growth work. The precup chambers are probably cracked beyond spec, spring pressures, valve guides, probably end up decking the block, piston rings, bearings, etc. This is not a high performance engine so I don’t intend to give it that sort of attention at this point. The only reason I’m removing the intake is to swap out the injection pump and to best clean/seal the valve covers. I’m confident that the engine runs because the guy provided me with a video of it running, so it worked. The transmission didn’t get a full tear down and rebuild either for the same reasons. It doesn’t bother me terribly to pull either out in the future and do a complete rebuild if they are not operating correctly, so it comes down to mitigating risk. I appreciate the feedback, and we’ll see where she goes from here!
 

DIVE DIVE

Well-known member
217
778
93
Location
Chesapeake, VA
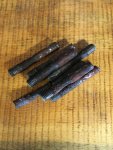
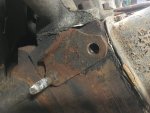
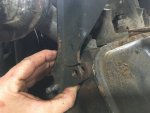
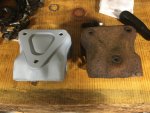
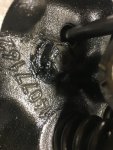
The motor mounts that came off the original engine had this triangular spacer and the ones off the “new” engine do not. The “new” ones are also a bit deeper, but the overall depth of both is about the same. I’m not sure of the reason for the two designs, maybe just the year or something. I think the spacer is where a torque arm would be mounted, if it were equipped with one.
 

Attachments

DIVE DIVE

Well-known member
217
778
93
Location
Chesapeake, VA
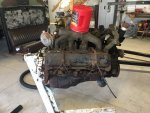
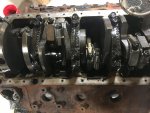
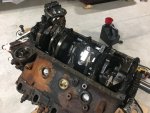
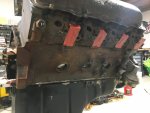
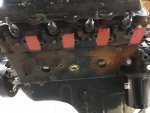
Motor looks good, I’m pretty happy with it. I pulled one connecting rod cap and one main cap. Looks really good. I can tell that someone has had this engine apart before. There is a sealant underneath the head bolts so I can reasonably assume that the head gaskets have been replaced at some point. Time for more cleaning and reassembly prep.
 

Attachments

87cr250r

Well-known member
1,267
1,988
113
Location
Rodeo, Ca
My 1986 CUCV had the triangle spacers. The 2001 6.5 engine I am installing in it didn't have the spacer. I will be using the 1986 mounts and spacer though I can't see any visual difference between the two.
 

cucvrus

Well-known member
11,473
10,433
113
Location
Jonestown Pennsylvania
My advice. If you have the engine out and on the floor. Do the heads and head gaskets. I agree that the bottom end looks good, but I never removed a cylinder head from a 35-year-old engine that did not need new head gaskets. Head gaskets have come a long way since 1980's. Here is a post I made from a truck I rebuilt and sold to a member here. That 6.2 diesel engine you have there is an early model. early 1984 late 1985. Take a look. It sure is 99% easier to do the heads and head gaskets at this point. I never seen any sealant under the head of a hex bolt on a head gasket. I use Teflon on the treads, and they have a small amount of sealant under the head of the bolt but never seen any squeeze out. I am only trying to help. Do as you wish. It is a gamble. 1669565786360.png dscf2476-jpg.661814 (800×600) (steelsoldiers.com)
I will go back out a stack firewood on my pile and keep my ideas to myself. Happy Holidays.
 

ezgn

Well-known member
650
1,039
93
Location
Lake Elsinore Ca.
My advice. If you have the engine out and on the floor. Do the heads and head gaskets. I agree that the bottom end looks good, but I never removed a cylinder head from a 35-year-old engine that did not need new head gaskets. Head gaskets have come a long way since 1980's. Here is a post I made from a truck I rebuilt and sold to a member here. That 6.2 diesel engine you have there is an early model. early 1984 late 1985. Take a look. It sure is 99% easier to do the heads and head gaskets at this point. I never seen any sealant under the head of a hex bolt on a head gasket. I use Teflon on the treads, and they have a small amount of sealant under the head of the bolt but never seen any squeeze out. I am only trying to help. Do as you wish. It is a gamble. View attachment 885101 dscf2476-jpg.661814 (800×600) (steelsoldiers.com)
I will go back out a stack firewood on my pile and keep my ideas to myself. Happy Holidays.
I see one piece of firewood on the bottom that looks a little out of place Rick. Maybe you can fix it. Nice job! Did you get dizzy building that stack?
 

rtk

Well-known member
Steel Soldiers Supporter
1,190
446
83
Location
Lockport N.Y.
My advice. If you have the engine out and on the floor. Do the heads and head gaskets. I agree that the bottom end looks good, but I never removed a cylinder head from a 35-year-old engine that did not need new head gaskets. Head gaskets have come a long way since 1980's. Here is a post I made from a truck I rebuilt and sold to a member here. That 6.2 diesel engine you have there is an early model. early 1984 late 1985. Take a look. It sure is 99% easier to do the heads and head gaskets at this point. I never seen any sealant under the head of a hex bolt on a head gasket. I use Teflon on the treads, and they have a small amount of sealant under the head of the bolt but never seen any squeeze out. I am only trying to help. Do as you wish. It is a gamble. View attachment 885101 dscf2476-jpg.661814 (800×600) (steelsoldiers.com)
I will go back out a stack firewood on my pile and keep my ideas to myself. Happy Holidays.
I agree with Rick , do it right now, it is a lot easier with the engine out then leaning over a fender , JMO
 

DIVE DIVE

Well-known member
217
778
93
Location
Chesapeake, VA
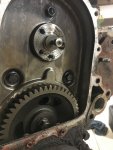
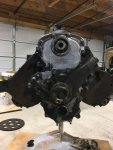
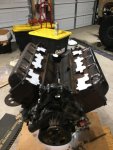
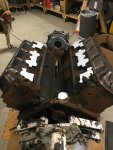
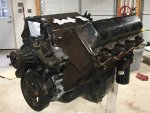
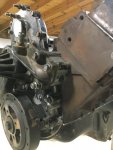
Started reassembly today after hours of prep. I’m going to finish cleaning up the block once I’m done reassembling. I’ve found that it’s easier to paint a block once it’s all assembled.
 

Attachments

cucvrus

Well-known member
11,473
10,433
113
Location
Jonestown Pennsylvania
So, I understand this. You are not going to change the main front crank seal, timing cover gaskets, or the water pump? Just asking? It is posted here for conversation and recommendations. That is what hobbyist do. Debate and share information. Happy Holidays and Good Luck..
 

DIVE DIVE

Well-known member
217
778
93
Location
Chesapeake, VA
So, I understand this. You are not going to change the main front crank seal, timing cover gaskets, or the water pump? Just asking? It is posted here for conversation and recommendations. That is what hobbyist do. Debate and share information. Happy Holidays and Good Luck..
I replaced all of the gaskets in the front end and I’m reusing the water pump because I know it is a working pump. Crank seal replaced as well. I sandwiched new gaskets with black rtv. New fuel pump gaskets as well. Used RTV vice a gasket on the valve covers and oil pan with exception of the rear main hump. Have a spare pump if necessary in the future, original parts. Thanks for asking, we all have to assess cost/benefit where we can!

If you look at the previous posts real close you can see the front end of the engine removed. Again, thanks for the feedback 👍
 

Attachments

Top
AdBlock Detected

We get it, advertisements are annoying!

Sure, ad-blocking software does a great job at blocking ads, but it also blocks useful features of our website like our supporting vendors. Their ads help keep Steel Soldiers going. Please consider disabling your ad blockers for the site. Thanks!

I've Disabled AdBlock
No Thanks