• Steel Soldiers now has a few new forums, read more about it at: New Munitions Forums!

  • Microsoft MSN, Live, Hotmail, Outlook email users may not be receiving emails. We are working to resolve this issue. Please add support@steelsoldiers.com to your trusted contacts.

Gov Planet HMMWV Refugee

sail78385

Active member
85
102
28
Location
Charleston SC
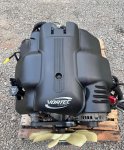
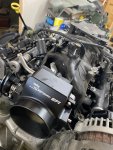
Since I got the Humvee home and found out the engine is bad I’ve been back and forth on putting a Detroit back in it or LS swapping it. I have almost finished LS swapping a friends M998 here and after hearing his run for the first time I’ve made the decision to LS swap my Humvee. There are a lot of factors that pushed me that direction. Probably number one at my list was the how expensive a replacement engine was going to be. Second hand 6.5 NA engines aren’t readily available near me, but what I did find was people selling them for $3500-$6000 within a 5-8 hour drive. The second reason was that diesel isn’t readily available some of the places I go. It just seems that of all the pros for keeping a 6.5 in it there were way more cons. Brought home this low mileage LQ9 6.0 out of a Cadillac Escalade. I’ve got a few more parts to get and this other Humvee to finish, but once I’ve got all that taken care of I’ll be creating a YouTube build on the Humvee. 42” Nittos, small lift, LS, swap and a few other things. Should be rad.
That being said if anyone needs any really nice parts from an m1123, such as the starter, alternator, ect let me know. These parts look brand new. Located in Charleston SC, I’d rather not ship. IMG_4591.jpegIMG_4610.jpegIMG_4611.jpeg
 

sail78385

Active member
85
102
28
Location
Charleston SC
Thanks, giving YouTube a shot, still got to work on the audio side. But if you’ve got a moment check it out. Some info on the m998 LS swap is on there already. Deepwood Garage is my channel IMG_4615.jpeg
 

sail78385

Active member
85
102
28
Location
Charleston SC
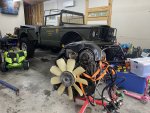
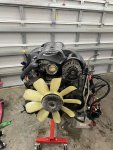
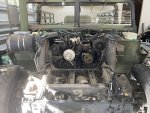
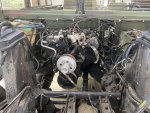
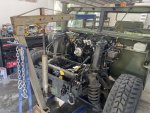
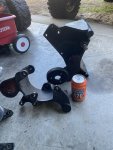
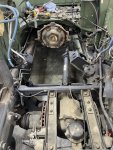
Should be able to yank that paperweight out tomorrow. This truck is so nice to work on, I don’t think it ever sat outside. All the bolts look brand new and the rubber is all soft and new. I plan on removing all the wiring professionally so that maybe someone else can use it. Idk. The accessory brackets on this engine are beefy and huge, wow. I confirmed that the engine still rotates on the crank bolt, hoping it’s enough to get all the torque converter bolts off without issue.
IMG_4698.jpegIMG_4699.jpegIMG_4704.jpegIMG_4706.jpegIMG_4703.jpegIMG_4707.jpeg
 

sail78385

Active member
85
102
28
Location
Charleston SC
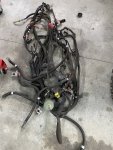
Slowly cleaning this up since a lot of the factory stuff isn’t going back in this. Went through the breather lines and made some corrections so that all of that stuff still works. Almost have all the wiring removed. I plan on selling the wiring once I’ve finished removing it all. Really great condition with the only thing cut on it was where they removed the 24v connection for the radios. Part of the lift kit should be here tomorrow, so I think I’ll at least have the rear tires mounted up early next week.IMG_4736.jpegIMG_4735.jpeg
 

sail78385

Active member
85
102
28
Location
Charleston SC
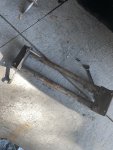
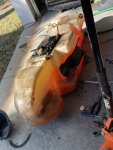
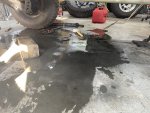
Dropped the fuel tank today, sheesh. If you ever wanted to know how NOT to drop the tank let me know -I’m an idiot.

Started off fine, disconnected the lines through the access panel.

removed driveshaft

Unfastened the hose between each tank side -for sloshing fuel???

removed fuel filler and vent tube

Then went to drop the tank…. And here’s where it went wrong.

I should have realized that 2 of the fuel hoses are connected to the heat shield on the forward part of the tank. Ok I fixed that.

went to drop tank and it almost came all the way out, but the damn brake rotor guard kept it from dropping all the way. And that’s about the time I realized the tank was completely full of fuel.

what a damn mess. Glad that’s over with, now to air out for a bit.
IMG_4749.jpegIMG_4753.jpegIMG_4750.jpegIMG_4752.jpeg
 

Mullaney

Well-known member
Steel Soldiers Supporter
Supporting Vendor
7,774
19,893
113
Location
Charlotte NC
Dropped the fuel tank today, sheesh. If you ever wanted to know how NOT to drop the tank let me know -I’m an idiot.

Started off fine, disconnected the lines through the access panel.

removed driveshaft

Unfastened the hose between each tank side -for sloshing fuel???

removed fuel filler and vent tube

Then went to drop the tank…. And here’s where it went wrong.

I should have realized that 2 of the fuel hoses are connected to the heat shield on the forward part of the tank. Ok I fixed that.

went to drop tank and it almost came all the way out, but the damn brake rotor guard kept it from dropping all the way. And that’s about the time I realized the tank was completely full of fuel.

what a damn mess. Glad that’s over with, now to air out for a bit.
View attachment 937587View attachment 937588View attachment 937589View attachment 937590
.
Yeah, that looks like it sucked.
 

sail78385

Active member
85
102
28
Location
Charleston SC
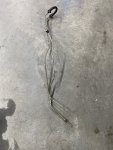
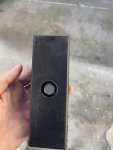
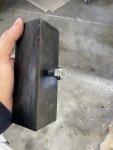
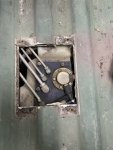
Body lift was supposed to show up yesterday, but apparently it’s not coming till next week -dang. Should be cool. I’ve got some other stuff to chip away at anyways. Started cleaning some stuff up and thought it was interesting that the 2 small lines on the fuel tank are in a loop -what’s the point? Looks like junk to me. Had some Holley and ICT billet parts show up. Took some advice and added some mounts to the fuel tank spacers for the body lift.
IMG_4749.jpegIMG_4761.jpegIMG_4757.jpegIMG_4758.jpegIMG_4759.jpeg
 

Mogman

Moderator
Staff member
Moderator
Steel Soldiers Supporter
7,018
9,699
113
Location
Papalote, TX
Your truck probably had a generator at one time or a heater that was diesel powered, one feed one return so they just looped them when they removed the equipment
 

sail78385

Active member
85
102
28
Location
Charleston SC
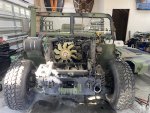
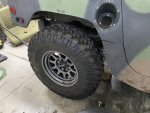
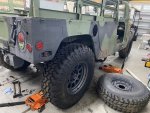
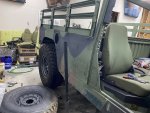
Ok, getting ready for the body lift and wanted to see what a 42” would look like beforehand and there is plenty of room! I’ll probably have to trim the exhaust on driver side. However it looks like I’ve got a little bit of caster to adjust. I’ve got some shims on the upper control arm mount. Wondering if I can just loosen those bolts and knock them out and tighten it all back up without issue?

man this thing is going to be rad! Photos don’t capture the awesomeness real well. Plan is to have the lift installed, engine mounted and all 4 wheels and tires mounted up before February.

IMG_4803.jpegIMG_4804.jpegIMG_4805.jpeg
 

Mogman

Moderator
Staff member
Moderator
Steel Soldiers Supporter
7,018
9,699
113
Location
Papalote, TX
Ok, getting ready for the body lift and wanted to see what a 42” would look like beforehand and there is plenty of room! I’ll probably have to trim the exhaust on driver side. However it looks like I’ve got a little bit of caster to adjust. I’ve got some shims on the upper control arm mount. Wondering if I can just loosen those bolts and knock them out and tighten it all back up without issue?

man this thing is going to be rad! Photos don’t capture the awesomeness real well. Plan is to have the lift installed, engine mounted and all 4 wheels and tires mounted up before February.

View attachment 937690View attachment 937691View attachment 937692
I think you mean camber
 
Top
AdBlock Detected

We get it, advertisements are annoying!

Sure, ad-blocking software does a great job at blocking ads, but it also blocks useful features of our website like our supporting vendors. Their ads help keep Steel Soldiers going. Please consider disabling your ad blockers for the site. Thanks!

I've Disabled AdBlock
No Thanks