• Steel Soldiers now has a few new forums, read more about it at: New Munitions Forums!

  • Microsoft MSN, Live, Hotmail, Outlook email users may not be receiving emails. We are working to resolve this issue. Please add support@steelsoldiers.com to your trusted contacts.

Cranetruck tire mounting

cranetruck

Moderator
Super Moderator
Steel Soldiers Supporter
10,350
75
48
Location
Meadows of Dan, Virginia
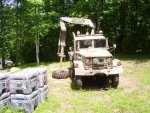
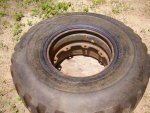
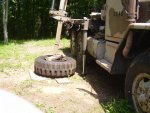
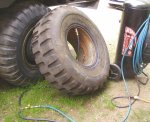
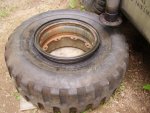
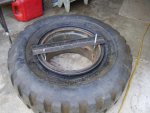
Well, got started anyway, couldn't get the bead over the "safety bump" (see other threads listed below), but the crane made the first stages of the mounting procedure relatively simple.
I used the "tire slick" soap and it seemed to help, but evaporated quickly in the sun.
Here are related threads:
http://www.steelsoldiers.com/conversations/35885-wheel-design-questions.html

http://www.steelsoldiers.com/deuce/35791-cranetruck-tire-bead-breaker.html

Question:
How do I proceed? What is the normal method used to get the bead further onto the tire? I'm guessing that air pressure will get the bead over the bump on the far side...
Thanks.
A couple of stats:
Tire weight: 139 lb
Wheel weight: 50 lb
 

Attachments

IMA944T

New member
198
0
0
Location
OKLAHOMA CITY
Tire soap work great but don't limit yourself to it. Any thing that stays slick. Have used Dawn liquid soap straight for years. then alot of air fast. We use alot of air in a big air line thats unrestricted. Make sure tires are in good shape. Just have to pull air line off when tire mounts. But theres alot of room for air in those tires. Fast you get air in the faster and easier they mount most of the time. Slow airing and you can watch the tire drag over the bead. Watch the monster trucks bead tires sometime. About the same princible but just little different. They use carb cleaner or something similar to have small explosion in unbeaded tire to pop tire on rim. They leave valve stem off to relieve pressure and because when they light it the tire pops onto rim and then the air inside cools fast and sometime unseats tire again by sucking it off rim again. Have done this on hundreds ATV tires. Just because they are small tire doesn't mean they are easy to mount.
Tires are stiff so letting them sit in hot sun helps too. Might seem insignifcate but it does help.
 
Last edited:

mudguppy

New member
1,587
15
0
Location
duncan, sc
what about just like you're doing in the first pic, but flip the tire over and put a small block (chunk of 2x4?) under each end of the board to press the sidewalls / bead further onto the wheel. may get two sides of the bead on further, then rotate the board to get the other areas...

?

then you can install the ring and fill 'er up!! taking the valve out of the stem helps the air to go in much faster to seat the bead.
 

cranetruck

Moderator
Super Moderator
Steel Soldiers Supporter
10,350
75
48
Location
Meadows of Dan, Virginia
Right, then again, the bead on the split ring side doesn't really have to be pushed over the "bump" as long as there is space to install the ring....
 

gringeltaube

Staff Member
Super Moderator
Moderator
Steel Soldiers Supporter
6,987
2,523
113
Location
Montevideo/Uruguay
Right, then again, the bead on the split ring side doesn't really have to be pushed over the "bump" as long as there is space to install the ring....
It would never seal if you could do THAT!!!

I would try this: first bead down, 2nd resting inside groove, install ring, press/stick/hold 1st bead as far and tight as possible against inner "hump", carefully support tire and slowly push wheel in while airing up as suggested.

To seat and seal correctly beads should popp over the humps, outward. Eventually apply the "explosive" trick if sidewalls came flattened together or uneven.

G.
 

tm america

Active member
2,600
24
38
Location
merrillville in
do you have a set of tire bars looks like you would need to use the curved one .the bead will strecth a little but i doupt they will give enough to push the tire straight down over the hump.thats where the tires bars come in handy only having to get one side to drop down at a time :roll:just think a tire machine does it one side at a time not just pushin straight on
 

cranetruck

Moderator
Super Moderator
Steel Soldiers Supporter
10,350
75
48
Location
Meadows of Dan, Virginia
Okay, I'll see about getting a tire bar. That's what this project is all about, learning. Appreciate the input guys!
I may also be a bit stinchy about using the tire slick
The hydraulic ram is nice, but if it isn't used right......don't like to see it stretch the sidewall so much.
When I pushed on the wheel, it tilted and one side dropped in before the other, not all at one time. I'll start over on the ring side.
Guess tube tires are a little easier....no humps....
 

BFR

Rocket Surgeon
2,330
42
48
Location
North Georgia
I would keep doing what your doing in the first pic, but I would put an old unmounted tire on the ground underneath the one you are working on.
 

cranetruck

Moderator
Super Moderator
Steel Soldiers Supporter
10,350
75
48
Location
Meadows of Dan, Virginia
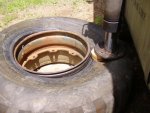
So I popped the split ring side back off to re-evaluate the job.
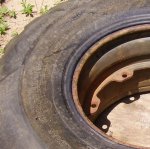
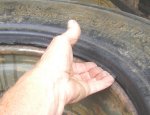
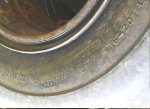
Used the compressor and it popped off after a short while. My previous efforts did some damage to a portion of the inside of the bead, so the procedure is obviously not good.....
 

Attachments

gringeltaube

Staff Member
Super Moderator
Moderator
Steel Soldiers Supporter
6,987
2,523
113
Location
Montevideo/Uruguay
This good explanation was posted by M543A2 in the "wheel design" tread: "...... It (the depressed area or well) is also there for ease of tire mounting. It is not as deep on your two piece rim because it only has to provide room for passing the first tire bead over the hump on the ring side of the rim. Without it, you would have to pop the inner tire bead over the first hump, a rather difficult thing to do...."

It is clear that this also applies for de-mounting.

I guess it could help you to better understand what was wrong in your procedure...:roll:

G.
 

cranetruck

Moderator
Super Moderator
Steel Soldiers Supporter
10,350
75
48
Location
Meadows of Dan, Virginia
Thanks Gerhart, I'll go over the procedure again and also see what difference proper tire irons may make.
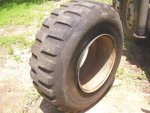
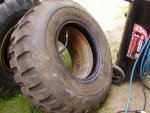
The tire is very stiff, when standing up (without the wheel), the gap measures 14 inches outside to outside bead. On its side and me standing on it, it only deflects a few inches, so it's difficult to work it down into the well area, since it keeps moving back up as I try to go around...I may have to seek professional help.....:)

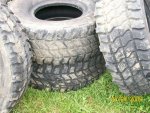
Maybe these (image) will be more cooperative.
 

Attachments

Last edited:

cranetruck

Moderator
Super Moderator
Steel Soldiers Supporter
10,350
75
48
Location
Meadows of Dan, Virginia
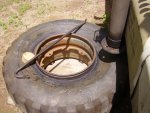
Went back to the outrigger and pushed one side down into the "well". A wrecking bar and a wood block was all it took to get the rest past the hump. :)
Now for the split ring........hints are welcomed.....
 

Attachments

gringeltaube

Staff Member
Super Moderator
Moderator
Steel Soldiers Supporter
6,987
2,523
113
Location
Montevideo/Uruguay
Hints no, HITS...!:smile: Nothing that a good hammer in a good hand couldn't solve...
Just stand on the ring and gradually work your way around with hammer and a piece of hardwood.
And... as always: Übung macht den Meister!:grin:

G.
 

rosco

Active member
Steel Soldiers Supporter
2,102
30
38
Location
Delta Junction, Alaska
In mounting tires, the shops use a vegetable based tire soap/grease. That helps prevent the damage to the bead and helps it to slide in place. Then out in the future, when you have to change the tires out again, you will be real happy, that you used it. It is sold in a pail. I use it straight - just grab a handful and smear it around. It does wonders.

Lee in Alaska
 

WPNS421

New member
441
3
0
Location
Cantley Quebec
What you need is a tire expander unit, basically a small tank the size of a barbeque tank with an air hose fill valve, a duck bill adapter(fits inbetween rim/tire. You fill the tank, attache the air hose to the tire to let air in, put rhe expander duck bill between the rim and tire , stand to one side , open the valve and the air in the tank gives the tire/rim a shot of air and seals the bead. The air pressure from air line maintains and fills the tire. second solution take the tire rim to a heavy truck tire place and they will seat it for you, at the same time you will see the bead seater in action. This is how they seat commercial truck tird/
 

cranetruck

Moderator
Super Moderator
Steel Soldiers Supporter
10,350
75
48
Location
Meadows of Dan, Virginia
As an alternative to standing on the ring to keep it in place, I made a bracket and needed very little effort to tap it (the ring) in place, tapping it progressively around the circle.
Followed the recommended precautions and popped the beads by slowly filling the tire to about 35 psi, put a new valve core in and filled tire to 30 psi.
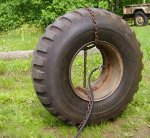
It looks good, but with air in it, cracks appeared on the sidewalls. I can't say I trust these old NOS tires, but this one will make a nice spare. It stands 44 inches tall.
 

Attachments

Top
AdBlock Detected

We get it, advertisements are annoying!

Sure, ad-blocking software does a great job at blocking ads, but it also blocks useful features of our website like our supporting vendors. Their ads help keep Steel Soldiers going. Please consider disabling your ad blockers for the site. Thanks!

I've Disabled AdBlock
No Thanks