DavidJBlythe
New member
- 64
- 1
- 0
- Location
- Fort Meade, MD
Hey guys,
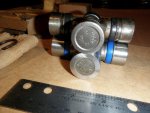
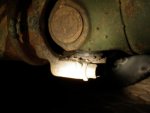
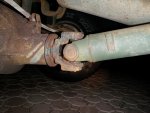
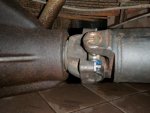
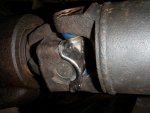
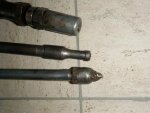
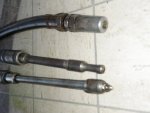
I just found the rear-axle u-joint to be broken. It is the one at the rear end of the shaft, where it meets the differential.
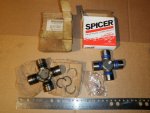
I looked up the replacement part number, 7806140, from the repair manual. I got the replacement one from Advance Auto for about $12.00.
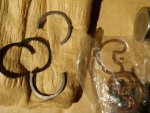
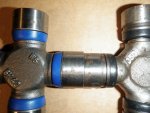
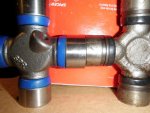
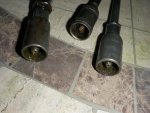
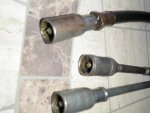
After melting the nylon retaining rings and removing the old u-joint, I found that the new one doesn't seem to fit at all. It looks nearly identical to the one I took out, but the groove on the cups is much closer to the u-joint body than the original nylon ones I removed. It came with these hefty spring-steel retaining clips, but I don't see how to get them in. If I push the cup all the way in until the top is flush with the nylon groove in the axle "ears" then the other side of the u-joint is waaaay to far out. I'm at a total loss here.
Please advise.
I just found the rear-axle u-joint to be broken. It is the one at the rear end of the shaft, where it meets the differential.
I looked up the replacement part number, 7806140, from the repair manual. I got the replacement one from Advance Auto for about $12.00.
After melting the nylon retaining rings and removing the old u-joint, I found that the new one doesn't seem to fit at all. It looks nearly identical to the one I took out, but the groove on the cups is much closer to the u-joint body than the original nylon ones I removed. It came with these hefty spring-steel retaining clips, but I don't see how to get them in. If I push the cup all the way in until the top is flush with the nylon groove in the axle "ears" then the other side of the u-joint is waaaay to far out. I'm at a total loss here.
Please advise.