• Steel Soldiers now has a few new forums, read more about it at: New Munitions Forums!

  • Microsoft MSN, Live, Hotmail, Outlook email users may not be receiving emails. We are working to resolve this issue. Please add support@steelsoldiers.com to your trusted contacts.

U Joint replacement problem

DavidJBlythe

New member
64
1
0
Location
Fort Meade, MD
Hey guys,

I just found the rear-axle u-joint to be broken. It is the one at the rear end of the shaft, where it meets the differential.

I looked up the replacement part number, 7806140, from the repair manual. I got the replacement one from Advance Auto for about $12.00.

After melting the nylon retaining rings and removing the old u-joint, I found that the new one doesn't seem to fit at all. It looks nearly identical to the one I took out, but the groove on the cups is much closer to the u-joint body than the original nylon ones I removed. It came with these hefty spring-steel retaining clips, but I don't see how to get them in. If I push the cup all the way in until the top is flush with the nylon groove in the axle "ears" then the other side of the u-joint is waaaay to far out. I'm at a total loss here.

Please advise.
 

tankie88

Member
357
4
18
Location
Redruth,Cornwall,England
Push the cups into the yoke holes until the outside edge is flush with the yoke.Where the inside of the cups poke out of the yoke there should be a groove in the cup.Push the C clip on the groove ....job done.I've not long done mine.I'm on the other side of the pond but the UJ came from the states.Part nr 534G from Precision U-joint.Southfield.MI.
 
Last edited:

CROM

New member
180
0
0
Location
Des Moines, IA
I just did both u's on the rear shaft. Brute Force joint part number: 2-3011BF. Tankie's method will work, but I've never been easily able to push the caps into the yolk. A big **** hammer is usually needed. What I do, is get a cap in place in the yolk hole and put the end of the actual joint all the way into cap (inside of the yolk) to get it started. Then, align a cap on the opposite end and gently hammer each side to seat the joint in the caps. This will prevent any needle bearings inside the caps to dislodge and keep you from being able to get a cap to seat. After two caps are on, and assuming you've pulled the entire shaft, do the same on the other side. Seat the caps evenly or you'll get a clip on one side and not the other.

This would take 5 seconds to show, and unfortunately is difficult to explain through typing.
 

73m819

Rock = older than dirt , GA. MAFIA , Dirty
Steel Soldiers Supporter
In Memorial
12,195
326
0
Location
gainesville, ga.
I just did both u's on the rear shaft. Brute Force joint part number: 2-3011BF. Tankie's method will work, but I've never been easily able to push the caps into the yolk. A big **** hammer is usually needed. What I do, is get a cap in place in the yolk hole and put the end of the actual joint all the way into cap (inside of the yolk) to get it started. Then, align a cap on the opposite end and gently hammer each side to seat the joint in the caps. This will prevent any needle bearings inside the caps to dislodge and keep you from being able to get a cap to seat. After two caps are on, and assuming you've pulled the entire shaft, do the same on the other side. Seat the caps evenly or you'll get a clip on one side and not the other.

This would take 5 seconds to show, and unfortunately is difficult to explain through typing.
A BIG c-clamp works a LOT better then a brute force, with a lot less stuff getting broke in the prosess
 

Wolf.Dose

Active member
1,062
9
38
Location
Boehl-Iggelheim, Germany
I never had these problems during 372000 km with my M1009. With a problem with the drive shafts I visited the local drive shaft shop and in some caces, within one hour the shaft problem was gone. Costs in the range of 125 to 150 Euro, depending on the case. Included balancing, of course.
Wolf
Parts came from Uni Cardan or Spicer, faxtory fresh.
 

Stonepicker1

Well-known member
2,446
86
48
Location
Coconut Creek, Florida
Hey guys,

I just found the rear-axle u-joint to be broken. It is the one at the rear end of the shaft, where it meets the differential.

I looked up the replacement part number, 7806140, from the repair manual. I got the replacement one from Advance Auto for about $12.00.

After melting the nylon retaining rings and removing the old u-joint, I found that the new one doesn't seem to fit at all. It looks nearly identical to the one I took out, but the groove on the cups is much closer to the u-joint body than the original nylon ones I removed. It came with these hefty spring-steel retaining clips, but I don't see how to get them in. If I push the cup all the way in until the top is flush with the nylon groove in the axle "ears" then the other side of the u-joint is waaaay to far out. I'm at a total loss here.
Please advise.
DavidJBlythe,
Do you have a M1009 or a 1 ton pickup?

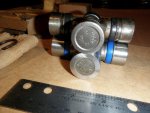
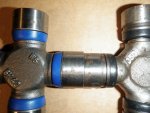
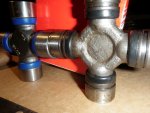
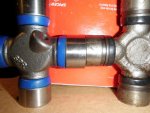
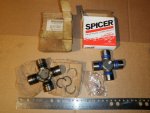
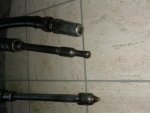
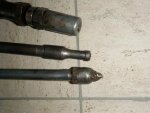
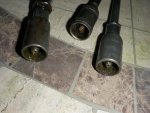
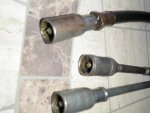
The TM (20P and 34P)list the same part number for both types, 3/4 and 1 ton. THE TM IS WRONG. Part# 7806140 is only for the 3/4 ton(M1009)
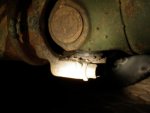
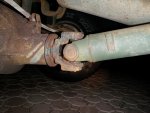
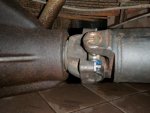
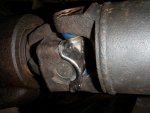
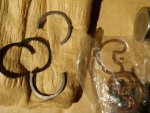
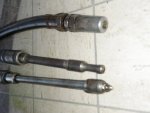
I took pictures of both U-Joints, as you can see the caps are different sizes.
Two pictures of the driveshaft are 1 ton and the other two pictures are of the Blazer(M1009) driveshaft.
 

Attachments

Last edited:

doghead

4 Star General /Moderator
Staff member
Super Moderator
Steel Soldiers Supporter
26,246
1,179
113
Location
NY
You may have dropped a needle bearing in the cap, so now it will not be the right length.
 

DavidJBlythe

New member
64
1
0
Location
Fort Meade, MD
Like always, you gents are the best.

I kept looking to put the retaining clip on the top of the cup. Just like Tankie88 said, when you seat the U-joint completely flush, the grooves are visible beneath the ears of the drive shaft, very close to the body of the u-joint. I was looking at it all wrong at first. Again thanks for the help!

Stonepicker1, I have the M1009, so luckily I wasn't given a bum part from the store. Thanks for the pics though! I hope you didn't ruin your clothes crawling up under the truck.

Those plastic retainers really are terrible... The presence of them tells me that the the joints have never been changed out, so I might need to get new ones all around.

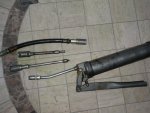
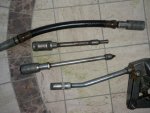
BTW - While we are on the subject: There's not that much room (in any position) to try and get a grease gun on the zerk fitting on the joints. I have the rather large-ish Humvee grease gun. Do they make ones with tiny little hoses to get on to those fittings? I don't think I should normally have to take apart the drive shaft just to get to the fitting.

Again, all thanks for the endless help. Some of you may have seen my truck right off base at Ft. Meade (Reese Rd gate).
 
Top
AdBlock Detected

We get it, advertisements are annoying!

Sure, ad-blocking software does a great job at blocking ads, but it also blocks useful features of our website like our supporting vendors. Their ads help keep Steel Soldiers going. Please consider disabling your ad blockers for the site. Thanks!

I've Disabled AdBlock
No Thanks