• Steel Soldiers now has a few new forums, read more about it at: New Munitions Forums!

  • Microsoft MSN, Live, Hotmail, Outlook email users may not be receiving emails. We are working to resolve this issue. Please add support@steelsoldiers.com to your trusted contacts.

Project Wild Weasel M1009

WWRD99

Well-known member
Steel Soldiers Supporter
1,009
1,556
113
Location
York Pa
The theory that the torque rods came from a Suburban is proven wrong. I forgot that I had a Suburban gate that I bought early on and have been storing it. That explains the same part number in the Mitchell manual for right and left. Totally different. I am getting old I remembers the layout as soon as I looked at the gate from the Suburban. Take Care. Stay Cool,View attachment 927831
So the suburban tail gate will work but the helper springs are different than the blazer?

Sent from my SM-S906U using Tapatalk
 

jmenende

Well-known member
451
370
63
Location
Puerto Rico
Looks great!! I used some half inch pex pipe over that spring bolt to keep it from making noise. Covered it in grease. Worked great so far. I just glued the seal on the gate the other day. They make pretty nice gaskets that fit good now. I don't remember them being formed. 3m weather stripping goop in black finished it off.

Sent from my SM-S906U using Tapatalk
Didnt know you were a skater. Nice vans.
 

WWRD99

Well-known member
Steel Soldiers Supporter
1,009
1,556
113
Location
York Pa
My hot day working on a cobbled up gate. I never had the issues I am having with this gate. Not sure why but I cannot get it to fit no matter what. I called out for help from a friend. We will give it another whirl today. It was just too heavy and awkward for me to in’s all by myself. View attachment 927930View attachment 927931View attachment 927932View attachment 927933View attachment 927934 View attachment 927931
Dang those spring retainers look like the ones we just did...I think 3 bolts broke off too. Was a mess. I don't know how you'd install a gate by yourself plus in this heat.

Sent from my SM-S906U using Tapatalk
 

cucvrus

Well-known member
11,373
10,045
113
Location
Jonestown Pennsylvania
I have met my goal for the evening. The gate is installed and adjusted to fit. The opening. Opens and closes very nice. I added a lot of new fasteners and the outer bumper braces are LMC. I fished 1/2” bolts thru the frame to attach the bumper braces. I will work at getting the rear gate back together next time I work. I hope tomorrow. Be Safe and Enjoy the weekend.
 

Attachments

cucvrus

Well-known member
11,373
10,045
113
Location
Jonestown Pennsylvania
I was out and pulled the transmission pan from the Wild Weasel. Pretty much uneventful. I did find clean red fluid and a bit of debris on the magnet. Not enough to get excited about in a 40-year-old vehicle that has been pushing a snowplow and being driven by several hundred different people in its lifetime. IMG_2264.jpeg IMG_2265.jpeg The magnet did revile some solid pieces sort of like a bead of steel that was crushed. IMG_2267.jpeg While I was there and had the rear driveshaft off, I replaced the U joints and used the AutoZone brand. IMG_2263.jpeg IMG_2262.jpeg This truck still had the factory OEM joints as they were held in with the plastic/nylon material. a U joint press makes life easier when doing U Joints. No hammering needed. Now as I was installing the crank in the gate, I noticed a nasty place on the flange of the gate. I cut a piece of angled galvanized and used some panel adhesive to clamp it into place. IMG_2261.jpeg
 
Last edited:

cucvrus

Well-known member
11,373
10,045
113
Location
Jonestown Pennsylvania
All clamped up and hopefully no where to go. Speaking from experience a person could easily get $1500. to $2000. In a rear gate if the gate needs replaced and all the parts are worn out. I have repaired and rebuilt several gates and it gets costly to do it right and even doing it functional can be expensive if you are not able to find parts. Who would have thought torque rods and inner torque rod brackets would be so costly. And before you say I checked around. Even HBW was without them. I am digging deep and finding things I forgot I had . Take care. May the force be with you. Be Safe. IMG_2283.jpeg
 

WWRD99

Well-known member
Steel Soldiers Supporter
1,009
1,556
113
Location
York Pa
That part that was in the pan, any chance it's the park rod end? Kinda looks like it. That hits the rooster tail and parking pawl.

Sent from my SM-S906U using Tapatalk
 

cucvrus

Well-known member
11,373
10,045
113
Location
Jonestown Pennsylvania
It could be the main clock spring in the air bag system I don’t know anything about transmission parts. I maintain things and try my best to duplicate the OEM fit and function. After that I open my wallet and let the dollar bills escape and untended. It is 40 years since I worked on GM vehicles professionally. This is just a hobby like fishing for me. I let transmission work to someone else. Same as most other things I do all the grunt work and not whiz thru it.
 
Last edited:

rtk

Well-known member
Steel Soldiers Supporter
1,186
433
83
Location
Lockport N.Y.
Same here rick , I started working at repair shops then GM dealerships at 16 in 1966 or so after HS until 1976 . A lot has changed under the hood . You have to be proficient with electronics AND mechanical to work on anything today .
 

cucvrus

Well-known member
11,373
10,045
113
Location
Jonestown Pennsylvania
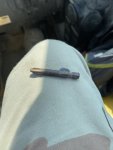
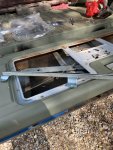
Last night I made good progress. I was able to get the gate reassembled and operational. As with most gates o work on without doing welding and adding a strip to the top outer flange this gate is structurally unsound. It works and opens and closes fine but the outer skin is corroded from the structure inside the gate. It works and I am not restoring this vehicle. Everything fits nice. I bought the used GM manual regulator from a YOUPULLIT after one of the vehicles I repaired for a customer ended up in the scrap yard after an accident. That was not even 6 months old. IMG_2296.jpeg 
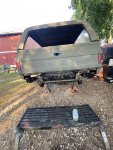
I wasn’t sure if the angle of the crank looked right but that is when I can tell the gates structural strength is compromised. IMG_2288.jpeg 
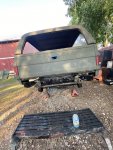
It looks good and for the first time in 6 months it is closed up from the elements. IMG_2292.jpeg Even the fillers fit perfect and tight in place. IMG_2293.jpeg IMG_2287.jpeg After I had everything adjusted and working I applied grease and oil. Real oil and real grease. No aerosol crap. IMG_2285.jpeg 
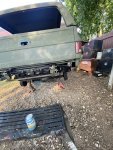
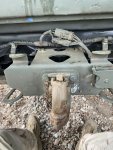
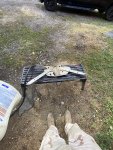
This is the used regulator. Dusty but not rusty. Making great progress so I bolted on the Pinter hook assembly. That was held on with 2 bolts when I removed it. I used the 7/16” bolts and am ready to crawl underneath the next time I get to work on it. I need to button up the driveline on my next project. I still have the front lighting harness and get the electrician system charging again. That will happen. Everything I get to has been hacked on done incorrectly. Common on older vehicles especially CUCV’s. Take Care and Be Safe.
 

Attachments

cucvrus

Well-known member
11,373
10,045
113
Location
Jonestown Pennsylvania
Check out this M1009 gate rebuild I done on Terminus M1009. Terminus M1009 | Page 4 | SteelSoldiers I welded, glued and riveted it back into shape and I even painted it to make it look pretty. While you are reading check out the entire thread. Terminus M1009 came from a junkyard crush pile to running for many years after. Terminus M1009 | SteelSoldiers
They were the fun years, and I ran the pants off that M1009 and really pushed it to the maximum limits off road in stock form.
 

cucvrus

Well-known member
11,373
10,045
113
Location
Jonestown Pennsylvania
I pressed in the front ujoint after work. And of course I painted the driveshaft. Any job that requires removal and I am working on gets makeup put on before reassembly. Have a Great Weekend. I hope to get some work done this weekend after I put in another Saturday. If not I will another day. I have a driveway full again.IMG_2310.jpeg
 

cucvrus

Well-known member
11,373
10,045
113
Location
Jonestown Pennsylvania
Over the years I have seen people melting the nylon from the driveshaft. I am talking the nylon that holds the OEM u joints into place. I never melted them out.
I use my trusty u joint press and a little grease and oil and press them on and out without any hammering and beating on the u joint or driveshaft. I watched guys cursing for hours and break new u joint caps and red tack needle bearings. No Sit I don’t like it. IMG_2306.jpeg IMG_2307.jpeg IMG_2309.jpeg
 
Top
AdBlock Detected

We get it, advertisements are annoying!

Sure, ad-blocking software does a great job at blocking ads, but it also blocks useful features of our website like our supporting vendors. Their ads help keep Steel Soldiers going. Please consider disabling your ad blockers for the site. Thanks!

I've Disabled AdBlock
No Thanks