• Steel Soldiers now has a few new forums, read more about it at: New Munitions Forums!

  • Microsoft MSN, Live, Hotmail, Outlook email users may not be receiving emails. We are working to resolve this issue. Please add support@steelsoldiers.com to your trusted contacts.

002 teardown and rebuild

Jimc

Member
725
1
18
Location
Mullica, nj
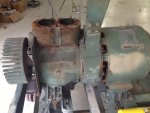
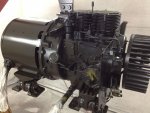
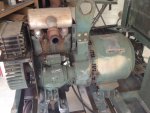
ok guys i have finally got a chance to start the 002 project and you guys asked for another thread so here it is. so far this one seems to be going alot smoother than my 003 but ill document what i can. here is what i started out with. i bought this from one of our members here a few months back. was sitting in his back yard and he never got around to doing anything with it. by just looking at its condition it appears to be in not that great of shape but so far thats really just external appearance. once i got it torn down and cleaned up the internals and all the stuff that really matters is in crazy good shape. this is pretty much before i started.
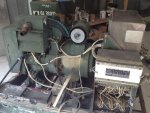
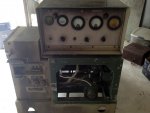
IMG_1318.jpgIMG_1319.JPG

since im familiar with these gens now from my 003 i can really just tear into these things and just start removing everything not worrying too much. this is about 30% torn down. all sheet metal removed.
IMG_1326.JPG

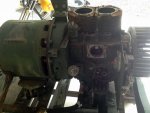
it took me about 3hrs to break the whole gen down to this lvl.
IMG_1331.JPGIMG_1332.JPG

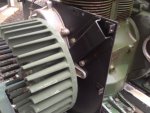
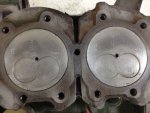
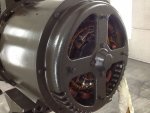
the cylinder bores look fantactic. perfectly smooth and all the hatch marks are still there with no wear at all. when i first brought this unit home i gave it a good powerwashing since it had quite a bit of dirt, mud and grease on it. now that i have it torn down i needed to give it another bath to get the stuff i couldnt get before. in by the blower wheel, gen end, etc. i took the end cover off the generator end and looked in where the diodes are. it was pretty nasty. everything was black and caked up. looked like 30 years of dirt and wd40 was sprayed in the thing. at first i thought this thing didnt look too healthy. here is a before pic. kinda hard too see.
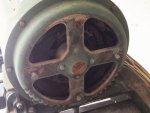
IMG_1333.JPG

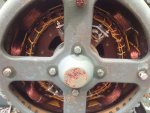
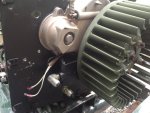
i rolled the unit outside my shop and i sprayed this crazy cleaner/degreaser i have all over everything. the blower wheel end was typical dirt and oil. i doused that with cleaner and i sprayed the gen end as much as i could get in there. let it set about 20 min then i busted out my hot water power washer and went to town. once i cleaned it up i was so surprised at the condition of this i couldnt believe it. it looks brand new.
IMG_1335.jpgIMG_1336.JPGIMG_1337.JPG

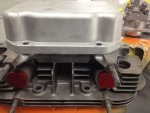
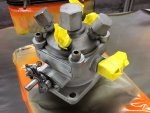
the gen is so clean even the heat sinks for the diodes are still in high polished chrome. believe it or not this gen is from 1981. i started this yesterday and got it all torn down. today i spent a few hrs and glassbeaded alot of the small parts, the cylinder head, pushrod tubes, injectors and line, etc. ill continue on with this a bit tomorrow.

one part i know i need if anyone has any.....the grey vibration isolator mounts for the control box. i need 3 of these.
 

Keith_J

Well-known member
3,657
1,316
113
Location
Schertz TX
I hate to see these sets languish in back lots. They were built to run forever when properly cared for. Great job so far.

I've restored one, save the paint. Just too busy to work that one out. But everything that was rusty is now in protective primer and the unit lives inside a shed with monthly running under load. One gauge was broken but was repairable. the frequency meter was rusted to death, only the faceplate could be used in an otherwise identical movement. Not a bad fix for $25.

It is my backup power and also runs my welder happily on three phase. While the welder uses nearly any voltage, I can use 12/4 extension cord on three phase at 200 amps output without duty cycle limits.
 

Jimc

Member
725
1
18
Location
Mullica, nj
Hey john, its actually sold as a tire and wheel cleaner. I get it in 5gal jugs but you can get the same stuff, different brand from walmart in the car care section. Its called westleys bleach white. Its basically the same thing as what im using. Its sodium hydroxide based cleaner so its very similar to oven cleaner. It just breaks down anything organic so wear gloves as its not good for your skin.
 

Jimc

Member
725
1
18
Location
Mullica, nj
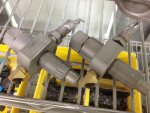
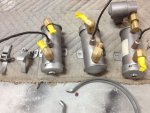
ok todays progress was just doin some blasting. i lifted the engine and gen off the skid. media blasted that and a few other parts and dropped it off at my friends shop to be powdercoated. i disassembled the injection pump and went through that to be sure all is good and it was. everything was nice and clean in there so i reassembled that. the rest of the small parts i glassbeaded the other night. tonight i masked them off, put them in the spraybooth to get some epoxy primer. in the morning i will paint them with the same dark OD green polyurethane i did my 003 in. the injectors are cleaned up and im ready to send them off to jerry for a little test and tune. here are some pics before epoxy.

IMG_1353.JPGIMG_1350.jpgIMG_1348.JPGIMG_1346.JPGIMG_1345.jpg

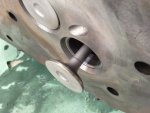
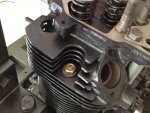
i glass bead the head and get in all the ports real well. it removes every bit of carbon buildup. you can see here is the injector port.

IMG_1349.jpg

i also removed the the inline noise suppressors from the fuel pumps. just something thats kinda unneeded that can fail and cause a problem.
 

Jimc

Member
725
1
18
Location
Mullica, nj
update.....

i got the skid and frame back from being powdercoated.

IMG_1361.JPG

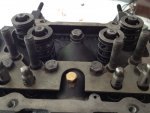
i took some of that same cleaner i used on the gen and srayed it on the piston top and used a soft wire brush to clean all the carbon off. i also ran a tap in all the head bolt holes so when i bolt the head on i am getting accurate torque on the bolts. i also dug up a 7/16 x 20 tap and ran that in the glow plug holes.

IMG_1357.jpgIMG_1359.JPG

i lapped all the valves to make sure they are sealing properly. im sure they were fine but kinda pointless to tear the head down and not take a few min to do it. once that was all done i put some oil on the valve stems, installed them and put the springs and retainers back on. the head is basically sitting on the shelf all ready to go back on now.

IMG_1358.JPG

i put some of the small parts that i have had ready for paint as well as the engine itself in the booth today. i epoxy coated everything and painted.

IMG_1366.JPGIMG_1364.JPGIMG_1362.JPG

tomorrow i should be ready to set the engine back on the skid. i still have yet to touch most of the sheetmetal, the control box and distribution box. that stuff will be next. it has been getting warm out and i really havent felt like getting all suited up to go outside and blast. that is the crappiest job in the world. cant stand doing that.

oh and yes jim i opted to not do the pink. lol
 
Last edited:

Jimc

Member
725
1
18
Location
Mullica, nj
Thanks. This one is moving right along. Knock on wood, so far i havent come across many snags like i did on my 003. This one is really in fantastic shape. I am going to put my data plate and control box face kit on it when done so that panel will look like new.
 

gimpyrobb

dumpsterlandingfromorbit!
27,785
749
113
Location
Cincy Ohio
Have you found the vibration isolators yet? I looked around and haven't found any. I'll call a buddy and see what he has.
 

Jimc

Member
725
1
18
Location
Mullica, nj
I have not found any yet. If i cant i do have a backup plan. I would prefer the oem ones though. If you find any please let me know. Much appreciated.
 

Jimc

Member
725
1
18
Location
Mullica, nj
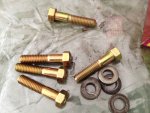
had a couple hours today to play with this. i got the eng/gen set back on the skid and bolted down. once i did that i wanted to get some of these parts off the shelf so i got the head, rocker arms on and adjusted. seems like on most of these gen sets the short head bolts that are exposed to the weather are always rusted pretty good. the heads arent too healthy so i just ordered new ones. the oem ones are grade 9. you can get them right from mcmaster carr for cheap. the long head bolts under the valve cover seem to be ok most of the time but they do have those too if anyone ever needs them.
IMG_1367.jpgIMG_1368.jpg

something i failed to mention on teardown. most of you guys prob know already but always number you pushrods, rockers, valves, etc. you see in the pic i numbered everything with a sharpie when i pulled it all apart this way everything goes back as a set. each part has been worn into the other and should go back matching.

IMG_1370.JPGIMG_1371.JPG

i removed all the rubber sealing o-rings for the pushrod tubes from the head and block. made sure they all looked good and were clean and pliable. i cleaned up the springs and the 2 washers that push down on the o-ring in the block, greased everything so it all moves smooth and free. the springs need to push and squeeze that oring to make a seal around the tube. also, for this generator rebuild, instead for bright silver i did the valve cover, pushrod tubes and injector pump in a flat greenish charcoal.

IMG_1372.JPG
 

storeman

Well-known member
1,345
52
48
Location
Mathews County, VA
Jim,
Injectors arrived today, spotless as the rest of your project. Glass beading is awesome! Working through the weekend and expect to get to them Tuesday.
Jerry:beer:
 
Top