• Steel Soldiers now has a few new forums, read more about it at: New Munitions Forums!

  • Microsoft MSN, Live, Hotmail, Outlook email users may not be receiving emails. We are working to resolve this issue. Please add support@steelsoldiers.com to your trusted contacts.

303M HydraMatic rebuild

m1010plowboy

Well-known member
Steel Soldiers Supporter
3,924
2,766
83
Location
Edmonton, Canada
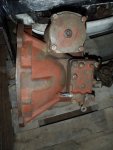
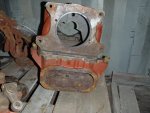
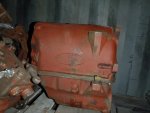
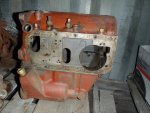
Hey, are you really attached to that main case ? I could use one as one of mine has that nasty crack in it.
Ironically, I just got a partial donation for Piglet that will take me so far away from Washington I won't be able to smell my Aunt Ollie's bouillabaisse or Cousin Clive's fishing boat. Uncle Melvin was one of Washington's top tree fellers for a long stretch and man I miss visiting their blackberries.

Interestingly, a Deuce boosting fellow Canadian is making a partial donation with a power pak for the Piglet project. That means I have extra unknown transmissions sitting and a known rolling/ running power pak for Piglet......

I'd meet you tomorrow if this hadn't happened Saturday.

Screenshot 2024-06-27 at 11-35-13 Stony Plain Alberta to Fort McMurray Alberta - Google Maps.png

If you come up all the way up here and start loading I will give you that case........ If I need to drive for 6 hours and meet you in Little Fort, Blue River, Valemont, Jasper, Banff, Canmore or some other far away place in the mountains..........that case will cost you $11.00 Canadian.

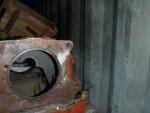
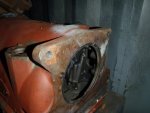
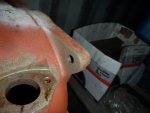
Bring a trailer and you can have 2 blown motors/ power paks with unknown transmissions. ...........I haven't made the effort to try and separate from the engines yet but the most knowledgeable fella I know gave me tips on getting them apart so now I just need time. A gas powered, hand held, 14" chop saw with a steel blade should help drill holes in the bell housing to get at the torus bolts.

Quick landscape question on that........... after the 30 torus bolts are out does the trans just gently slip away from the engine or is it a fight?....... is there anything else holding the shaft into the trans?......asking for a friend lol.


Thinking while I type......I also have the trans out of Piglet which we know sucked up radiator fluid...... You could have that for parts.....

I will give you the sea can parts........a spare Piglet trans that must come off the Piglet motor I plan to pull real soon....( less than 10 years from now but hopefully within the month )...... You could have 2 power paks 'unknown' trans....... One belonged to Mentor Robert G and was supposed to be a good trans on a bad motor. One trans came from Little Fort and we saw some rust in the pan on that one.....so unknown..... Come and get em' and you can have them.
 

USMC 00-08

Well-known member
1,186
187
63
Location
Skiatook, OK
Before I start on the rear servo rebuild, I have some really interesting news. As many of you know I collect Military manuals. All types, but especially ones with Automatic transmissions in them. Well I just bought another copy of the "TM 9-8025-2" ( an original June 1957) which makes four copies I now own. It came with a special surprise . It had a 15 page supplemental with it that listed changes made to the HydraMatic in August 1962. One of those was the use of the "overrun" valve in the front servo ! The very same one I was planning to use in my rebuild. How interesting was that !
Seems the military noticed the civilian markets use of it and thought they should use it too.
Only took 5 years. Not bad for the military !
This is very interesting. I have this overhaul tag on my transmission and I have been unable to find out anything on the MWOs applied to it in 1964. Would your supplemental be able to shed light on this? Would you be interested in uploading a copy of the supplemental to the TM section?

Here is the tag on my transmission. Does this mean I have the overrun valve?

IMG_20240627_160925131~2.jpg
 

rustystud

Well-known member
9,298
3,072
113
Location
Woodinville, Washington
This is very interesting. I have this overhaul tag on my transmission and I have been unable to find out anything on the MWOs applied to it in 1964. Would your supplemental be able to shed light on this? Would you be interested in uploading a copy of the supplemental to the TM section?

Here is the tag on my transmission. Does this mean I have the overrun valve?

View attachment 926701
Sorry no. You need the "C" MWO applied for that.
The "A" and "B" MWO is just converting a 302M transmission to a 303M unit. Basically adding two clutch plates to the front drum assembly.
Yours was probably still in good condition so they left it in.

I was thinking about why they (the military powers that be) decided to finally use this servo. I believe it was because the old style parts had dried up since all the civilian HydraMatics had gone to this newer design. So why would GM still make an obsolete part like that just for a few parts sold a year.
After all the new servo fits directly in, with no modifications whatsoever, and it's a better servo.
 
Last edited:

rustystud

Well-known member
9,298
3,072
113
Location
Woodinville, Washington
Ironically, I just got a partial donation for Piglet that will take me so far away from Washington I won't be able to smell my Aunt Ollie's bouillabaisse or Cousin Clive's fishing boat. Uncle Melvin was one of Washington's top tree fellers for a long stretch and man I miss visiting their blackberries.

Interestingly, a Deuce boosting fellow Canadian is making a partial donation with a power pak for the Piglet project. That means I have extra unknown transmissions sitting and a known rolling/ running power pak for Piglet......

I'd meet you tomorrow if this hadn't happened Saturday.

View attachment 926696

If you come up all the way up here and start loading I will give you that case........ If I need to drive for 6 hours and meet you in Little Fort, Blue River, Valemont, Jasper, Banff, Canmore or some other far away place in the mountains..........that case will cost you $11.00 Canadian.

Bring a trailer and you can have 2 blown motors/ power paks with unknown transmissions. ...........I haven't made the effort to try and separate from the engines yet but the most knowledgeable fella I know gave me tips on getting them apart so now I just need time. A gas powered, hand held, 14" chop saw with a steel blade should help drill holes in the bell housing to get at the torus bolts.

Quick landscape question on that........... after the 30 torus bolts are out does the trans just gently slip away from the engine or is it a fight?....... is there anything else holding the shaft into the trans?......asking for a friend lol.


Thinking while I type......I also have the trans out of Piglet which we know sucked up radiator fluid...... You could have that for parts.....

I will give you the sea can parts........a spare Piglet trans that must come off the Piglet motor I plan to pull real soon....( less than 10 years from now but hopefully within the month )...... You could have 2 power paks 'unknown' trans....... One belonged to Mentor Robert G and was supposed to be a good trans on a bad motor. One trans came from Little Fort and we saw some rust in the pan on that one.....so unknown..... Come and get em' and you can have them.
Once you bust up that housing (it is a real pain, that cast iron does not like to break ! ) and remove all those fun little bolts, the transmission slides out like butter. Then your left looking at that poor housing you had to destroy and cleaning up all that spilled transmission fluid.
Oh, before you start busting the housing, remove the four large bolts connecting the transmission to the bell-housing. It won't come out but it will protect your transmission case from the shock of the beating the bell-housing is going to be taking.
 

rustystud

Well-known member
9,298
3,072
113
Location
Woodinville, Washington
Ironically, I just got a partial donation for Piglet that will take me so far away from Washington I won't be able to smell my Aunt Ollie's bouillabaisse or Cousin Clive's fishing boat. Uncle Melvin was one of Washington's top tree fellers for a long stretch and man I miss visiting their blackberries.

Interestingly, a Deuce boosting fellow Canadian is making a partial donation with a power pak for the Piglet project. That means I have extra unknown transmissions sitting and a known rolling/ running power pak for Piglet......

I'd meet you tomorrow if this hadn't happened Saturday.

View attachment 926696

If you come up all the way up here and start loading I will give you that case........ If I need to drive for 6 hours and meet you in Little Fort, Blue River, Valemont, Jasper, Banff, Canmore or some other far away place in the mountains..........that case will cost you $11.00 Canadian.

Bring a trailer and you can have 2 blown motors/ power paks with unknown transmissions. ...........I haven't made the effort to try and separate from the engines yet but the most knowledgeable fella I know gave me tips on getting them apart so now I just need time. A gas powered, hand held, 14" chop saw with a steel blade should help drill holes in the bell housing to get at the torus bolts.

Quick landscape question on that........... after the 30 torus bolts are out does the trans just gently slip away from the engine or is it a fight?....... is there anything else holding the shaft into the trans?......asking for a friend lol.


Thinking while I type......I also have the trans out of Piglet which we know sucked up radiator fluid...... You could have that for parts.....

I will give you the sea can parts........a spare Piglet trans that must come off the Piglet motor I plan to pull real soon....( less than 10 years from now but hopefully within the month )...... You could have 2 power paks 'unknown' trans....... One belonged to Mentor Robert G and was supposed to be a good trans on a bad motor. One trans came from Little Fort and we saw some rust in the pan on that one.....so unknown..... Come and get em' and you can have them.
As per our PM message, this should be a real interesting trip !
My injections went well, so I should be in less pain and able to withstand a long trip like this.
 

rustystud

Well-known member
9,298
3,072
113
Location
Woodinville, Washington
I forgot to mention. We have tons of Blackberries out here. Grow wild everywhere. A real nuisance plant actually. They only ripen in late August early September though. We will also have plenty of Blueberries this year. They should start ripening late July.
 

rustystud

Well-known member
9,298
3,072
113
Location
Woodinville, Washington
In that new 303M information manual I just got, it mentions all the specifications of the transmission including the spring pressure on the "Reduction Accumulator" .
Remember I told you to leave it alone if the springs where not broken, well here's the reason why I said that. The smaller inside spring is under 295 to 325 ft Ibs of torque. The outside larger spring is under 481 to 531 ft Ibs of torque. Add those together and that is a "lot" of pressure !
Remember when I said the one that got away from me once went flying across the shop ?
That's the reason why.
 

m1010plowboy

Well-known member
Steel Soldiers Supporter
3,924
2,766
83
Location
Edmonton, Canada
In that new 303M information manual I just got, it mentions all the specifications of the transmission including the spring pressure on the "Reduction Accumulator" .
Remember I told you to leave it alone if the springs where not broken, well here's the reason why I said that. The smaller inside spring is under 295 to 325 ft Ibs of torque. The outside larger spring is under 481 to 531 ft Ibs of torque. Add those together and that is a "lot" of pressure !
Remember when I said the one that got away from me once went flying across the shop ?
That's the reason why.
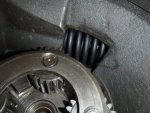
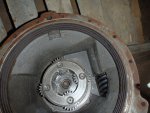
Your timing is great. Both for the adventure and your accumulator explanation. I took some pics to give us some detail on parts and we can see the spring from inside. Trying to picture the assembly line in 1951 and asking the mechanic to simply squeeze this spring to 325 psi then shove it in this spring at 530 psi. The background music would have been Buddy Holly but I can't imagine the conversation.

P6282478.JPGP6282475.JPGP6282474.JPGP6282472.JPGP6282463.JPG

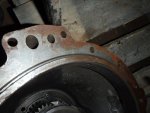
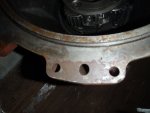
When you explained how things can crack I took a closer look to see anything obvious. Glad you pointed that out.....nothing to see here.

P6282464.JPGP6282468.JPGP6282465.JPGP6282484.JPGP6282479.JPGP6282480.JPG
 

rustystud

Well-known member
9,298
3,072
113
Location
Woodinville, Washington
Your timing is great. Both for the adventure and your accumulator explanation. I took some pics to give us some detail on parts and we can see the spring from inside. Trying to picture the assembly line in 1951 and asking the mechanic to simply squeeze this spring to 325 psi then shove it in this spring at 530 psi. The background music would have been Buddy Holly but I can't imagine the conversation.

View attachment 926783View attachment 926784View attachment 926785View attachment 926786View attachment 926787

When you explained how things can crack I took a closer look to see anything obvious. Glad you pointed that out.....nothing to see here.

View attachment 926788View attachment 926790View attachment 926796View attachment 926789View attachment 926791View attachment 926792
That transmission should clean up nicely. The output carrier looks good too.
Do you know what MWO A and B were? I can find no information on the MWOs.
The "A" and "B" MWO applies to converting a 302M transmission to a 303M unit. Basically they added two clutch plates to the front drum assembly.
There was a change in the rear servo too. They went to the newer style with the "exhaust valve" built in. This valve allowed quicker dumping of the fluid in the servo. That translates into faster release of the servo. Since the rear servo is released with fluid pressure, by dumping the fluid faster you will get a quicker apply of the band to the rear drum.
 
Last edited:

rustystud

Well-known member
9,298
3,072
113
Location
Woodinville, Washington
I talked with the people at "Gardico" gasket manufacturing today. We settled on a material to use. It has a 1700 PSI rating and a 700 degree temperature rating. It is also partially reusable. Meaning parts can be taken off and the gasket reused if it has not torn. They are getting back to me next week with a price for the eight gaskets.

OK that was weird ! I was just typing this last sentence and the website kicked me off ! I came back and the sentence was still there. Weird stuff going on here.
 
Last edited:

1944mb

Active member
419
113
43
Location
Big Timber, MT
Hey Rusty, So in regard to thrust washers and bushings....could we work on coming up with part numbers to be able to advise a person on how to put a kit together? I did not see where fatsco had a bushing kit. But maybe a person needs to call in for that.
Secondly, if no one offers a rebuild kit for the front pump, could we have the pieces made to be able to rebuild them .Just a thought.
 

rustystud

Well-known member
9,298
3,072
113
Location
Woodinville, Washington
Hey Rusty, So in regard to thrust washers and bushings....could we work on coming up with part numbers to be able to advise a person on how to put a kit together? I did not see where fatsco had a bushing kit. But maybe a person needs to call in for that.
Secondly, if no one offers a rebuild kit for the front pump, could we have the pieces made to be able to rebuild them .Just a thought.
I know "Fatsco" sells a bushing kit. I think they sell the thrust-washers on a need basis.
As far as a kit for the front pump goes, that might be diffucult. I haven't seen the vanes for sell for several years now. We might be able to use vanes from another manufacturers pump.
The front seal is being repoped by a California company. I've bought three from them lately. Good quality, the seal is made from Silicone.
 

rustystud

Well-known member
9,298
3,072
113
Location
Woodinville, Washington
I was thinking about problems rebuilding front pumps on the 303M transmission. Really there is only one and that is the lack of new "vanes" . The front seal is being repoped, the seal ring is being remade as is the gasket and bushing. The housing is easily machined if there are any grooves in it. That just leaves the "vanes" . If we can just find a manufacturer that makes this size vane we would be "Golden" .

The thickness of the vanes is 0.1240" to 0.1250" .
The width is 0.4845" to 0.4855" .
The length is 0.638" to 0.639" .

So if anyone has some spare time on their hands, they could look up possible candidates for a replacement vane.
 
Last edited:

rustystud

Well-known member
9,298
3,072
113
Location
Woodinville, Washington
Another interesting item about the "C" MWO and the newer rear servo was the "rear band actuating lever spring" was removed. So no more automatic rear band adjusting. Like I mentioned earlier, it never really worked well.

img006.jpg I circled the "actuating lever" . You can see there is no more "spring" here.
This servo cannot be used in our cases unless you drill some holes. I was going to attempt this on one of my cores. The problem is it is drilled at an angle, which meets up with another angled hole. Mess up here and you ruin the whole case.
 
Last edited:

rustystud

Well-known member
9,298
3,072
113
Location
Woodinville, Washington
Received the quote from "Gardico" gaskets today. They want $80.00 per kit. So for ten kits that's $800.00.
I sent them a message asking if they will drop the number of kits to four. I'm sure I will not receive an answer until next Monday.
Honestly that price is not that bad. That's only $10.00 per gasket and some of those gaskets are pretty complicated. I hope they drop the number down to four kits though.
img007.jpg
 
Last edited:

rustystud

Well-known member
9,298
3,072
113
Location
Woodinville, Washington
For the past two days, I have been cleaning up "valve bodies" from all the transmissions I tore down recently. Most valve body work is just tedious cleaning and reassembling the valve bodies correctly.
As in all "Automatic Transmission" work you need to be clean. Working with valve bodies, you need to be
Super Clean !
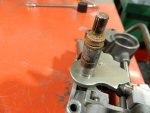
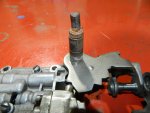
The only problem the HydraMatics seem to have with the valve bodies is the "shift and throttle lever" gasket area. Since the "throttle" lever goes through the "shift" lever they installed a very small gasket that is always bad. Rust also is a problem here.
004.JPG
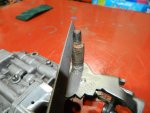
It is almost impossible to remove the small "pin" they used to retain the seal and the two levers together. I use a small file to grind down this pin on both sides, then remove the two shafts.
005.JPG
You can drive out the pin with a very small punch and clean it up with a 1/16" drill bit. You will need to clean-up the shaft spline areas extremly well and use some type of grease on them to prevent rust returning. I just sandblast them and then paint them. Then apply a rust preventative !

This valve body I'm working on here is not a "303M" one. It is a civilian model and the only items that can be used on the "303M" is the "Shift lever and Throttle lever" .
It's sad that you cannot interchange the civilian valve bodies with the 303M. There are several that have really good "upgrades" that would make the M135 perform much better.
GM made eight valve bodies that I know of. In the later years of production. they had perfected the shift points pretty well in all the HydraMatics.

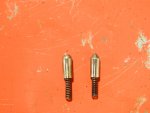
This "trick" I have is for all early HydraMatics, 1948 to 1952. Reinstalling the shift "detent" ball can be a "Life Altering" experience ! You must install the detent holder and shift and throttle levers first, since the "manual valve" must engage the shift lever and the "throttle lever" must be in its "trapped" position. Then you install the detent spring and ball last. After you sent this ball flying across your shop for the twentieth time, you start questioning your sanity for starting this project.
But take heart ! I have a fix. After years of fighting these little devils I finally came up with a solution.

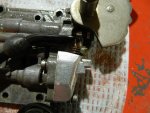
007.JPG

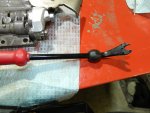
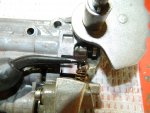
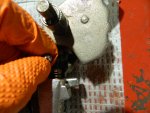
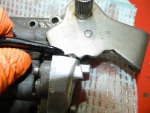
Using a "body" panel trim remover, you can easily hold this check ball from Hell !
Yes I said from Hell as this ball "is" possessed of the devil .

010.JPG 008.JPG006.JPG009.JPG
After using this tool a few times, you can easily install any check ball that allows you clearance.
 
Last edited:

rustystud

Well-known member
9,298
3,072
113
Location
Woodinville, Washington
So today I started the 303M valve body teardown/clean-up.
This poor valve body has seen better days ! One thing I've noticed is the "compensator valve" is sticking on "all" the valve bodies I've tore down recently. That's six valve bodies this week. What's going on here ?
I cannot explain it.
Anyway, take care removing these valves, as you do not want to hurt the valve bores.
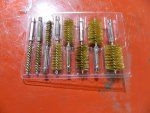
After tear down of the valve bodies, take a "brass" brush set and clean up all the bores. Then take some green "scrub" pads and clean all the valves, removing all the varnish they pick up over time.

010.JPG
The 1953 and up HydraMatic models used the same "detent" holder as the 303M does so you can "upgrade" to the smoother operating lever. I plan on doing this on my rebuild.
001.JPG008.JPG007.JPG
You will notice the "control valve lever" on the "303M" (the one on the right) is longer than the standard
lever. This is to accommodate the extra length of the "manual valve lever shaft seal retainer" . I plan on leaving this off my rebuild as it is not needed. The standard seal is perfectly able to keep all nastiness out of the transmission. Plus it just ends up being a rust collection site.
 
Top
AdBlock Detected

We get it, advertisements are annoying!

Sure, ad-blocking software does a great job at blocking ads, but it also blocks useful features of our website like our supporting vendors. Their ads help keep Steel Soldiers going. Please consider disabling your ad blockers for the site. Thanks!

I've Disabled AdBlock
No Thanks