rustystud
Well-known member
- 9,402
- 3,392
- 113
- Location
- Woodinville, Washington
 Using the special clamp tool again I compress the seal rings and install the rear drum assembly.


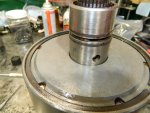
Now after installing the front and rear bands the drum assemblies are ready to go into the case. You need to "stab" the front shaft first angling the assembly into the case. The TM shows this. I don't have a helper to take pictures so I cannot show you how I do this .


Once the assembly is in place and the main support is bolted down, you can pressure test the whole assembly.
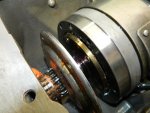
 This hole applies the front clutch.
 This hole applies the rear clutch.
After tearing down everything due to the high leakage, I checked the iron seals for clearance. Since I only have four seal rings at this time, I never checked this as it is a moot point. You need a .002" and .007" feeler gauge to check this gap. The gap must be over .002" and under .007" .
Everything checked out as I figured it would. Since most likely the military rebuilt it last.


Now everything is almost back to where I started this morning !


A quick note here about the clutch plates. There was two types of plates used. Waved and flat. This was used on both the steels and fiber plates.
Never use the wave plates !
They were originally used in the 302M transmission but replaced in the upgrade to the 303M transmission. These plates were originally used in the civilian HydraMatics and allowed a "cushioning" effect on clutch apply creating a "softer" shift. The problem is this allows clutch "slippage" which is not wanted in larger vehicles.
Last edited: