• Steel Soldiers now has a few new forums, read more about it at: New Munitions Forums!

  • Microsoft MSN, Live, Hotmail, Outlook email users may not be receiving emails. We are working to resolve this issue. Please add support@steelsoldiers.com to your trusted contacts.

68 Unimog 404 Restomod

BELinNC

Member
72
91
18
Location
White Oak, NC
Sounds like you are making some progress. Check the wiring on the temp sender before you order a new gauge. My SEE temp gauge did not work at first, but cleaning the electrical contacts had it working again. My oil pressure gauge did not revive and I plumbed in a new mechanical gauge.
 

SuperMochombo

Well-known member
127
338
63
Location
Albany, NY
Progress to report! Not really good news, but I'm working hard at it becoming good news.

I did a compression test, and the range is 155 at the highest to 130 at the lowest cylinder. I have changed plugs and wires, and changed the engine oil (not the filter yet.) I cleaned out the fuel tank, changed the fuel filter, and refilled with fresh gas. I topped up the coolant and added gear oil to the water pump bearings. The belts are in good shape, not too tight.

Still runs poorly. Won't idle.

Gotta be a carb or timing issue. I suspect my crappy carb rebuilding skills, and my lazy approach to the distributor. In fact I know something is amiss in the carb still bc when I tried to choke it has dropped out the choke gasket. Stopped dripping when I closed the choke.
 

SuperMochombo

Well-known member
127
338
63
Location
Albany, NY
Here's a short video running. The steam is antifreeze I spilled when filling the reservoir.


SuperMochombo

Well-known member
127
338
63
Location
Albany, NY
Victories! Small ones.

I just figured out how to follow the manual!

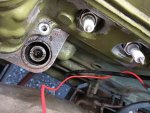
The running issues have turned into starting issues again, but even though that seems like a setback, it's actually just a chance for me to learn all this stuff now. I know I need fuel, air and spark in the cylinder. I have good compression, I have good fuel at the carb at the correct pressure. The float bowl has fuel in it. I have spark at all the plugs. But I cant get the truck to fire.

I think the trouble lies in the timing. I removed the distributor and cleaned and inspected the Petronix unit and the advance, and it all seems in order. I put the distributor on in the orientation in the manual (opposite how it was previously) with the wires fitting facing forward. I jacked the rear wheel and put it in 6th gear and I am rotating the motor and trying to find TDC on piston 1. The plug hole is in an awkward place, and so I have a friend coming by tomorrow to spin the wheel while I watch the piston with a camera or a feeler of some kind. I used a plastic straw today and the piston was pushing it up but I can't spin the wheel and mind the straw at the same time, and I am nervous about putting things into my cylinders to begin with.

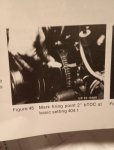
The marks on the balancer are evident, and I'm assuming that the 0 mark should line up when the #1 piston hits TDC. I chalked 2 degrees bTDC as per the manual on the balancer , only to clean off more balancer and discover another whole set of marks with degrees stamped on it. There are degree marks and numbers on the front edge of the balance and on the back edge. Not sure which to use, though the manual has a picture using the back edge marks so I will go with that for now. However, my balancer does not look like the one in the manual. It's still a bit of a mystery but I assume that the controlling factor here is the piston, so when I know its at TDC, the balancer will say what it says... and I will remember it.

Once I get the #1 piston to TDC, I will be able to properly set the timing on the truck (hopefully) and should be running!

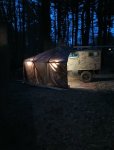
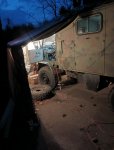
I made a tent so I can work in inclement weather.

I know this is basic to some, maybe most. But it's a first for me, and I'm enjoying it. I need to learn this stuff to earn the honor of driving my truck. I just wish I didn't have to work all day every day. I might have to quit for a while so I can get rolling :LOL:
 

Attachments

Pohl

New member
15
18
3
Location
North California
Victories! Small ones.

I just figured out how to follow the manual!

The running issues have turned into starting issues again, but even though that seems like a setback, it's actually just a chance for me to learn all this stuff now. I know I need fuel, air and spark in the cylinder. I have good compression, I have good fuel at the carb at the correct pressure. The float bowl has fuel in it. I have spark at all the plugs. But I cant get the truck to fire.

I think the trouble lies in the timing. I removed the distributor and cleaned and inspected the Petronix unit and the advance, and it all seems in order. I put the distributor on in the orientation in the manual (opposite how it was previously) with the wires fitting facing forward. I jacked the rear wheel and put it in 6th gear and I am rotating the motor and trying to find TDC on piston 1. The plug hole is in an awkward place, and so I have a friend coming by tomorrow to spin the wheel while I watch the piston with a camera or a feeler of some kind. I used a plastic straw today and the piston was pushing it up but I can't spin the wheel and mind the straw at the same time, and I am nervous about putting things into my cylinders to begin with.

The marks on the balancer are evident, and I'm assuming that the 0 mark should line up when the #1 piston hits TDC. I chalked 2 degrees bTDC as per the manual on the balancer , only to clean off more balancer and discover another whole set of marks with degrees stamped on it. There are degree marks and numbers on the front edge of the balance and on the back edge. Not sure which to use, though the manual has a picture using the back edge marks so I will go with that for now. However, my balancer does not look like the one in the manual. It's still a bit of a mystery but I assume that the controlling factor here is the piston, so when I know its at TDC, the balancer will say what it says... and I will remember it.

Once I get the #1 piston to TDC, I will be able to properly set the timing on the truck (hopefully) and should be running!

I made a tent so I can work in inclement weather.

I know this is basic to some, maybe most. But it's a first for me, and I'm enjoying it. I need to learn this stuff to earn the honor of driving my truck. I just wish I didn't have to work all day every day. I might have to quit for a while so I can get rolling :LOL:
If the distributor was incorrectly installed, perhaps you should also determine the valve-camshaft timing at the same time. Follow the instructions in your manual about valve timing. The notches on the camshaft and cam bearing should align when you are at TDC. This will make feeling for compression not needed, because your valves will both be closed if all is in alignment. If they are not all aligned, you have a valve timing issue as well.
 

SuperMochombo

Well-known member
127
338
63
Location
Albany, NY
If the distributor was incorrectly installed, perhaps you should also determine the valve-camshaft timing at the same time. Follow the instructions in your manual about valve timing. The notches on the camshaft and cam bearing should align when you are at TDC. This will make feeling for compression not needed, because your valves will both be closed if all is in alignment. If they are not all aligned, you have a valve timing issue as well.
I would like to determine that! However I assumed because I have good compression in each cylinder that the valve timing is at least close, and that a valve issue would not cause the truck to simply not start.

But...

All my friends who hated on me for getting this truck are smug. I feel a bit like an idiot. I've been trying since 5 PM and still no running. Offering to pay someone to come get this darn thing running, required to tell me WTF I'm doing wrong.
 

SuperMochombo

Well-known member
127
338
63
Location
Albany, NY
Well, I struggled through it. Tried it one more time using the compression tester method and it must have worked bc I got running. Even went on a test drive! I was able to start several times with just a push of the button. It runs about the same though, possibly worse a little. No power at all. Trouble idling.

I've been reading threads on multiple forums, and absorbing the knowledge. I'm hoping to leave a decent set of tracks here so anyone chasing these things down on a 1968 German Unimog 404 can be careful not to follow in my footsteps.

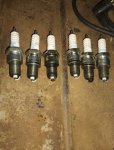
I'm about to pull the valve cover and the lower part of the distributor. I'm getting oil out the tailpipe. Think I have a bad exhaust valve seal on #2 bc all the plugs are clean but cylinder 2, which is black. Also, I just discovered the actual idle screw itself. I've never checked the throttle valves to see where they sit at the current setting. The distributor isn't right yet either. So I'm backing up and checking stuff.

Just the short drive was great, and I'm hooked. I love this truck. All I want is to drive it.

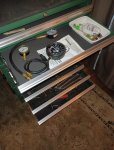
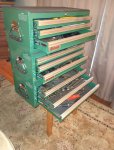
Been getting organized tool wise. Got a deal on a bunch of new toolboxes.
 

SuperMochombo

Well-known member
127
338
63
Location
Albany, NY
Progress. I removed the carb, the distributor, the fuel pump and little filter, and the distributor bearing and helical gear. I think the gear was installed 180 degrees out. The keyed bottom of the distributor and the slotted top of the helical gear is offset, so it only fits in the bearing one way. However, the slotted bottom of the helical gear is centered and I have heard is reversible 180 degrees. I think mine was reversed.

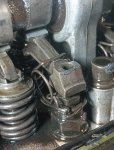
I removed the valve cover, which was pretty easy after getting the dash plate out. Like others, I had to drill out one of the screws holding the dash plate in. After loosening the coolant reservoir, it came right out. Under the cover I found several rocker arm retaining springs out of place, so I replaced them with snap ring pliers. I have started checking clearances but have only done a few, which weren't too tight. [Edit: Really got me wondering how those springs popped loose. What causes that? ]

Tomorrow I'm going to finish the valve clearances and make any adjustments needed, then bring the #1 to TDC and reinstall the fuel pump and distributor. I'm anxious to find out if I can get it all back together again with the distributor properly seated and the hash marks properly aligned with TDC.

Assuming I get that far, I might even get to try to drive again.

Lots of other little odd jobs going on. I repaired the rear passenger side reflector. The rubber strap broke during delivery, and when I tried to get the retaining nut off the back of the reflector to put the reflector on the new strap, it broke off. So I slathered the whole shebang with black Sikaflex, making sure to fill up all the cracks in the old rubber bezel. WHen it cured I sanded it all down smooth and it looks as good a new.

I repaired the door driver door handle so you can let yourself out without rolling down the window.

I opened up the little fuel filter and holy cow what a mess! Probably not going back in the truck right away. I have other modern filters right now. Eventually I might reinstall it just for originality. But maybe not.

Progress! I already signed up for Massmog in May. Gotta be ready!

IMG_20240325_173520935.jpgIMG_20240325_132440570.jpgIMG_20240325_122841940.jpg
 
Last edited:

Pohl

New member
15
18
3
Location
North California
Progress. I removed the carb, the distributor, the fuel pump and little filter, and the distributor bearing and helical gear. I think the gear was installed 180 degrees out. The keyed bottom of the distributor and the slotted top of the helical gear is offset, so it only fits in the bearing one way. However, the slotted bottom of the helical gear is centered and I have heard is reversible 180 degrees. I think mine was reversed.

I removed the valve cover, which was pretty easy after getting the dash plate out. Like others, I had to drill out one of the screws holding the dash plate in. After loosening the coolant reservoir, it came right out. Under the cover I found several rocker arm retaining springs out of place, so I replaced them with snap ring pliers. I have started checking clearances but have only done a few, which weren't too tight. [Edit: Really got me wondering how those springs popped loose. What causes that? ]

Tomorrow I'm going to finish the valve clearances and make any adjustments needed, then bring the #1 to TDC and reinstall the fuel pump and distributor. I'm anxious to find out if I can get it all back together again with the distributor properly seated and the hash marks properly aligned with TDC.

Assuming I get that far, I might even get to try to drive again.

Lots of other little odd jobs going on. I repaired the rear passenger side reflector. The rubber strap broke during delivery, and when I tried to get the retaining nut off the back of the reflector to put the reflector on the new strap, it broke off. So I slathered the whole shebang with black Sikaflex, making sure to fill up all the cracks in the old rubber bezel. WHen it cured I sanded it all down smooth and it looks as good a new.

I repaired the door driver door handle so you can let yourself out without rolling down the window.

I opened up the little fuel filter and holy cow what a mess! Probably not going back in the truck right away. I have other modern filters right now. Eventually I might reinstall it just for originality. But maybe not.

Progress! I already signed up for Massmog in May. Gotta be ready!

View attachment 919886View attachment 919887View attachment 919888
Your fuel filter shows an incredible amount of calcification, probably due to the amount of moisture in the fuel system and tanks. As well, that is the early filter. The late filters are the only ones available which require a newer cannister. The cannister shown has the old thick lip. Get a replacement gasket also.
 

SuperMochombo

Well-known member
127
338
63
Location
Albany, NY
I have taken some time away from the Unimog, and now I'm back at it. And very happy to report I made some real progress.

I finished the valve clearance adjustment, and replaced a few spring retainers that had given up the ghost. I had to make a special tool for that. I also took note that when the #1 piston is at TDC, the very top tooth of the timing chain gear (cam shaft gear maybe) has a punch mark. Then I put the valve cover back on.

Then I put the distributor back on. I oriented the housing per the pictures in the manual (wire facing forward) and turned the rotor until it dropped down fully seated. It will only seat with the rotor pointing in one direction. I then made a reference mark for the rotor location that I could see with the cap on, and put the cap on, using the hold down holes in the counter clockwise orientation. Then I used the wire connection point just by the rotor reference mark and called that wire #1, and ran the wires per the firing order.

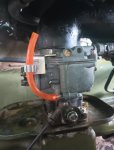
Put the carb on, including my new air filter boot, and charged up the battery and it started pretty easy.

After driving up and down the driveway a few times and trying to tune it by ear , dissy twisting and the air screws on the carb, I finally got smart and put a timing light on it and timed in to 15 degrees BTDC.

Still running like crap, smoking, stumbling, dies easy, sputtering rev.

Next step is get somebody over to rev it while I time it to see if the advance is working. If it is, and I suspect it is because the motor runs terrible even at idle, then I will move on to checking the carb. I know for sure my float bowl level is too low.

I'm getting there! Not fast, but hey at least I have the right truck. Maybe I'll paint it to look like a turtle.

IMG_20240625_182559053.jpg
IMG_20240403_144745963.jpg
 

SuperMochombo

Well-known member
127
338
63
Location
Albany, NY
The Turtle is my Spirit Animal.

I ran through everything again, plus other things. Still have not solved the mystery.

My next move I feel pretty confident about. I have been reading a ton of threads on these trucks, and one thing I noticed is that I do not have a ballast resistor. In the manual you can see it in the picture (figure 46, page 43) the hockey puck, round thing. Can of dip. My truck doesn't have one. I think it should. It's in the 404.1 wiring diagram, number 34.

I have a brand spanking new ballast resistor, flamethrower coil, and Petronix unit so I'm going to add the ballast resistor taking 24 volts (ign keyed) in to the resistor, and out going to the coil. I'll put a meter on everything. As per Scott from Expedition Imports I should be looking for 17 volts or so to the coil with the engine revved. If adding the resistor doesn't fix it, I'll change out the coil and Petronix too.

High hopes!

IMG_20240625_155737209_HDR.jpg
 

SuperMochombo

Well-known member
127
338
63
Location
Albany, NY
If this was a murder mystery, I have eliminated the following possible suspects:
Plugs, plug gapping.
Wires, wire resistance
Fuel pressure, fuel quality.
Distributor advance mechanism
Air/ air filter
Oil, oil filter
Good compression
Head bolts torqued
Valve clearances
Timing alone
Some carb functions

Remaining suspects:
Carb float bowl level
Carb cleaning for the 7th time
Carb something else I can't figure out yet
Spark issues
Head gasket leak
Valve guides
Manifold/thermospiral
vacuum leak


SuperMochombo

Well-known member
127
338
63
Location
Albany, NY
:naner: I got it solved! Starts instantly, idles smooth, revs fine!
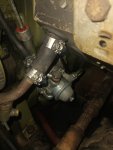
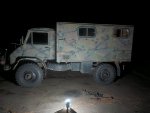
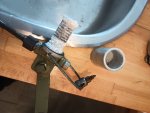
It was the carb. I took it apart AGAIN to find mangled o rings. Cleaned it again, went to Ace hardware and bought new orings. You need 4 of them, two for the injection pipe jets and two for the idle jets. All four of those jets have cylindrical aluminum housing, and the o ring fits tight against the walls as you screw them in. The walls are so rough from oxidation pitting that as the jet screws in it was rubbing the rubber o rings to shreds. I took a drill bit and cleaned up in inside of the cylinders, then greased the o rings and took extra care when seating them.

Popped it back in the truck, and PRESTO! Starts instantly, runs smooth as glass. I drove around a bunch, and it revs fast and clean, and returns to smooth idle like it should!

OH MY LORD I AM SO GRATEFUL!!!!!!

Thanks to all those on the forum who helped. I couldn't have done it without you.

Watch out! I made an appointment for an inspection, so I have a deadline. Now that the motor is running properly I can move on to brakes, lights, etc. I have also cleaned out the fuel tanks and they are in good shape so that's tomorrow's project: fuel pump rebuild and salvage what I can of the existing fuel lines.

Time for a some new threads. Holy moly I'm ready to move on.
 

BELinNC

Member
72
91
18
Location
White Oak, NC
Congrats on your progress! Way to work through the issues and possible culprits. I have the chance to buy a non running 404 locally if I can work out a decent price. Maybe your experiences will come in handy! Have fun with your running Mog.
 

SuperMochombo

Well-known member
127
338
63
Location
Albany, NY
More progress! I rebuilt the fuel delivery system. I got a pump rebuild kit, cleaned out the tanks and got a new filter. Tested and working perfectly, leak free. I didn't plumb the tanks together like many people do, because it's more work and the original setup works fine. I don't mind having to switch tanks.

I pulled out the 12 volt fuel system and boat tank, which were in the way of mounting the spare tire. I mounted the spare tire (not perfectly), and even painted the battery box and tool chest.

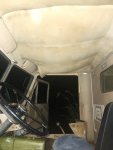
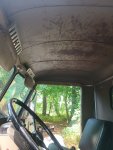
I also pulled out the old headliner which was sagging and full of mouse house, and scrubbed the engine and coolant res jackets with Dawn.

I checked the diffs and portals, and hit 8 grease points. I painted the front bumper and winch and started to work on the Jerry cans. I wire brushed and painted the Jerry can rack.

IMG_20240706_203214244.jpg
IMG_20240706_231047464.jpg

Next up is finding the remaining 16 grease points (how many e's???) and then brakes.

I'm working towards inspection in NY, so I need turn signals, brake lights, windshield wipers, seat belts and a horn.
 

SuperMochombo

Well-known member
127
338
63
Location
Albany, NY
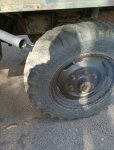
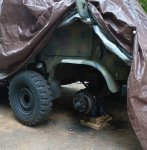
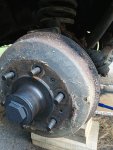
I did the front brakes today. Even with the heat and the filth. This has to be the dirtiest truck I have ever seen. Someone drove it through deep mud and never cleaned it off, but 20 years ago. Everything is encased in a crust of sandy mud seasoned with oil and grease.

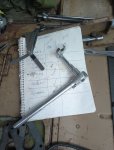
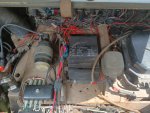
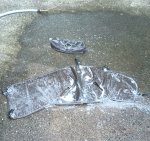
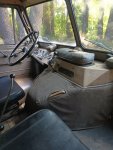
There are two brake lines that run along the front axle from a junction at the differential out to each wheel and I replaced them both, and rebuilt the wheel cylinders which were completely frozen. Greased it all back together and now I have working brakes!
Tomorrow I'm hoping to finish the rear brakes, and remove the hydro boost and get everything bled. SO far it seems like the master cylinder is working, so I'm hoping I won't have to rebuild or replace that.

IMG_20240709_194200888.jpgIMG_20240708_175800608.jpgIMG_20240709_194211620.jpgIMG_20240709_170255758.jpg
 
Top
AdBlock Detected

We get it, advertisements are annoying!

Sure, ad-blocking software does a great job at blocking ads, but it also blocks useful features of our website like our supporting vendors. Their ads help keep Steel Soldiers going. Please consider disabling your ad blockers for the site. Thanks!

I've Disabled AdBlock
No Thanks