• Steel Soldiers now has a few new forums, read more about it at: New Munitions Forums!

  • Microsoft MSN, Live, Hotmail, Outlook email users may not be receiving emails. We are working to resolve this issue. Please add support@steelsoldiers.com to your trusted contacts.

803 Bogs Down and dies at 85% Load

USAMilRet

Member
390
15
18
Location
Tampa, Florida
In my opinion you got reamed. Throwing an engine together with no gaskets, a clogged air filter, and gobs of RTV is a far cry from being a competent rebuild. If you are happy with it then great but I would feel cheated.

FYI, be mindful that those gobs of RTV can get into oil and water passages and ruin an otherwise okay engine.
OK, there seems to be a misunderstanding here. The generator and motor were not fully housed or put together when we came to the end result of the deal that I would get the refund. After that, it was just assembled as fast as it could be to get it on the road. Yes, they cheated on the gasket set and the use of the RTV and the missing gaskets. But otherwise than that, I was fully aware of the condition that the genset was in (of course I was expecting a clean gasket set and gaskets everywhere) and that it was not functioning the way it was supposed to be functioning.
I do not know what the original rebuild looked like, and it may have been just as bad, or I suspect that it was done rather well. The fuel cutoff solenoid failing, well that just happens. Return fuel line not replaced? Well, when does that ever happen. Leaky front seal...well that happens when you build tear down then build again. Sometimes seals do not get set right the second time. And that small bit of scaring on the seal......who would have ever seen that unless they knew what they were looking for. The undersized bolt in the head was inexcusable though.
Yes I am disappointed and frustrated the way the engine was put back together without a few of the upper gaskets and one lower gasket and with the use of "globs" of RTV cement. Truthfully, when we made the deal to do the partial refund, the engine may still have been partially apart at that time. He may also of considered it an AS IS sale like Gov Liq or IP or whatever, and considered this the end of it. I did not get that impression though.

I have seen worse...…..much worse...….then the overuse of RTV cement and missing gaskets. I do not think you guys are seeing the trees because of the forest and yes, I do know what RTV and STP and LUCAS and blah blah blah can do to engines.

You have to remember that all this started with IRMA last year and pricing has not subsided. The price I paid at the time is $3K to $4K less then what they were selling for after the VI and PR. So I have to tell you that I was pretty pleased to get the final down to $3500 for this genset.

He never wanted to sell this genset in the condition it was in and I asked him to sell it to me at the discounted price knowing it needed work because it was the one that I knew the most history about and had actually seen the inside of the engine through photos.

Yes Scott and I are going to have a discussion about these things, as we have had discussions about this genset before. I am pretty sure that if I ask for a gasket set because of this, I will get it for free. The rocker arm....that I can not explain and truthfully, we do not even know at this time if the rocker are breakage is a new thing or the cause of the problems.

I am not defending this particular reassembly of this particular genset. That put aside, the original low hour generator with 212 hours on it with the main bearing in it serviced, attached to a low hour original motor that has had all its wearable parts replaced, a new fuel pump, 4 new injectors, a complete valve job including grinding all surfaces and surfacing of the head with replacements of a couple of valves and all the springs, seals, etc..., new main fuel lines, new fuel filter, new oil filter, rings, bearings, seals, piston pins and bushings, new water pump with new hoses, on an engine now with 15 hours on it that a lot of people are pretty sure that the rocker arm replacement will fix all the problems.

To me, this is a extremely low (212) hour generator married to a newly rebuilt (15 hour) engine in a shell where every missing screw and nut was replaced with the proper sized original. Now I know that Scott had a mechanic that he was using to do the engine rebuilds so for me, it is hard to blame the owner for the action of the employee (if the owner is unaware) of the actions. I also know that the head was sent out to a machine shop for servicing. But I will have discussions about his mechanic and how this all looks very bad for his business.

YMMV
 

jamawieb

Well-known member
1,435
557
113
Location
Ripley/TN
How do you figure? I knew the motor worked because it ran before they rebuilt it. I knew the generator worked because it made power before they touched it. They rebuilt the engine and put a bunch of new parts into it. They sent the head out and had the valves reground and the head surfaced, replaced a couple of valves and all the springs. Because they could not figure out a problem does not mean I could not. So I used this to my advantage and got a $1500 refund plus about $500 of other stuff.

So for $3500 and a little elbow grease, I will have a newly rebuilt engine and a newly rebuilt head. A very nice and clean machine that only had 212 original hours on it. Yeah I have put about $500 into it, so we will say $4000, but wait.....the $500 free stuff. Now back to $3500.

So, yes I agree this was a very incompetent rebuild from what appeared to be a legitamate business, but maybe you can explain to me how I got reamed for a basically a 'what everyone really hopes to get genset' in this condition for $3500.?

I just saw a scrap parts MEP803A sell on GL from Jacksonville for $3200 plus taxes and fees, so I make it about $3800 and is all but garanteed NOT to work.
I don't have a dog in this fight but from the start, I think the seller was up front and didn't try to hide anything. He told USAMILRet everything that was wrong and it was USAMilRet decision to buy the unit "as is". USAMILRet knew what he was buying before the transaction ever took place. I would have to agree, for the past year prices have been way above $3500 for a 200 hour unit and that doesn't include shipping.
 

USAMilRet

Member
390
15
18
Location
Tampa, Florida
So now, to get back on subject. I did some more tear down yesterday on the genset and checked as much as I could. Unless I start removing bearing caps, with the exception of the oil pick up tube, this engine is about as far down as it goes. That comes soon as I have to take off at lease one rod bearing cap to get the piston out to examine the rings. If all is OK, that will be the end of the piston ring questions.

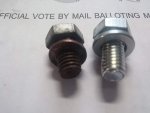
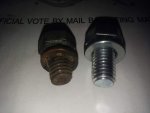
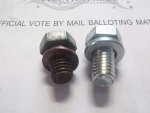
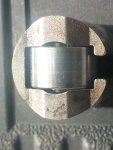
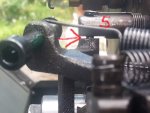
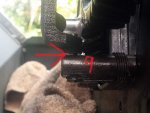
Here are some photos of the undersized bolt next to a proper sized bolt, not the proper length though.


20180803_181153.jpg20180803_181211.jpg20180803_181236.jpg

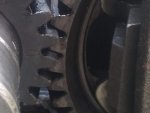
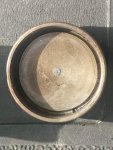
A recheck of the timing marks on the cam shaft and the crank shaft.


20180804_172256.jpg20180804_172308.jpg20180804_172453.jpg20180804_172732.jpg20180804_172733.jpg


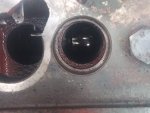
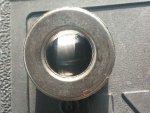
A look at the cam shaft down one of the fuel metering roller lifter holes.


20180804_172801.jpg


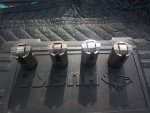
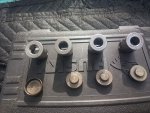
Fuel metering roller lifters and caps.
20180804_173108.jpg20180804_173139.jpg20180804_173147.jpg20180804_173156.jpg20180804_173204.jpg20180804_173211.jpg


All lifters and fuel metering roller lifters operate freely (snugly) in their holes.

A visual and "feel" inspection of the cam shaft indicated no abnormal felt wear.
 

USAMilRet

Member
390
15
18
Location
Tampa, Florida
Governor Adjustment and Shim Count

I am looking at the fuel rack and the adjustment needed to be made to it. According to the TM, this is the process:

3-23.5. Adjustment.

a. Adjust governor lever (6, FIGURE 3-19) assembly end play as follows:

(1) Move lever assembly (6) until it abuts against top pivot support (9). Check that it falls freely under its own
weight.
(2) Check governor lever (6) assembly end play. Add or remove 0.0098 in. (0.25 mm) shims (11), at top
pivot support (9) to obtain an end play of 0.0039 to 0.0118 in. (0.1 to 0.33 mm).

NOTE

Adjustments in steps b thru d must be done with gear end cover installed.

b. Adjust control lever (25) setting as follows:
(1) Turn control lever (25) counterclockwise into stop position.
(2) Adjust upper cap screw (17) until it just touches curved part of lever (25) and lock it in this position with nut
(16).

etc etc etc


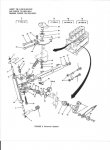
Here is the picture of the governor assembly for the sequence above:

Govoner.jpg


I am having problems with the instructions.

Number 1 is no problem. It falls under its own weight.

Number 2 is what I am having problems with. The end play that they are talking about, is that the upward and downward movement of the rack 6 between the pivot pins 5 and 9? Is so, where do you get the shim 11 to place in this spot to get the end play down to where it belongs? I have searched all day for the shim using the numbers provided in the TM and can not find them.

Here is the area on my governor control that we are speaking about:

20180804_172858.jpg20180804_172921.jpg

Note: Got the pivot pin numbers mixed up. Number 9 is at top and 5 at the bottom.


Next is the fuel rack: Where do I get the fuel rack adjustment tool to adjust the fuel rack? I can not find one anywhere. I would make one but I do not have the dimensions or even some good pictures of one to copy.

I know that a lot of you have torn down these engines and removed the metering pumps and have had to adjust the fuel rack. How do you make that adjustment if you can't find the tool?

Thanks


I also want to thank everyone who has participated in this thread. It has been a pleasure to get to know some of you.


Here is the genset auction that I was talking about earlier. Sure would be nice if all it needed was a oil filler cap and some batteries to run.


View attachment auction.bmp

Did you see how clean this thing was? It looks like it has never seen the outdoors and the paint on the engine is pristine. This was the auction.... http://www.govliquidation.com/auction/view?auctionId=13103744
 
Last edited:

justacitizen

Active member
408
40
28
Location
oklahoma
looks like you are on the way to a great engine. i would urge you to have the head and valve stems measured. it is obvious that a valve kissed a piston and there isn't anything to explain why.
 

Daybreak

2 Star Admiral
Steel Soldiers Supporter
1,522
771
113
Location
Va
Howdy,
I do not have a dog in this fight either.

You got reamed.

You would have been better off not knowing anything was done with the engine and doing it all correctly yourself. You would have been better off with a non runner and working it over. It is a sad state of affairs when you accept known problems from someone which said they rebuilt the engine. With the issues you have uncovered so far. IMHO I would rip the engine down and hot tank it, and start correctly from scratch.

Good luck.
 

USAMilRet

Member
390
15
18
Location
Tampa, Florida
Everyone is entitled to their opinions. But as the saying goes......that includes mine as well.

Yes I wish I would have gotten a brand new MEP803A with 1 known hour on it that ran flawlessly without any maitenance needed on fairy dust and produced 5000000 MW of cold generated power for $3500. Well, maybe 2 or 3 years ago this was possible, but like all other supply & demand tactics, no matter what the price was 2 years ago, it ain't gonna buy diddly squat today.

I am retired, waiting on my wife to retire, so I have the time, tools, basic knowledge, and appreciate a challange. And you know what? I prefer a machine that needed a little work better than a machine that was working fine with 3000 hours on it that as soon as I needed it, it would throw a rod or drop a valve the first time under load and then where would I be?

OK, I accept that some of you think I got reamed. What is important is that for what I got, I do not feel that way. So enough on that topic.

What about the governor adjustment and the shims? Is this the areas that a) the TM is talking about, b) where the shim would go.

Also, c) where to get the shim PAFZZ 44940 186-6143, and d) what to use or how to adjust the fuel rack without the special tool.

Thanks.
 

USAMilRet

Member
390
15
18
Location
Tampa, Florida
looks like you are on the way to a great engine. i would urge you to have the head and valve stems measured. it is obvious that a valve kissed a piston and there isn't anything to explain why.
I agree. Valve stem is fine. The valve in question was measured and it is in spec. BTW, this is the piston I am pulling today to check the rings. Can't measure the head as there are no specs on it as far as total thickness is concerned. The thickness of this head is 2.770in thick. I have to do the piston solder test to get the final clerance between piston crown and the valve recessed chamber. That won't happen until I start putting it back together. But I can tell you that there is sufficient clearance between the piston crown and the valves, so the valve had to be over extended to kiss the crown.


From what I have seen so far, aside from the rocker arm failing, I can find no cause as to why the valve kissed the top of the piston. Everything points to the broken rocker arm as the culprit.
 

USAMilRet

Member
390
15
18
Location
Tampa, Florida
More parts today. Got the R12T Fuel Filter/Water Separator that I am going to use in series for fuel polishing for my three 55Gal drums of diesel fuel. I plan on plumbing two of the tanks together while keeping the third semi isolated as my "working" tank. Any incoming fuel will be placed into the working tank and go through the polisher which will consist of an
inline crappy disposable 10 cent filter, the
R12T on the suction side of the fuel pump, the inline 12V Onan fuel pump, and finally the Donaldson Fuel/water (with valve) filter. So I am going to feed all new outside fuel into the "working" tank. From there, it will be processed through the polishing system then stored in the two 55 gal drums which will be kept full all the time. There will be fuel remaining in the third tank as well but it will not be full all the time. Once the two 55 gal "supply" tanks are filled, the polisher will be switched over to a second circuit that will circulate and polish the "supply" tanks. I can put the algicide in the working tank and the fuel lube into the secondary circuit to feed the "supply" tanks. polishing can take place on the "supply" tanks every month during the monthly genset load test, or can be placed on a shorter schedule.

Also got my replacement push rod. Would like to know why a GPP 6 2006 rod came out of a 99 machine and my rods are labeled GPP 6 96. Either the numbers have nothing to do with the year of manufacture or something is fishy here.....

Got the replacement Oil Relief Valve.

Got my new plastic wing nut for the air filter. The other one had to be cut off because it was there since 2009 and never moved. I found a replacement on line for $7 so figured I's give it a shot.

And finally today, I got my 186-6157 shim kits that I ordered. I got two kits cause I figured that I would need a bunch of shims as it seem that each of the metering pumps have about 5 black shims. So I was expecting a handful of shims in these packages. Boy what I fool I was. I should have known that Onan packages for a single unit only. Well, each one of these $16.00 shim kits come with only 3 shims in them. One black, one green, and one white. So to replace the 20 black shims on my fuel metering pumps is going to cost $320 unless I can find a bulk shim pack that goes with these metering units. Nope.....time to start cutting pieces of paper

Well, off to remove the piston. More pics to come.
 

jamawieb

Well-known member
1,435
557
113
Location
Ripley/TN
More parts today. Got the R12T Fuel Filter/Water Separator that I am going to use in series for fuel polishing for my three 55Gal drums of diesel fuel. I plan on plumbing two of the tanks together while keeping the third semi isolated as my "working" tank. Any incoming fuel will be placed into the working tank and go through the polisher which will consist of an
inline crappy disposable 10 cent filter, the
R12T on the suction side of the fuel pump, the inline 12V Onan fuel pump, and finally the Donaldson Fuel/water (with valve) filter. So I am going to feed all new outside fuel into the "working" tank. From there, it will be processed through the polishing system then stored in the two 55 gal drums which will be kept full all the time. There will be fuel remaining in the third tank as well but it will not be full all the time. Once the two 55 gal "supply" tanks are filled, the polisher will be switched over to a second circuit that will circulate and polish the "supply" tanks. I can put the algicide in the working tank and the fuel lube into the secondary circuit to feed the "supply" tanks. polishing can take place on the "supply" tanks every month during the monthly genset load test, or can be placed on a shorter schedule.

Also got my replacement push rod. Would like to know why a GPP 6 2006 rod came out of a 99 machine and my rods are labeled GPP 6 96. Either the numbers have nothing to do with the year of manufacture or something is fishy here.....

Got the replacement Oil Relief Valve.

Got my new plastic wing nut for the air filter. The other one had to be cut off because it was there since 2009 and never moved. I found a replacement on line for $7 so figured I's give it a shot.

And finally today, I got my 186-6157 shim kits that I ordered. I got two kits cause I figured that I would need a bunch of shims as it seem that each of the metering pumps have about 5 black shims. So I was expecting a handful of shims in these packages. Boy what I fool I was. I should have known that Onan packages for a single unit only. Well, each one of these $16.00 shim kits come with only 3 shims in them. One black, one green, and one white. So to replace the 20 black shims on my fuel metering pumps is going to cost $320 unless I can find a bulk shim pack that goes with these metering units. Nope.....time to start cutting pieces of paper

Well, off to remove the piston. More pics to come.
Every engine I've worked on had the pushrods stamped with the year the engine was manufactured. I could always tell someone had been into an engine before me if the pushrod had different dates on them. But if they all have the same date, I wouldn't be worried, just if they all had different ones.
Also I wouldn't remove the shims under the metering pumps. It's a pain to get those readjusted if those are ever mismatched.
 

98G

Former SSG
Steel Soldiers Supporter
6,089
4,493
113
Location
AZ/KS/MO/OK/NM/NE, varies by the day...
From what I have seen so far, aside from the rocker arm failing, I can find no cause as to why the valve kissed the top of the piston. Everything points to the broken rocker arm as the culprit.[/QUOTE]

I'm thinking that the pushrod/piston/valve is the effect of something as yet undiagnosed, and not the underlying primary cause of the badness.

I readily admit I have no idea what, other than "not that".

I watch and learn.
 

m32825

Active member
224
171
43
Location
Central Florida
Could the pushrod have started to bind, causing the valve to kiss the piston, and causing the rocker arm to have to push "harder" until it hit the point where the rocker arm broke? Could raising the oil pressure have had anything to do with it?
 

Guyfang

Moderator
Staff member
Moderator
16,924
24,545
113
Location
Burgkunstadt, Germany
If you really feel I got reamed......nothing I can do about it except disagree.

Your replies in this thread are not at all what or how you post in other threads. They have not been of much help and I had been hoping to tap your knowlledge. Are you aware of something I an not about the seller of this unit or his business? I did have his info out for a day before I removed it but it is not hard to figure out where it came from.


Ok partner, perhaps its my turn to explain.

First off let me say, I do believe your going to get this sucker whipped. But from the start, I have felt you might have thought of the golden rules.
1. If it sounds too good to be true, it normally is.
2. Gut und Günstig, wohnen nicht unter die gleiche dach. Translates to: Quality and price worthiness, don't live under the same roof.

Both of these statements are meant to say, If a company that is supposed to be able to fix this thing cant do it well enough to sell you a gen set that is good to go, perhaps the alarm bells should have gone off in your head. You wanted to get a good deal, I see that. But if the "professionals" cant get it, or better said, don't want to spend the time and money to fix it right, somethings real wrong.

And your right, I haven't been as helpful at time as I might have been. One of the reasons is because you have some of the smartest guys I know helping you on this thing. Way smarter then I can ever hope to be. And they are doing great work. So I held back a bit. And will admit I was ready to stop altogether reading this thread. Many reasons, and we don't need to get into them here. Normally, when I wish someone well in their endeavor to fix something, I never come back. But someone in this thread wrote and told me to pull my head out and try and help. He said, (and I agree) that you got pulled across the table. So we need to try and get this thing back on track. So I sat down and read the whole thing, from start to last post, 3 times. The reason was that the thread is so long, and so convoluted, that no one can make heads or tails anymore. That's why I wrote the post #151. A round up. You needed to get folks back into the whole picture. Some of your problems are so far back in the thread, its just hard to remember. Have you ever read it all from start to end? I have, (again) just before I started this. You need to get this published.

And that's why I wrote that you have been reamed, and you should share the news about who did this to you. And he is not alone. Someone was supposed to do the top end, and that was not a roaring success. So maybe we can keep someone else from having the same problem. You have got to admit, (and you have about a million time, post # 198, or 277 are fine examples) that its been a crappy "rebuild". You don't want to use this firms name. Ok, fine. But I would at least use the thread to shame him into giving you some more help and or parts. At this point, I could not sleep well at night If I had this gen set, without a completed engine overhaul. I would be dreaming about what else is not done right, or to specs. It would drive me mad.

Had this been something simple, indeed, you would have been in fat city! But its not been easy. The parts you need, or may need are not going to break the bank in Monaco. But don't ever make the mistake of figuring out how many hours you put into this baby. A good hourly wage would cripple you.

No I don't know who did this "rebuild". No I don't know anything about it. And for me, its immaterial. I don't even own one. Just did a bit of work on them. I just don't want it to happen to someone else. And it could be a case of, "Crap happens". But if so, its sorry. I do not want this to become a dog fight. If your offend, sorry. I haven't a bone to pick with you. Its not personal. So keep up the good work. Don't get down. You will get it. But don't trust anything about this set until you check it!
 

Guyfang

Moderator
Staff member
Moderator
16,924
24,545
113
Location
Burgkunstadt, Germany
Everyone is entitled to their opinions. But as the saying goes......that includes mine as well.

Yes I wish I would have gotten a brand new MEP803A with 1 known hour on it that ran flawlessly without any maitenance needed on fairy dust and produced 5000000 MW of cold generated power for $3500. Well, maybe 2 or 3 years ago this was possible, but like all other supply & demand tactics, no matter what the price was 2 years ago, it ain't gonna buy diddly squat today.

I am retired, waiting on my wife to retire, so I have the time, tools, basic knowledge, and appreciate a challange. And you know what? I prefer a machine that needed a little work better than a machine that was working fine with 3000 hours on it that as soon as I needed it, it would throw a rod or drop a valve the first time under load and then where would I be?

OK, I accept that some of you think I got reamed. What is important is that for what I got, I do not feel that way. So enough on that topic.

What about the governor adjustment and the shims? Is this the areas that a) the TM is talking about, b) where the shim would go.

Also, c) where to get the shim PAFZZ 44940 186-6143, and d) what to use or how to adjust the fuel rack without the special tool.

Thanks.
PAFZZ means:

PA=Stocked items; use the applicable NSN to request/requisition items with these source codes. They authorized to the category indicated by the code
entered in the 3rd position of the SMR code.

F: Direct support or aviation intermediate level can remove, replace, and use the item.

Z: Nonrepairable. No repair is authorized.

Z: Non repairable item. When unserviceable, condemn and dispose of the item at the level of
maintenance shown in 3rd position of SMR Code.

In short, the item has a NSN, it is to be ordered by NSN, It can only be used by Direct Support or higher shops, its a non repairable item, and can be disposed by Direct Support or higher shops.

44940: is the FSCM code. The Federal Supply Code for Manufacturer, (or distributor, NOT always the same!!) 44940: Cummins Power Generation.

186-6146: Military Part number, (not always the same as the manufacturer) Crosses over to NSN: 5365-01-360-2911
Cost: $5.74

Sadly, there is no tech data on the shim, or you could buy an off the shelf, generic shim. But I did find several listings when I plugged in the NSN into my browser. So try doing that, there should be several other references.
 

Guyfang

Moderator
Staff member
Moderator
16,924
24,545
113
Location
Burgkunstadt, Germany
I am looking at the fuel rack and the adjustment needed to be made to it. According to the TM, this is the process:

3-23.5. Adjustment.

a. Adjust governor lever (6, FIGURE 3-19) assembly end play as follows:

(1) Move lever assembly (6) until it abuts against top pivot support (9). Check that it falls freely under its own
weight.
(2) Check governor lever (6) assembly end play. Add or remove 0.0098 in. (0.25 mm) shims (11), at top
pivot support (9) to obtain an end play of 0.0039 to 0.0118 in. (0.1 to 0.33 mm).

NOTE

Adjustments in steps b thru d must be done with gear end cover installed.

b. Adjust control lever (25) setting as follows:
(1) Turn control lever (25) counterclockwise into stop position.
(2) Adjust upper cap screw (17) until it just touches curved part of lever (25) and lock it in this position with nut
(16).

etc etc etc


Here is the picture of the governor assembly for the sequence above:

View attachment 737005


I am having problems with the instructions.

Number 1 is no problem. It falls under its own weight.

Number 2 is what I am having problems with. The end play that they are talking about, is that the upward and downward movement of the rack 6 between the pivot pins 5 and 9? Is so, where do you get the shim 11 to place in this spot to get the end play down to where it belongs? I have searched all day for the shim using the numbers provided in the TM and can not find them.

Here is the area on my governor control that we are speaking about:

View attachment 737010View attachment 737011

Note: Got the pivot pin numbers mixed up. Number 9 is at top and 5 at the bottom.


Next is the fuel rack: Where do I get the fuel rack adjustment tool to adjust the fuel rack? I can not find one anywhere. I would make one but I do not have the dimensions or even some good pictures of one to copy.

I know that a lot of you have torn down these engines and removed the metering pumps and have had to adjust the fuel rack. How do you make that adjustment if you can't find the tool?

Thanks


I also want to thank everyone who has participated in this thread. It has been a pleasure to get to know some of you.


Here is the genset auction that I was talking about earlier. Sure would be nice if all it needed was a oil filler cap and some batteries to run.


View attachment 737012

Did you see how clean this thing was? It looks like it has never seen the outdoors and the paint on the engine is pristine. This was the auction.... http://www.govliquidation.com/auction/view?auctionId=13103744

Do you have a copy of the Lister Petter parts manuals and work shop manuals?

I am still trying to get a diagram of the tool. My contact is moving right now. Hope he will be up online soon.
 

justacitizen

Active member
408
40
28
Location
oklahoma
i want to see the vid when this thing is fixed and it is powering at 100+ percent. i am a little skeered that it might bend another push rod though. if you go back into the original thread not this one there is enough info to establish the name and business of the seller. i am not sure and am kinda on the fence to whether the op got jimmied on the deal though. the seller as far as i could tell didn't sell a rebuilt unit but rather a unit he tried to fix and gave up on. as far as quality Mehh i would rather fix it myself or just buy one that hasn't been fixed. anyway at least the set isn't a complete POS and will probably give many years of excellent service and i learned some stuff about the petter that i wouldn't have known if it weren't for the OP's generosity to share his experience.
 
Last edited:

USAMilRet

Member
390
15
18
Location
Tampa, Florida
Every engine I've worked on had the pushrods stamped with the year the engine was manufactured. I could always tell someone had been into an engine before me if the pushrod had different dates on them. But if they all have the same date, I wouldn't be worried, just if they all had different ones.
Also I wouldn't remove the shims under the metering pumps. It's a pain to get those readjusted if those are ever mismatched.
The metering shims are all tagged and with their respective pumps. Looks like they all have 5 black shims under them. I also know to not screw with the shim between the metering pump and the flange. That one is there by the factory according to the LP LPW master manual.
 

USAMilRet

Member
390
15
18
Location
Tampa, Florida
i want to see the vid when this thing is fixed and it is powering at 100+ percent. i am a little skeered that it might bend another push rod though. if you go back into the original thread not this one there is enough info to establish the name and business of the seller. i am not sure and am kinda on the fence to whether the op got jimmied on the deal though. the seller as far as i could tell didn't sell a rebuilt unit but rather a unit he tried to fix and gave up on. as far as quality Mehh i would rather fix it myself or just buy one that hasn't been fixed. anyway at least the set isn't a complete POS and will probably give many years of excellent service and i learned some stuff about the petter that i wouldn't have known if it weren't for the OP's generosity to share his experience.
Could not agree with you more. And yes, there will be a vid on the re-start. It's just too bad that the valve covers are not see through. Sure would make working on these things a bit easier.

Thanks for your kind words. Yes I could have kept it to myself but I have always believed that information is power and if you have the information to tear into these things, you can use your powers to do it. I know a lot of people that are almost terrified to take machinery apart because it's so complicated, or there is a gazillion pieces, or some other stuff. If someone sees in pictures what it is all about, it takes the majority of their fears away concerning these things.
 

USAMilRet

Member
390
15
18
Location
Tampa, Florida
From what I have seen so far, aside from the rocker arm failing, I can find no cause as to why the valve kissed the top of the piston. Everything points to the broken rocker arm as the culprit.
I'm thinking that the pushrod/piston/valve is the effect of something as yet undiagnosed, and not the underlying primary cause of the badness.

I readily admit I have no idea what, other than "not that".

I watch and learn.[/QUOTE]

You may be right. I just decided a little bit ago that I was going to pull the pistons. The rings in cylinder 2 are not where they are supposed to be. I suspect the remainder are the same.

Now as to the original reason the rocker arm broke, it goes one of two ways. Either something caused the rocker arm to over extend and cause the valve to kiss the piston (still undiagnosed), or the rocker arm failed due to metal fatigue (as happens) and during the break down process, allowed the valve to be over extended causing it to kiss to the piston.

I am leaning towards the latter because I have found no evidence that there is anything that caused the former.
 

USAMilRet

Member
390
15
18
Location
Tampa, Florida
Could the pushrod have started to bind, causing the valve to kiss the piston, and causing the rocker arm to have to push "harder" until it hit the point where the rocker arm broke? Could raising the oil pressure have had anything to do with it?
I usually do not eliminate anything but I do not think that the oil pressure had anything to do with it. The max oil pressure after the tinkering was 55 psi cold and that is well within the limits of the machine. So I think that this is unlikely.

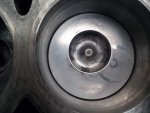
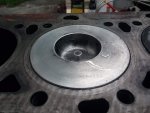
On the binding part, yeah I can see at some time during the failure that there could have been some binding going on for a bit. I do not think that this thing snapped apart. I think that it began to fail slowly and eventually failed completely breaking apart but while breaking apart there could have been many cycles passed between the initial failure and total failure. At some point in one or two or those cycles is when them parts kissed. The photo shows just one kiss IMHO and that is what finally broke the rocker arm in two. I did break right across the top of the push rod.

20180802_191803.jpg20180802_193244.jpg
 
Top
AdBlock Detected

We get it, advertisements are annoying!

Sure, ad-blocking software does a great job at blocking ads, but it also blocks useful features of our website like our supporting vendors. Their ads help keep Steel Soldiers going. Please consider disabling your ad blockers for the site. Thanks!

I've Disabled AdBlock
No Thanks