• Steel Soldiers now has a few new forums, read more about it at: New Munitions Forums!

  • Microsoft MSN, Live, Hotmail, Outlook email users may not be receiving emails. We are working to resolve this issue. Please add support@steelsoldiers.com to your trusted contacts.


84 m1009 cucv chevy blazer build-up

2INSANE

Well-known member
722
819
93
Location
Belgrade, Montana
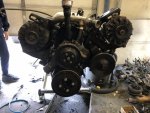
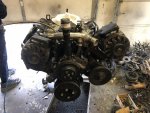
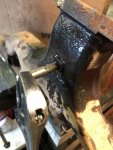
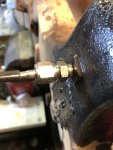
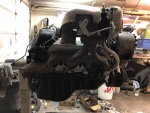
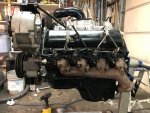
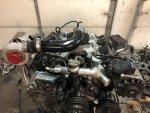
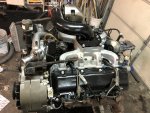
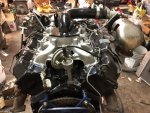
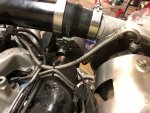
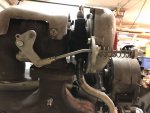
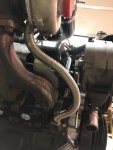
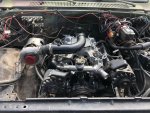
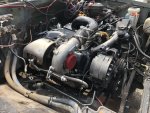
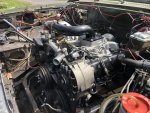
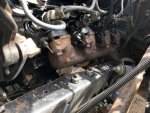
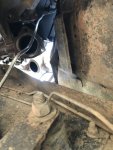
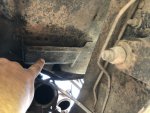
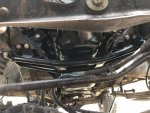
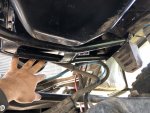
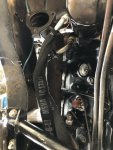
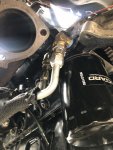
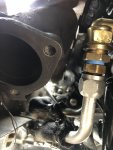
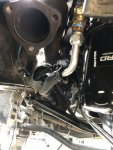
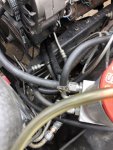
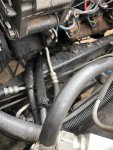
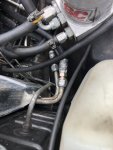
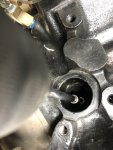
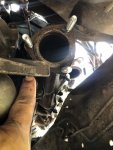
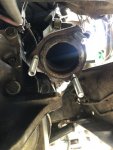
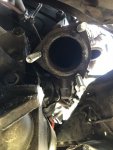
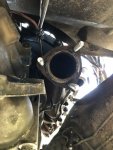
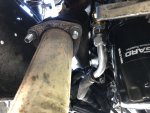
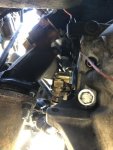
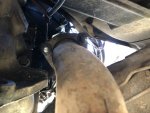
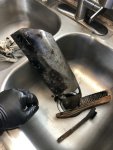
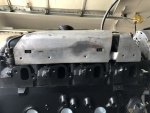
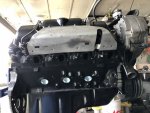
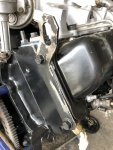
Next up, the 6.5 exhaust manifold heat shield. I cleaned this one up in my kitchen sink and installed it. I had to move around the rubber return injector lines to make sure they did not touch the heat shield.

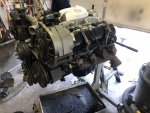
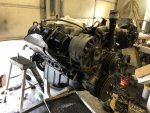
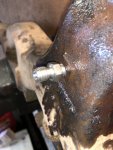
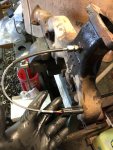
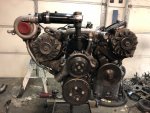
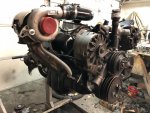
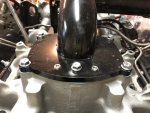
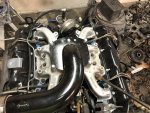
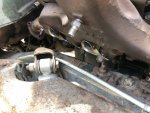
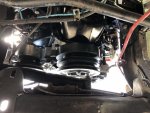
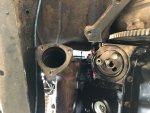
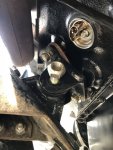
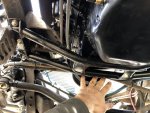
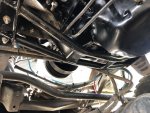
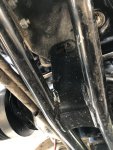
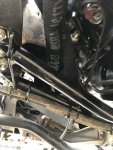
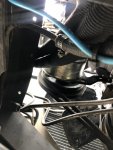
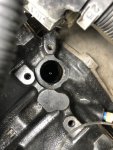
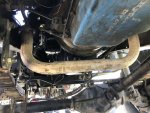
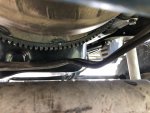
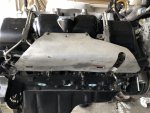
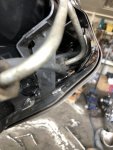
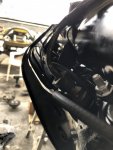
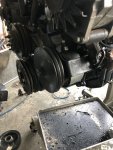
I also got the rear motor puller bracket installed and the power steering pump temporarily so I can mock up the belts.
 

Attachments

2INSANE

Well-known member
722
819
93
Location
Belgrade, Montana
Here is where I left it at for today.

The rest of the night was spent running back and forth to the parts store to figure out the best fitting belt sizes to compliment the Dampened V-Belt Crank Pulley since it is not the same size as OEM. Here are the 3 best fitting V-Belt part numbers that work well with the rare Dampened V-Belt Crank Pulley. I had to order them.

Gates #
7565
7480
7465

Tomorrow I am hoping to install the passenger side exhaust manifold, turbo, oil drain tube and upper plenum.
 

Attachments

Last edited:

Sharecropper

Well-known member
Steel Soldiers Supporter
1,814
942
113
Location
Paris KY
Have you considered adding 2 more lifting brackets so you can lift the engine via 4 points instead of 2? That’s what I did with my P400. If a bracket or chain were to break during engine installation with only 2 brackets, the additional stress on the remaining bracket and chain would probably cause it to fail also, which means your nice engine would hit planet earth and undoubtedly cause serious damage.
 

2INSANE

Well-known member
722
819
93
Location
Belgrade, Montana
Have you considered adding 2 more lifting brackets so you can lift the engine via 4 points instead of 2? That’s what I did with my P400. If a bracket or chain were to break during engine installation with only 2 brackets, the additional stress on the remaining bracket and chain would probably cause it to fail also, which means your nice engine would hit planet earth and undoubtedly cause serious damage.
That is a great idea! I also noticed that the two brackets always bend when the motor is lifted with one chain doubled up. I was also thinking about getting or making a 3’ bar with loops on it to prevent the brackets from bending and hitting the return line causing pinching.

Well, today I was tired and slept in. I might be buying a Duramax Dually today and spend the 2nd day off cleaning the house.
 

Sharecropper

Well-known member
Steel Soldiers Supporter
1,814
942
113
Location
Paris KY
That is a great idea! I also noticed that the two brackets always bend when the motor is lifted with one chain doubled up. I was also thinking about getting or making a 3’ bar with loops on it to prevent the brackets from bending and hitting the return line causing pinching.

Well, today I was tired and slept in. I might be buying a Duramax Dually today and spend the 2nd day off cleaning the house.

Here you go -

https://real4wd.com/product/14033947/

Also get you an engine leveler to go along with the 4-point lift -

https://www.amazon.com/gp/product/B077ZWHNVN/ref=ppx_yo_dt_b_search_asin_image?ie=UTF8&psc=1
 

Rutjes

Well-known member
Steel Soldiers Supporter
359
272
63
Location
Amersfoort, The Netherlands
There is a company that makes a lifting bracket that mounts to the intake manifold. It's pretty much the base of the high flow plenum but with a hook. I'm pretty sure it was Quadstar, but I can't find it on their site.
 

2INSANE

Well-known member
722
819
93
Location
Belgrade, Montana
Well, when it is time to drop in the motor I’ll figure it out. I have spare lift point brackets I could use to make it a 4 point but it does not solve the bracket bending issue. The 2 point with lifter/leveler is a good idea. The intake hoist bracket is too pricey and I don’t feel comfortable using that since the intake is aluminum which bends easy and could cause boost leaks on the lower end.

I am still debating in my head or not if I should cut the firewall to give more clearance for the down pipe so I can squeeze it between the frame.

Also I read that the 6.5 Oem exhaust manifold bolt ends don’t clear the frame on our square body trucks with Oem motor mounts. It will be interesting to see what clearance I’ll get with my ORD motor mounts. I’ll address this issue when the time comes and get a video of it running once done! 😎

I am in no big rush! And I did buy the Duramax today will be towing the M1009 to Moab in style😄

All I need now is a nice big truck bed camper with A/C
 

Attachments

Last edited:

2INSANE

Well-known member
722
819
93
Location
Belgrade, Montana
I went to O’reillys and picked up another 1/8 npt tap and a 21/64 drill bit. Putting the 21/64 bit on the drill press and slowly drilled the pyrometer port on the passenger exhaust manifold using wd-40 as a lubricant for the bit.

Taping the threads was easy with an adjustable wrench with the manifold on the vice. The goal is to not let the fitting go in too far to restrict exhaust flow.

Test fitting the pyro probe and the took off the probe fitting and added copper anti seize to the threads.

Now that is done I will take the manifold to the machine shop and get it all cleaned up before I install it.
 

Attachments

2INSANE

Well-known member
722
819
93
Location
Belgrade, Montana
Today is a beautiful day! She is all done!

I got the passenger exhaust manifold on.

Installed Quadstar glow plug heat shields.

Had fitment issues with the made in China turbo. The Turbo master would not work with the mold bolt patterns. I cleaned up a Gm1 turbo and installed it. I had to grind the turbo exhaust flange a little to get the Turbo Master to move freely.

Installed a Quadstar Oil Drain Tube.

Installed Quadstar Upper intake plenum.

Installed the vacuum lines and alternator brace.

Installed a Turbo Master.
 

Attachments

Last edited:

2INSANE

Well-known member
722
819
93
Location
Belgrade, Montana
After power washing the motor bay and installing the ORD motor mounts and Oem motor mount spacer keeping the bolts loose, I got the motor in the M1009. I don’t think I can call it an M1009 anymore with all the upgrades it has acquired over the decade. What do you guys think?

Anyhow...

At first I thought I was going to have problems with the 6.5 Passenger Exhaust Manifold bolts hitting the frame which it did until I aligned the motor true with the transmission. The Off Road Design Motor Mounts with the OEM Motor Mount Spacers gave more then enough clearance for the Passenger Exhaust Manifold Bolts to clear the frame. See pictures...

The 6.5 Driver Side Exhaust Manifold exit port kinda sticks out further then the 6.2 Exhaust Manifold which hit the frame as I was installing it. All I had to do was push the motor passenger side to get it to drop past the frame. See pictures...

I did have to remove the battery tray because the turbo would have been sitting on top of it.

Looking ahead on how I plan on running the Down pipe... I think if I notch the frame and take out that heat shield on the firewall and add some heat tape over the Downpipe, I think I will be able to get it between the frame.

Not going to spend my whole day working on hooking it all up. I am just going get the trans bolts, torque converter bolts and motor mount bolts installed with lock tight and spend the rest of my day doing laundry and cleaning the house.
 

Attachments

2INSANE

Well-known member
722
819
93
Location
Belgrade, Montana
Pictures of the Offroaddesign Motor Mounts and the Offroaddesign Motor Crossover Brace. Fits great with the frame and 6.5 Optimizer.
 

Attachments

2INSANE

Well-known member
722
819
93
Location
Belgrade, Montana
The 6.2 and early model 6.5 oil cooler fittings were too small for the Optimizers oil cooler line ports. I went into Ace Hardware to get adaptive fittings to make this work.

My goal is to use the OEM 6.2 oil cooler lines and adapt it to the Optimizer keeping the oil cooler lines as far away from the exhaust manifold and exhaust cross over pipe as much as possible.

I found the best oil cooler line routing for the Oem 6.2 oil cooler lines is threw the ORD Engine Crossover and to prevent chafing of the lines and to help keep it cool I added Kevlar to the lines. Oh and new rubber O-Rings as well.

I did have to bend the lines a tad to get them in the right angles to fit on the fittings.

I tried many alternative locations for the OEM 6.2 oil cooler lines and found this routing is the best with the Kevlar and wire ties of course. And for reference, I have over 4” of space between the Exhaust Manifold and the lines.
 

Attachments

2INSANE

Well-known member
722
819
93
Location
Belgrade, Montana
Flushing the oil cooler and priming the oil was an easy task! Using small extensions with an 8mm socket and with the 6.2 vacuum pump off, I easily primed and flushed with the cordless as instructed from BMI.

To get the 6.5 Exhaust Crossover to mate well with the Optimizer, I had to cut a section of the Th400 Casing off.

This stud kit for the manifolds worked great after double nutting them to get them tight on the manifolds. It comes with 6 studs and nuts. No springs.
 

Attachments

Last edited:

2INSANE

Well-known member
722
819
93
Location
Belgrade, Montana
After cutting, installing new Exhaust Manifold Studs and installing a 6.5 OEM exhaust crossover, it fits very nicely. There is about 3” of space between the driveshaft and Crossover. I will have to get the Crossover shortened after I do the first test run on the Optimizer. FYI I have about 5 1/2” of lift.

I noticed that I will have to relocate the Th400 transmission cooler lines after I get the Exhaust Crossover shortened. My future goal is to do an upgraded Transmission Cooler deleting the 6.2 Oem one in the radiator because it tends to overheat when on long uphill runs.
 

Attachments

2INSANE

Well-known member
722
819
93
Location
Belgrade, Montana
I hooked up the batteries and cranked it a few times and she fired right up!

Now that I know the motor is good, I will take the passenger fender and wheel well off and have it towed to an exhaust shop to get the Down pipe and exhaust done.

I will get you pictures and videos once the exhaust is done.
 

2INSANE

Well-known member
722
819
93
Location
Belgrade, Montana
I would like to add if you plan on using OEM 6.5 oil cooler lines, these fittings will work for the Optimizer. Thanks to a SS member for sharing this knowledge because I had thought about using a 6.5 oil cooler but decided to try out the 6.2 cooler and see where my temps are at with the new oil temperature sensor location on the pan. If the temps seem too high, I will upgrade to the 6.5 oil cooler on the front of the radiator.
 

Attachments

2INSANE

Well-known member
722
819
93
Location
Belgrade, Montana
Things left to do...

Temporarily adapt a 6.5 air box until I get one custom made for the snorkel.

Exhaust

Built 700r4 trans

Install Pyro and Boost gauges

Tidy up the motor bay electrical

Oil Change after 300 break in miles

Check and Fill all low fluids

Replace rusted rocker panels

New soft top. It will be my 4th one since trees, tree branches and hard winters tend to break the windows

Touch up paint

40” tires with bead lock rims

Updated radio

Replace cobra 40 watt CB radio with 80 watt Connex CB radio

Spare driveshafts. More specifically the front driveshaft because it is the weak link that breaks often

Custom easy detachable anti sway bars front and rear for street driving

Wheel it break it and fix it again!
 
Top
AdBlock Detected

We get it, advertisements are annoying!

Sure, ad-blocking software does a great job at blocking ads, but it also blocks useful features of our website like our supporting vendors. Their ads help keep Steel Soldiers going. Please consider disabling your ad blockers for the site. Thanks!

I've Disabled AdBlock
No Thanks