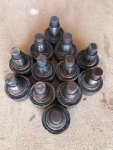
UPDATE: All 12 torque rod bushings have been successfully replaced and installed in THOR. This task has been (for me at least) the single most challenging so far. The fabrication & acquisition of various tools (some successful, others not so much) and physicality needed at times tested my capabilities. I now have a new standard for what a REAL BFH means. For those who can accomplish this feat in a weekend - I promise a 12-pack of your favorite beer when our paths cross - You Rock! And THANK YOU to the SS Forums and Contributors from which I gained a wealth of knowledge and useful (critical) insights on how to safely accomplish this task.
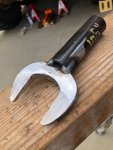
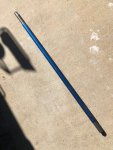
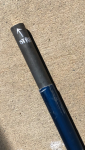
After struggling with the upper torque rod center bushings I fabricated a 30lb "slide hammer" from 1.5" Hot Rolled steel bar and an aluminum sleeve with a 1.5" I.D. (pictures attached). 5 feet of 1.5" steel bar weighs a bit over 30lbs, cut the outer aluminum sleeve to about 4' ... 3-4 solid whacks with the slide hammer on the bushing threaded end (with the castle nut partially backed out) and mission accomplished. I just couldn't single handedly get enough momentum and accuracy with a 6lb sledge striking a 3' drift bar. The slide hammer provided the stability, accuracy and most importantly - shear impact force required to pound the bushing rod ends free from the suspension mount (without removing the spring u-bolts and cap : which was "Plan-B")
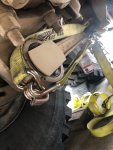
I also used a 2" ratchet strap to facilitate alignment of the torque ams back into the suspension mounts. New vulcanized rubber bushings are stiff - I used a ratchet strap to pull one end of the new bushing inward to compensate for the acute angle of the torque rod during installation (pic attached). I also used a tie-strap to help pull the torque rod ends into alignment with the suspension mounts. Insert one end of the torque rod into one suspension mount and secure with a castle nut (only a couple threads just to keep it in place) - then use the second ratchet strap to pull the other end out, and then into alignment with the second suspension mount taper. Well, that's what worked for me ...
Road Test: I put 60 hwy miles on the truck this afternoon: Truck feels much more stable at 55mph. The rear wheel bounce I was experiencing at hwy speeds is now gone (I'm running 16.00R-20's). Now its time for new front shocks... going to try the Monroe 65116's mentioned in another thread...(thank you Wes)


")


