A little bit of incite on this.
Short story is, I managed to break my at the time brand new standard windshield. I met a local guy that by chance happened to have 3 Ibis Tek windshields taking up room in his garage. They were fogged fairly bad...un drivable. Me being me, $200 and they were in my truck.
I spent a lot of time searching to see what I could do with them. Didn't have any luck, so here's what I did. I will say, take your time, don't rush.
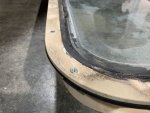
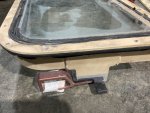
These windows are multiple layers of glass with film in between each layer of glass, There are 2 layers of lexan with film on the inside. Be mindful of the heating elements , they are on the outer most 2 layers of glass but the wires extend to the interior on the side.
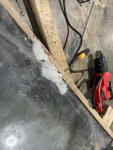
tools:
oscillating tool ( a better one that has a good cut...Fien, Bosch ect...) Use only a steel tooth blade....not carbide it will chip the glass
Painters 5 in 1
pliers
small screw driver
Heat Gun
razor knife
Black RVT
1st Make sure windows are tight in the frames ( if not remove the exterior bolts ( must be on a flat surface) and run a bead of RVT and reset them.
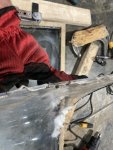
2nd set speed to medium ( in my case 3) you want to cut steady but not fast.
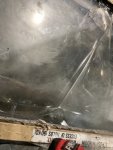
3rd start cutting in a corner,depth is about 3/16'' . You will see a white saw dust. move the blade slowly and gently until you see the blade start to gum up. (this is the first layer of film. continue around entire window until you have cut all the way around to that depth. ( I cut out around the wire area)
4th Use the heat gun to soften the Lexan. Do not over heat! What I noticed is that the small bubbles in the film start to move, that's hot enough. Use the 5 in 1 to gently the sheet off, reheating every couple of inches. Make sure you do not remove the material that is still in the frame! If you see it starting to pull,cut again.
5th use the razor knife to cut around the perimeter again to make sure the film is completely cut. Again, do not pull from inside the frame.
6th repeat steps 3-5 to remove 2nd layer
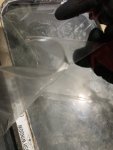
At this point your fingers are cramped and you will most likely have blood and burns on you hands.....but you have nice windshields now! Take your time, some sections come off fairly essay others take for ever. Use the pliers to pull the film as you heat it and work it all slow.
Last step is to toughly clean the debris and lay a sealing bead with the RVT on the inside. I used a fairly large glazing bead. I used RVT as I don't know what the existing sealant is and RVT will not harm most sealants. I guessed here and got lucky it guess..
I did all 3 windshields with no issues. Takes forever, but at about $100 a window worth it all day. (windows+materials)
Now remember you no longer have spal shields on your widows anymore, so if you plan on taking rounds make sure you have eye protection.
Good Luck


")