• Steel Soldiers now has a few new forums, read more about it at: New Munitions Forums!

  • Microsoft MSN, Live, Hotmail, Outlook email users may not be receiving emails. We are working to resolve this issue. Please add support@steelsoldiers.com to your trusted contacts.

Central FL M1031 project

Keith_J

Well-known member
3,657
1,323
113
Location
Schertz TX
Guess you still have power. Painting is all about prep, military paint jobs are much easier as 180 grit is the finest needed.

It appears you didn't have the surface sealed which telegraphed the issue to the surface. Let it harden, then 180 grit sand smooth and try again.

Once assembled, I can help with the SECM generator. I am designing a connection panel system so it can be used for 120/240 split or 208/120 3 phase. So far, I discovered the generator leads are properly marked with stamped aluminum tags.

I've load tested my generator to over 10 kW, frequency control is spot on.
 

deank

Well-known member
Steel Soldiers Supporter
217
384
63
Location
Florida
Please tell me more about sealer. I have no knowledge on painting. I have only used 80 grit so far.
I have been trying very hard not to get down to metal after CUCVRUS posted to this thread. I am trying to not go past the tan carc.

if you can tell me what to do or direct me to a good video ( I am a visual learner first, reading second).
 

Keith_J

Well-known member
3,657
1,323
113
Location
Schertz TX
Sealer is a high solids primer, useful if you have used coarse abrasive especially on body filler. I haven't done a full look into your process and just used your finished product.

Definitely get some finer grit. Coarse open grit is for shaping and thick finish removal, once you get scratches past the red, switch to 120 or finer. 180 for final sanding with orbital or patternless. Now apply the high build primer-sealer and let cure.

Here is where the show car guys use a thin mist of flat black spray called guide coat to block sand with 240 grit. This removes scratches and micron high-low areas. If needed, primer sealer can be used for filling lows or spot putty. But we aren't that level because deep gloss black isn't a military paint job.

Guide coat is still useful for scratches when the top coat is thin, like original GM CARC. But with 180 grit, two coats should cover.

I'm a fan of Home Depot Behr exterior house paint over a good primer for military vehicles, especially as a CARC look substitute. No solvents, easy clean up. Only takes a month to cure fully to get scratch resistance. I've even rattle can primed with great success.
 

deank

Well-known member
Steel Soldiers Supporter
217
384
63
Location
Florida
As I understand your last post. After I have sanded at 80 grit and primed with two coats of say, rustoleum rusty metal primer, I then need to allow it to cure a day, then sand with 120 or 180 grit, one or two coats of my black zinc phospate primer, allow it to cure, then apply my top coat colors? Please advise.
 

Keith_J

Well-known member
3,657
1,323
113
Location
Schertz TX
As I understand your last post. After I have sanded at 80 grit and primed with two coats of say, rustoleum rusty metal primer, I then need to allow it to cure a day, then sand with 120 or 180 grit, one or two coats of my black zinc phospate primer, allow it to cure, then apply my top coat colors? Please advise.
Rusty primer over bare metal, then high build primer-sealer over all. Mist coat with flat black spray paint, not enough to cover, just a dusting.
Then sand with 180 grit with orbital sander until scratches are gone. It is now ready for final finish.
Washing between sanding will show scratches.

The key is progressively finer grit.
 

deank

Well-known member
Steel Soldiers Supporter
217
384
63
Location
Florida
I am using the rapco black zinc phosphate primer also. Would that count as the high build primer sealer?
 

deank

Well-known member
Steel Soldiers Supporter
217
384
63
Location
Florida
Is there a way to change the title of this thread to Central FL M1031?
 

Keith_J

Well-known member
3,657
1,323
113
Location
Schertz TX
I am using the rapco black zinc phosphate primer also. Would that count as the high build primer sealer?
Zinc phosphate is a metal primer, save it for bare metal. Primer over bare needs sealing. Layers have purpose based on order of application.

We were all beginners at one time. But never be afraid to ask for advice.

There are many threads on using Home Depot Behr, a month's worth of reading. Any CARC color can be created, airless spraying works as does fine nap roller. You can paint in sections, making this a great coating for the budget DIYer. The only complaint is the dried paint is soft for about a month, it cures slowly. But it is rain safe after 8 hours.

Water based acrylics like Behr from Home Depot are emulsions suspended in water. The water evaporates within minutes, acrylic polymerization starts once the water evaporates but like Portland cement, it continues for weeks.
 

deank

Well-known member
Steel Soldiers Supporter
217
384
63
Location
Florida
Please lay it out in layers for me based on what you would do if it was yours. Using brand names helps me.

1. bare metal/some paint
2.

thank you!
 

deank

Well-known member
Steel Soldiers Supporter
217
384
63
Location
Florida
Ordered a replacement grill and a dashpad today. I will see how they work out upon arrival.
 

deank

Well-known member
Steel Soldiers Supporter
217
384
63
Location
Florida
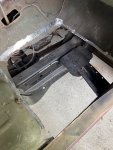
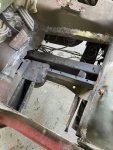
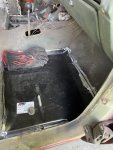
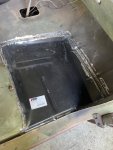
Well hello all. The dash pad was a bust. A hard plastic overlay.
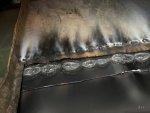
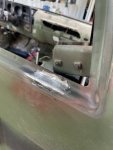
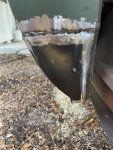
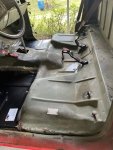
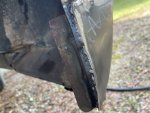
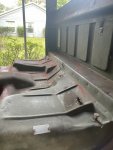
i did get the floor pans welded in. Not restoration quality work bt solid welds that will outlive me.
sounding, priming and painting…
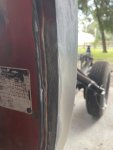
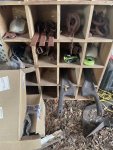
9C634232-5600-4FC9-94D3-23E8E638A483.jpeg9C592BB1-2179-4E4D-9171-BCF5AD60526D.jpeg9C4B8419-C0BA-4D9D-901D-6814A13FD89D.jpeg92A3317E-E691-468C-B7B1-F12CF578333C.jpegD6E0DA5D-3D3F-4CB9-949A-CF29E7C154EE.jpeg28F9B521-A190-418F-8A8C-6B4728D99C5E.jpegB152ACE9-39CC-464C-802B-BD9673DEFFC1.jpegSo whe i get the cab painted i can get the glass back in and then work on the doors spent most tof today cleaning hardware CD0E3EC9-654D-4BE1-853C-147A0362CDB7.jpeg24BB7E42-1E84-4EF7-B6BA-EE97E5E83F7D.jpeg
 

cucvrus

Well-known member
11,473
10,434
113
Location
Jonestown Pennsylvania
Why are the seatbelts still attached. Go under with a propane torch and heat the nuts. Have an assistant hit them bolts with the impact and remove them. I see pictures here of cab interiors repainted and the seat belts all taped up. Hey not my truck but wanted to mention it. It looks great. A nice coat of LineX and you will never have to visit that floor repair again. Good Luck. Happy Holidays.
 

deank

Well-known member
Steel Soldiers Supporter
217
384
63
Location
Florida
Good afternoon All,

Seatbelts are out. No torch needed, no impact either. I only have help when taking off or putting on the work box. One man show the rest of the time.
49987CE6-B1C7-46D9-8541-C838B312C38C.jpeg
Today I am working more on removing red paint inside the door frames of the cab.
CBA67C97-D061-4F3F-B2E3-7C3DBAAEE120.jpeg
Sanding and painting never stops…
408B8668-10FA-4FC5-86F3-69E9C5A20A89.jpeg
 

nyoffroad

Well-known member
942
690
93
Location
Rochester NY
Just came back to this thread, this is to late to help you but will hopefully help the next guy.
When replaceing the floor pans don't drill the welds out, instead locate and mark all the welds from the inside and then use a grinder to remove just the one layer of sheet metal (thats the floor itself), this way after cutting the old floor out you don't have holes in the floor braces. All the welding is done from the top and is nice and neat. Leave a nice solid piece to weld to and cuts down on places rust can start.
To mark the floor pan just lay the new one in place and then get under and scribe lines where you cut the old floor and where the braces are, then trim to size and drill holes for spot welds.
Some swear by using weld-thru primers and some swear at them, I do both! They are a PIA to work with but do help prevent rust and up here in NY we need all the help we can get.
 

deank

Well-known member
Steel Soldiers Supporter
217
384
63
Location
Florida
It has been a while. Have not done much lately except replace the rear brakes. I did encounter one wierd item that I would like some opinions on. When turning the brake drums there was one band about an inch wide starting about one inch from the edge (where the drum is the thickest all the way through) that does not want to resurface. After every pass it still feels (by touch) that is raised higher than the surrounding areas. Has anyone encountered this before? It is like the drum material is harder in that band.

thanks for any input.
 
Top