• Steel Soldiers now has a few new forums, read more about it at: New Munitions Forums!

  • Microsoft MSN, Live, Hotmail, Outlook email users may not be receiving emails. We are working to resolve this issue. Please add support@steelsoldiers.com to your trusted contacts.

Cheap eBay LEDs - The Install

jasonjc

Well-known member
5,325
283
83
Location
Gravette Ar.
I the 3rd pic of the tail light the one to the right is working right, is that the one on the left or is it your skull??? If you have "B" step on the brake you should see a white light under the 4 red lights. If you want to know how they work there is a thread on here about that. It's like this if you see 2 of the 4 red lights you are good. If you see all 4 you are TOO close back off. If you only see one you backed too far off.
 

DUG

Senior Chief/Moderator
Super Moderator
Steel Soldiers Supporter
2,799
73
48
Location
Mesquite, NV
I the 3rd pic of the tail light the one to the right is working right, is that the one on the left or is it your skull??? If you have "B" step on the brake you should see a white light under the 4 red lights. If you want to know how they work there is a thread on here about that. It's like this if you see 2 of the 4 red lights you are good. If you see all 4 you are TOO close back off. If you only see one you backed too far off.
Thanks - I might check it out. I don't care about the blackouts too much, but it's nice to know how they should look. I didn't have him hit the brakes with the BO's on.

Third pic is blackouts only though I forget which setting. The skull doesn't come on with the blackouts.
 

Billy Bobbed

Active member
1,346
13
38
Location
Terre Haute,Indiana
Nice pictures DUG,I have my leds on in the front when the parking lights are on and led head lights.I wired it from behind my light switch.I even have 5 cab lights on to.Im waiting on my other wires and Y connectors to come to hook my lollipop lights to my turn signals and the side lights.I hope the light system holds it all.:shock:
 

DUG

Senior Chief/Moderator
Super Moderator
Steel Soldiers Supporter
2,799
73
48
Location
Mesquite, NV
Nice pictures DUG,I have my leds on in the front when the parking lights are on and led head lights.I wired it from behind my light switch.I even have 5 cab lights on to.Im waiting on my other wires and Y connectors to come to hook my lollipop lights to my turn signals and the side lights.I hope the light system holds it all.:shock:
Would love more details on this. Post here or PM me. Want to keep the wire hacking to a minimum and I am known to be somewhat "electricly challanged" so keep that in mind when sharing the info.

:beer:
 

m376x6

New member
357
4
0
Location
Colorado
When I converted the 6X6 to 12 volts here a couple of years ago I also switched to LED lighting front and rear, as well as the tactical lighting. Had to use a flasher specifically designed for LED lighting. Found any number of colors and quantity of LEDs on a single bulb that would illuminate the standard lenses on my composite marker light units both front and rear. They have just about any variety of voltage and base size you need for just about any veicle. Just bought the right base and type I wanted and they plugged right in. I've not been stopped by any Officer yet. We kind of chuckle because when we're driving back to camp at night and I use the military standard turn signal handle the LED I have in there right now lights up the cab with a very bright green light. You can easilly see it in bright daylight, you sure as he!! can see it at night.
 

tm america

Active member
2,600
23
38
Location
merrillville in
Nice improvment....I like the jerry can mounting on the mud flaps..but even more i like the jerry can lock setup you have on the drivers side..looks very effective and fits the style of the truck..Did you buy it or is it something you made up?
 

DUG

Senior Chief/Moderator
Super Moderator
Steel Soldiers Supporter
2,799
73
48
Location
Mesquite, NV
Nice improvment....I like the jerry can mounting on the mud flaps..but even more i like the jerry can lock setup you have on the drivers side..looks very effective and fits the style of the truck..Did you buy it or is it something you made up?
DarwinT did a post on the jerry can locks. I have them on three of my four jerry cans (won't work with the plastic water jug). They came two pairs for 20ish over at the same place the famous Fording kit is now.

To make them work with the newer blitz jerry cans you have to mod the cap. I did a write up when I did the installs (jerry cans (3 extra) and locking straps).

I have an extra one here if you want it. Just pay the ride.
 

tm america

Active member
2,600
23
38
Location
merrillville in
i'm gonna do a search and see what i come up with ..i still need to get one more jerry can holder to..My cans are all steel but a plastic water can could come in handy to?..
 

DUG

Senior Chief/Moderator
Super Moderator
Steel Soldiers Supporter
2,799
73
48
Location
Mesquite, NV
i'm gonna do a search and see what i come up with ..i still need to get one more jerry can holder to..My cans are all steel but a plastic water can could come in handy to?..
I got all my metal jerry cans at the local Army/Navy. I threw away the CARB approved spout and picked up a couple at that site that sells stuff BIN and auctions that we don't talk about.

I also bought three more jerry can holders at the local Army/Navy. Some say the blitz stuff is crap and not as good as other stuff- works fine for me.

I can not remember where I got the TAN water jerry can. It's military issue that I bought online somewhere.

Search under my name and you find pics/write ups of everything I've done to the truck. I mean - it is a factory M109 that I let Dog Head pick out for me.

One of my two gas cans is mix gas for my cheapie Harbor Frieght generator - only Soldier B and I know which one - I hope a thief can guess correctly. LOL
 

DUG

Senior Chief/Moderator
Super Moderator
Steel Soldiers Supporter
2,799
73
48
Location
Mesquite, NV
Riddle me this - when is a "shortcut" NOT a "shortcut"?

When it involves DUG and electrical.

DH gave me TWO ways to make my front LED turn signals act as a normal car.

#1 was to get some y connectors and plug into the left rear tail light. Then run a single wire along the ENTIRE frame, up under the radiator and then disconnect the proper wire on each front light and plug into my new wire. The front LEDs would turn on when the left rear did and still flash as normal.

#2 was to quickly disconnect the harness at the light switch and run a jumper with the quicky connectors between the same wire numbers.

Option 1 is a lot more work getting dirty but the factory harness remains untouched and could be put back together normally at any time.

Option 2 was quicker, easier but harder to undo and you could mess up those old wires.

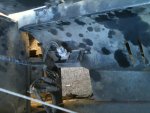
I of course went with option 2. I unplugged the harness, couldn't read any numbers tried cleaning things off when I noticed a wire that looked to be in bad shape. The spot was hard to get to and it looked like just rubbed insulation so I shot it with liquid tape. I carefully put things back, planning to go with option 1.

Of course I ended up with no headlights or tail lights at all. The iffy looking wire - #15 broke with all the movement. Everything came back apart, wire wrap tape carefully cut away and it was properly repaired. Re taped, reinstalled and Im back to where I was over an hour ago.

In some ways maybe it's a good thing I found it and fixed it now, but maybe it would have never broke if it hadn't been touched. Who knows. I'll be running a wire the length of my truck after lunch. Or when soldier B gets out of school. I shouldnt be trusted alone with electrical.

I have a pic of my flasher that I will upload later. It works with four LED lights.
 
Last edited:

DUG

Senior Chief/Moderator
Super Moderator
Steel Soldiers Supporter
2,799
73
48
Location
Mesquite, NV
The wires I have behind my switch aren't in the mood for a splice or jumper wire. Soldier B ran his RC car into a curb minutes after I spent 80 bucks on a battery and charger. If he wants it repaired, he shall learn the JOYS of zip tying wire along the length of the truck.

Someday soon I'll install a new dash harness.
 

DUG

Senior Chief/Moderator
Super Moderator
Steel Soldiers Supporter
2,799
73
48
Location
Mesquite, NV
Once again the DH way has proven to be the best way. After patching up the broken wire and doing research on installing a new wiring harness I headed to the RC Hobby store. I picked up the repair parts for soldier B's busted RC ride but didn't have time to get to Erik's for the Y connectors.

Once soldier B got home and saw his parts he was ready for a tear down and repair, BUT I had one small task for him 1st. He ran 12 gauge wire from the drivers side tail light to the radiator along the drivers side frame rail following the factory harness. He then secured it with 30-40 zip ties.

Since I had no Y connector I tapped into the proper tail light wire with the a cheapie clamp/crimp connector but on the civie wiring harness so not to further mess up the tail light wires. I'll order the proper connectors when I get a budget allocation or can use untracable cash at Erik's.

Up front I removed the wire guards behind the fenders and unpluged the 491 wire on each side. I then taped up the factory truck side. Using a crimp style bullet connector I plugged into the front light on both sides and taped it all up. Then connected into soldier B's wire from the tail light (21) that he was just finishing. He painted everything that could be easily seen with flat black paint and the test was flawless.

Pics soon along with the flasher pic I promised.

If you got a soldier B in your life that can turn wrenches and wants to learn - hug him/her and take good care of them. So much easier with him helping.
 
Last edited:

doghead

4 Star General /Moderator
Staff member
Super Moderator
Steel Soldiers Supporter
26,247
1,172
113
Location
NY
I'll certainly shake his hand(your soldier b). He sounds like a good kid that is willing to work and learn. Keep up the good work(both of you).
 

Recovry4x4

LLM/Member 785
Super Moderator
Steel Soldiers Supporter
34,012
1,804
113
Location
GA Mountains
DUG, why don't you send me your address and what connectors you need and I'll see if I can put a care package together!
 

DUG

Senior Chief/Moderator
Super Moderator
Steel Soldiers Supporter
2,799
73
48
Location
Mesquite, NV
Pics as promised. One of the flasher that is installed in my truck which works with four LEDs and no other "load" or mods. A few pics of the front lights with headlights on and in the park position.

Recovery - I just need a couple y connecters so I can plug my #21 tail light wire from the truck to the tail light along with a civie flat four connecter and the feed wire the runs up front. The way it is now I have two of the Walmart crimp/clamp connectors that you use pliers to install and slice through the insulation to make the connection. I would rather un redneck that and plug things in right. Erik's has them for 3 bux each and he's not too far out of my way. Unless you really want to send me a couple.
 

Attachments

Top
AdBlock Detected

We get it, advertisements are annoying!

Sure, ad-blocking software does a great job at blocking ads, but it also blocks useful features of our website like our supporting vendors. Their ads help keep Steel Soldiers going. Please consider disabling your ad blockers for the site. Thanks!

I've Disabled AdBlock
No Thanks