• Steel Soldiers now has a few new forums, read more about it at: New Munitions Forums!

  • Microsoft MSN, Live, Hotmail, Outlook email users may not be receiving emails. We are working to resolve this issue. Please add support@steelsoldiers.com to your trusted contacts.


cHucv Soup: The animal to be

ODw/envy

New member
310
0
0
Location
Deltona, FL
Yeah Rix, that is what Josh told me too. The mount is non existant on mine. My truck is an '86, I don't know if that is the difference. Either way, I'll do a writeup on it when I make the mod. The floor needs some repairs and reinforcement anyway, so I will lickly do all of that while the tranny is out.

Some photos for comparison. I'll get a few more today. My mounting patern is even different. Only one bolt hole will work.
 
Last edited:

ODw/envy

New member
310
0
0
Location
Deltona, FL
As promised, better pics of the floors.

I only had about three hours to work today but I got a few things done.

I did the final mockup of the fuel filter braket and applied a coat of self etching primer.

I removed the battery treys and started the prep work on the inner passenger fender. Surprisingly, the weight of the 6TLs had broken it and, more suprisingly, there are some hackjob repairs to fix as well. :deadhorse:

Next is a pair of custom battery treys and 12 volt conversion.
 

Attachments

ODw/envy

New member
310
0
0
Location
Deltona, FL
From what I can tell, it was used for a radio/scanner, or the like. There was a metal "tunel", presumably, for wiring leading to it (visible in a few photos). This truck has a civvy top on it. I beleive it may have also a large antenna at one point. If you look at the photos of the rear bed, you will see a plate welded to cover up a hole smack in the middle.

I will use the mount for my center console. er..a...20mm Glock Box. Cut flat, of course.
 

ODw/envy

New member
310
0
0
Location
Deltona, FL
Yeah, it seems impractical (aua) to mount a fuel filter under the breather, on the back of the intake to me. The primary is a water seperator too. I believe they are 12 and 6 micron respectively.

Thanks for the vote of confidence. I will have a little more on it after final install.
 

ODw/envy

New member
310
0
0
Location
Deltona, FL
I accomplished a few things in the last couple of days. I finished out the fuel system and did the 12 volt conversion. I still have a bit of fine tuning to do.

The finished dual fuel filter mount, with a heavy coat of Rustoleum Rubberized Undercoating.
The mounted setup
Pics of the butchered miss I had to deal with (electrical).

I will be cleaning up the install in time. I cannibalized the rear radio cables to complete the conversion, but they need to be shortened. I came to the realization that I did not want open 12v power running in proximity to my 3 year old in the rear seat. I suppose I will have to find a different place to mount my radios.

The 12 volt conversion was simple and effective. As you will see, I did things a little differently. I filled the secondary fuel filter with ATF which did change the nature of the way the truck runs. I can comment that even with the ATF (runs a little ruff), it only takes about 1.5 turns to crank. Previously it took 1. I keep you posted on the 12v results when the ATF is gone.
 

Attachments

Last edited:

ODw/envy

New member
310
0
0
Location
Deltona, FL
Sense I will be doing a turbo conversion, I decided to go with 2 34/78 Optima's, one on either side of the engine. This pattern is somewhat more convintional and provides me the room I need for the turbo and breather.

You may be asking, OD, Why did you waste your time fabricating battery trays?

There are two reasons: first, I like to fabricate; second, there is not a pre-fabed box that fits my needs exactly. I was able to minimize the foot print of these and use the base mount system instead of the top cover system, which is common among custom battery mounts.

Again, I coated them with Rustoleum Under coating. It is really tough and "everything" resistant; just be sure to allow extra time to cure.
 

Attachments

Last edited:

ODw/envy

New member
310
0
0
Location
Deltona, FL
Is that a Tranny?

It has been a very busy couple of weeks. I only had 1 day to devote to the Blazer. I did manage to create a little carnage though.

The little K case 700r4 is at Aztec Transmissions getting some love. Some love; actually it is receiving a ground up rebuild/refit. It is one of those nasty little ‘83 models, so a full list of upgraded guts is on the medical chart. I will post a bill of materials when I can.

I have officially gone insane, if that was not already obvious. My little NP205 will be following the 700 as backup; or is it forward up? Anyway, I had to do yet more shopping and be sure the UPS dude will be earning his pension.

Also official, I am going to run the D60 in the rear. My ¾ ton 14bff is finding a home under a moon buggy. More to come on axles as funds and time allow.

A few pics of the patient.
 

Attachments

ODw/envy

New member
310
0
0
Location
Deltona, FL
Another CL score. The ammo can is cool but this Tuffy Security Console is more practical and will allow me to store my radios and my PDAs (Personal Defense Accessories) more securely.

Best of all I payed about half the price of a new one.
 

Attachments

ODw/envy

New member
310
0
0
Location
Deltona, FL
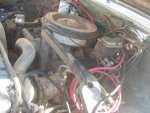
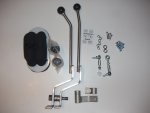
Well, I did not get much done this week, with only 1 day sense the wife is out of town again. I should have probably been doing more on the drive train, but I felt like doing some fabricating instead of working on a greasy old NP205. Besides, I am waiting on a new 32 spline front output shaft and rebuild kit. The spacer/adapter should be here on Tuesday as well. I did get the twin sticks in the mail and a fire wall mounted dip stick.

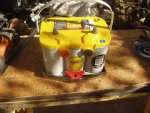
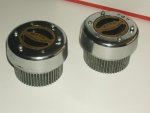
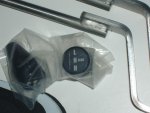
Additionally, I received my new front hubs. I am kind of proud of this one. I had planned to run the ones that came with the unit and upgrade down the road. Believe it or not, I am on a tight budget with this build and am selling stuff to finance it. Anyway, these came up on Ebay, at about half price, from a company that specializes in the liquidation of returned items. They arrived today (2 days), they were advertised as incomplete. Upon inspection I find that they are complete and function perfectly. It just happens that they are assembled.

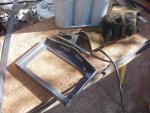
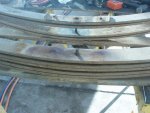
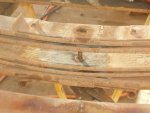
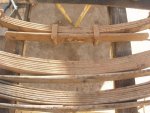
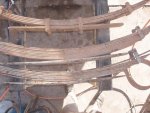
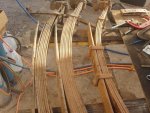
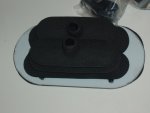
Anyway, I built my custom rear spring packs. They are 6 leafs and a combination of the K30 (8) 
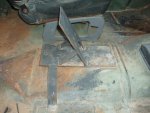
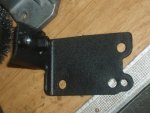
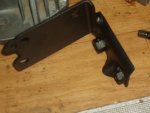
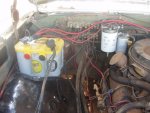
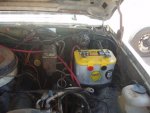
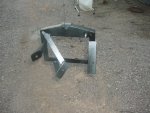
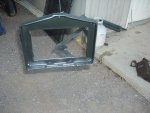
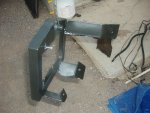
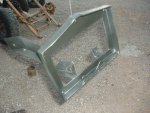
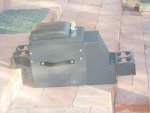
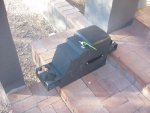
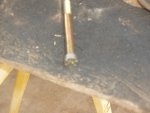
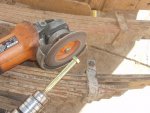
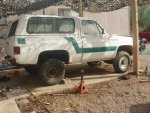
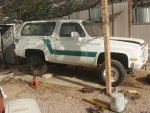
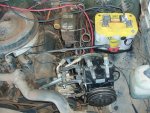
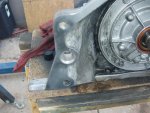
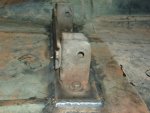
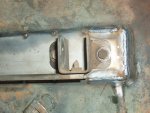
and M1009 (4) packs. I mocked up the D60 install with the Dodge unit. I need new hardware still. And lastly, I mocked up the mounts for the York OBA install. The latter took 70% of the day and should likely have been lower on the priorities, but I needed a break from drivetrains.

Next week will be the drivetrain install, hopefully.
 

Attachments

ODw/envy

New member
310
0
0
Location
Deltona, FL
You may notice above that the packs are, top to bottom, four, eight, and seven leafs. I opted for six in the end.

If you are doing this type of mod do use caution. As demonstrated in the above pictures some packs can be under considerable pressure. I use a C-clamp on either side of the bolt to relieve and release the tension.

Below is the mock-up of the Blazer sitting on the D60 with modified springs. The ride height is crooked. The passenger side is higher than the drivers by 3 inches. It seems the K30 had different packs, and indeed different leaf counts on each side. I suppose a trip to the spring shop is in order. It occurs to me; this is why we do the mock-up process.

I think I am liking the York OBA even more, now that I have the mount fabed up and can see it in place.
 

Attachments

Last edited:

ODw/envy

New member
310
0
0
Location
Deltona, FL
It has been a while sense I gave an update. The truth of the matter is that I have been so busy working on the truck I have not had time to keep up with the thread. I will write short explanations until I am caught up. If you have questions in the meantime feel free to ask.

This first set of pictures is a custom plate I ordered to connect the NP205 to the second cross-member. I promise this will become more clear as time progresses.
 

Attachments

ODw/envy

New member
310
0
0
Location
Deltona, FL
This is the JB Conversions twin stick setup I decided to go with. There are more complex and more expensive kits out there, but this one fit me needs best. I like the simplicity and the fact that everything is stainless steel. The kit functions flawlessly and the instructions are easy to follow. More on this later.

I did splurge and buy the billet aluminum shift handles. They have both the front and rear axle shift patterns machined on them with a ball mill. Polished aluminum is also available.
 

Attachments

ODw/envy

New member
310
0
0
Location
Deltona, FL
I took some pics of the floor before during and after the repairs and sectioning for the civilian seat mounts.

I think Uncle Sam's Boys must have been doing some "Dukes of Hazard" renditions out in the desert, judging by the caved in floor and multiple "repairs".

I added 1/8" plate under the passenger seat and 3/16" under the driver's seat, in addition to fixing the floor and some stress cracks in the body.
 

Attachments

Top
AdBlock Detected

We get it, advertisements are annoying!

Sure, ad-blocking software does a great job at blocking ads, but it also blocks useful features of our website like our supporting vendors. Their ads help keep Steel Soldiers going. Please consider disabling your ad blockers for the site. Thanks!

I've Disabled AdBlock
No Thanks