• Steel Soldiers now has a few new forums, read more about it at: New Munitions Forums!

  • Microsoft MSN, Live, Hotmail, Outlook email users may not be receiving emails. We are working to resolve this issue. Please add support@steelsoldiers.com to your trusted contacts.

First Post - Introduction - My MEP003 Saga to Date...

RichardR

Member
96
3
8
Location
Austin, TX
Stan,

I had to laugh when reading about your experience trying to remove the blower housing without removing that pesky top bolt holding the grille. I spent quite a while and exercised my vocabulary for at least an hour on exactly the same problem. I'm sure many others have had the same experience. The engineer that came up with that nefarious design must be very proud!

This thread on SmokStak gives a few tips on replacing the camshaft.

Onan 12.0DJC broken camshaft cause - SmokStak

It sounds fairly easy to do if you take out all the pushrods and raise all the lifters to clear the camshaft. The camshaft should then simply pull out toward the front. One of the gurus there recommended putting the engine on its side to keep the lifters from falling back down after being raised. I'm sure it is more trouble than those experts make it sound.

Good luck on your adventure,
Richard
 

Keith_J

Well-known member
3,657
1,323
113
Location
Schertz TX
Funny how I have pulled all three off, not remembering it is the top center grill boltaua. But I am getting better, yesterday I worked on an H7 classified 002A and only pulled the top bolt. Yes, it ran, after minor fuel leaks and putting enough fuel in the tank. It takes more than 1 gallon, otherwise it unports the pickup during vibrations, causing an unstable speed.
 

NJ_Toolnut

New member
83
0
0
Location
Bloomsbury, NJ
Here is an update.

I finally got the gear cover off yesterday afternoon, and I found significant mayhem inside. I will post some images when I get a chance. I still don't know the exact sequence of events that caused this catastrophe, but it involved a hardened steel 7/16" nut that somehow got into the rotating gears. I cannot see why such a nut would be under the gear cover since per the TM-34 it does not appear to be used to fasten anything there. Are nuts of this description used elsewhere in the crankcase?

As a result of the interaction this errant nut had with the gears, the drive shaft for the oil pump is sheared off at the oil pump gear, the oil pump gear itself (whichs was loose in the bottom of the gear case) is missing several teeth, the crankshaft gear has numerous mangled teeth and is cracked, and the camshaft gear has numerous teeth with minor scoring and is missing part of one tooth. The oil pump base inside the gear case under the crankshaft is cracked at one of its mounting holes, and one of its two bolts is bacly bent.

When crankshaft gear became bound, it sheared the Woodruff key that indexes it to the crankshaft and smeared the remnants of this key as well as parts of the ID of the crankshaft gear around the OD of the crankshaft under the crankshaft gear. The remainder of this key is still stuck in its recess, but I may be able to pick it out. There is some scoring and deposition on the crank journal under the location for the crankshaft gear that I may be able to polish out.

So based on what I currently know, the following are trashed:
Crankshaft gear and Woodruff key
Possibly the front camshaft gear
Oil pump, including drive shaft and gear
Oil pump base

Questions:
Is the front camshaft gear integral to the camshaft? I can't exactly tell from TM-34 but I suspect it is. What is the gear on the rear of the camshaft for? What controls camshaft end play? Must the oil base come off to remove the oil pump, or can it be removed from the front after removing the back plate? Referring to Figure 7-22 on page 7-23 of TM-34, what is the appearance and function of the part numbered 12 ("cup")? All I see at this location on my gear cover is a hole that appears to have a small brass orfice pressed into it. Regarding the part numbered 1 ("retainer") mine is missing. It appears to be only a circlip, so I should be able to measure and souce one from McMaster-Carr. Do you agree? When I'm finally ready to reassemble, where can I source gaskets?

I'm going to be away from home for Christmas, but I will get back to this unit before the year is out. I will need to address the scored crankshaft, remove and inspect the pushrods for straightness, remove the oil pump, and possibly remove and inspect the camshaft. I'm certainly getting a lot more than I bargained for!

Thanks in advance for your responses. I would really appreciate it if any of you can clear up the mystery of the presence of the hardened 7/16 nut in the gear case.

Happy holidays,

Stan
 

RichardR

Member
96
3
8
Location
Austin, TX
Stan,

Sorry to hear the latest revelations from under the gear cover. My suspicions would be that some sorry SOB, either intentionally or carelessly, included an extra 7/16" nut when assembling the front of the engine after rebuild. I don't know where else it could have come from. It lasted long enough to make it through testing plus a few more hours before coming to the current state of affairs. aua

On the bright side, it sounds like the IP is OK, and the camshaft may well be OK too. I thought you had indicated that the observable part of the camshaft was displaced lengthwise, meaning that it was broken somewhere. But that may not be the case. Only the driving gear may need to be replaced.

I think I can answer a couple of your questions. Refer to Figure 55 in TM5-6615-585-24P. That's a better picture than the one you're working from in the TM-34. From looking at that I believe:

1. The camshaft gear should be removable from the camshaft. I seem to recall that it is assembled by heating the gear (not too hot, maybe only 200 degrees or so) and quickly placing it over the cooled cam. There's a key to make the angle right. Therefore, the gear and camshaft assembly should be able to be disassembled with a good press.

2. The gear and retaining ring on the "rear" of the camshaft is actually in the middle of the camshaft. That's the gear that drives the IP. I don't know how tight it fits, but it is probably easy to install/remove since it has the retaining ring to keep it in place. There is also a key for it.

3. If you use the same camshaft, the end play should be the same as it was before.

4. The part numbered 12 and called "cup" is simply a brass oil orifice. Lord knows why they call it "cup," but it sounds like you are OK with what you have.

5. The part numbered 1 and called "retainer" is a clip that fits on the end of the governor yoke and keeps the yoke from falling out of the governor shaft. You really should have that retainer in place because you don't want the yoke falling out of the governor shaft and causing more mayhem. The retainer clip is Onan part number 518-0129, available from all the usual Onan parts places for less than $5, or a lot less $$ at many other hardware sources.

Sounds like all you need is some time, the crankshaft gear, the camshaft gear, several keys and a few odds and ends. It may take some searching to find the gears.

Oh yeah, you definitely need an OIL PUMP. I'm sure oil pumps are readily available but I don't have a clue about the price. I see them on GL occasionally, and on eBay, but I haven't noticed the price. As with many Onan parts, a little searching may save you lots of $$.

And if you haven't discovered it yet, many of the part numbers in the -24 and -34 are Onan part numbers, which can lead you quickly to a source, but almost surely a very expensive source.

Good luck with your project and have a Merry Christmas,
Richard
 

coyote62ny

New member
184
-1
0
Location
sherburne new york
you could try delks surplus 1-336-629-0991 for parts they have new and used colmans surplus may also have some parts as for the gaskets you could mike the thickness of the old gasket meterial and go to napa and get a roll of the same thickness and use a ballpeen hammer lay the gasket meterial over the area of the part you want to make the gasket for and use the rounded end of the ballpeen hammer to lightly tap out the holes then put some of the bolts in the holes and tap around the edges and you have a new gasket napa might be able to get gaskets for you
 

NJ_Toolnut

New member
83
0
0
Location
Bloomsbury, NJ
Richard,

Thanks for your post. I don't know where else the nut could have come from either but I'm not yet as familiar with these units as many here are. However, I'm certainly getting a crash course! I can't possibly imagine anyone purposefully and maliciously destroying such a fine machine in such a manner. These really do appear to be fine machines, vastly overengineered in some respects, should be rugged as blazes, but not designed specifically for ease in wrenching. My main concern about this nut is that it may have been fastening something together in the crankcase that is really critical, like maybe a rod end cap. This would be another ticking time bomb.

I thought the camshaft had been displaced lengthwise, and it may have been. The tappet for the exhaust valve I could see through the port I removed in the block to the left of the IP was not riding exactly on the center of its cam lobe. However, once I got the gear cover off, the camshaft gear was aligned with what was left of the crankshaft gear.

1. I hope I don't have to go there. If I decide the camshaft gear is trash, I know where I can get a new known good block for a very reasonable amount of cash. I may take this option instead of working to resolve the issues of the questionable camshaft gear and the scored crankshaft. It would also solve the issue of sourcing a new oil pump and oil pump base. This option would require a lot more wrenching, though. This option would also eliminate the possibility of a future problem caused by reassembling and running this engine with some undiscovered damage. On the other side, this engine only has about four hours on it following a Tier 2 reset. I will need to make a decision soon.

2. Correct, the IP needs a camshaft lobe with four humps as well as a gear. Thanks for reminding me.

3. Yes, if I use the same camshaft, the end play will be the same, but I still don't know what controls it. No mechanical feature I can discern prevents the camshaft from moving longitudinally. It can easily be moved by prying with very moderate force between the camshaft gear and the back plate using a pair of screwdrivers. In fact, this is how the TM-34 says to remove it. Is it designed to just float?

4. Agreed. I should be good to go on the "cup".

5. Governer yoke retainer. Please define "usual Onan parts places". Do you mean the places mentioned in many of the threads herein that sell parts? Their names currently escape me, but I have them all written down somewhere. I still need to figure out how to source all the gaskets I will need. And speaking of gaskets, I don't know what kind of gasket sealer Letterkenny used when they rebuilt this unit, but that stuff is good. Getting that gear cover off took a lot of very careful effort , tapping a thin putty knife wedged in the crack between the cover and the back plate with a small hammer to break loose the gasket sealer before it would even budge. I was surprised that I did not find the yoke retainer since I was really careful to watch for everything that dropped out upon gear cover removal. I wonder if the yoke was even assembled with a retainer. It will definitely get one when I re-assemble.

I'll have a look at Fig. 55 in TM-24P. So far, I've focussed on TM-12 and -34. I guess I sort of forgot about -24P.

Thanks for wishing me good luck. I like to avoid needing luck, but in this case I will need all I can get.

Merry Christmas to you as well,

Stan
 

joesco

Member
442
1
18
Location
Hampstead, NH
Stan,
Please, I don't want to rain on your parade, but I would cut your loses and part out the unit. I just have a feeling you are going to wind-up like I did. I had over 100 hours of time invested in my set, without success and I am pretty familar with Military Old Iron. I have restored M37's, Unimogs and even an Humvee, but the MEP unit defeated me. I don't know what you paid for your set, but it sure sounds like you got yourself a lemon. I am almost at a break-even point, parting mine 002A out and with those funds purchased one of these units....

http://www.steelsoldiers.com/auxill...new-my-mep-002a-would-come-handy-someday.html

You are one brave soul. I wish you the best!
 

RichardR

Member
96
3
8
Location
Austin, TX
Stan,

"I can't possibly imagine anyone purposefully and maliciously destroying such a fine machine in such a manner." (NJ_Toolnut quote)

Ah... The confidence and believability of youth. Buying stuff from GL will bring both age and skepticism to you very quickly. My condolences...

Joesco's advice above is certainly valid, but I'm not sure I would go there just yet. A fresh rebuild of the complete trailer-mounted powerplant is fairly rare and, as you now know, expensive by surplus standards. If you can get either a new long block or a fresh rebuild of the complete MEP-003a engine at a reasonable price, I would carefully consider it. You have the mechanical expertise, but lesser experience just yet, to make your unit good as new. But you need to learn where and how to shop.

For example, I just bought what LOOKS like (in the GL photos) a fresh rebuilt MEP-003a engine in a wooden crate and covered with desert sand but with all ports sealed (probably just back from sitting for years in Kuwait) for about $240. But I won't know what I actually bought till I pick it up.

When shopping, Google is your friend. You can find Onan parts by Googling for "Onan XXX-XXXX" where the Xs are the Onan part number. A reliable source (but not cheap by any measure) is
www.m-and-d.com . And eBay sometimes has remarkable bargains, and sometimes not. For example, there is one seller who has NOS oil pumps like you need (Onan 120-0547) for $625 each... hardly a bargain unless you are truly desperate.

And the military surplus sellers you see on SS often have parts you need, in this case parts originally manufactured by Onan. Also, check out SmokStak.com.

Good luck; I believe you can make that powerplant as good as new,
Richard
 

joesco

Member
442
1
18
Location
Hampstead, NH
Richard,
All pretty good points, but parting a out a machine is by no means maliciously destroying it, more like recycling it.

I just knew when to quite and also knew my limitations, which are many. My parts have helped out at least a half dozen other MEP owners (so far) and that has been somewhat gratifying for me at least and has recouped my original investment.

I am very confident Stan will win this battle and possible the war with old iron, I just wanted to give him my opinion. Take care and enjoy the holidays!

Stan,

"I can't possibly imagine anyone purposefully and maliciously destroying such a fine machine in such a manner." (NJ_Toolnut quote)

Ah... The confidence and believability of youth. Buying stuff from GL will bring both age and skepticism to you very quickly. My condolences...

Joesco's advice above is certainly valid, but I'm not sure I would go there just yet. A fresh rebuild of the complete trailer-mounted powerplant is fairly rare and, as you now know, expensive by surplus standards. If you can get either a new long block or a fresh rebuild of the complete MEP-003a engine at a reasonable price, I would carefully consider it. You have the mechanical expertise, but lesser experience just yet, to make your unit good as new. But you need to learn where and how to shop.

For example, I just bought what LOOKS like (in the GL photos) a fresh rebuilt MEP-003a engine in a wooden crate and covered with desert sand but with all ports sealed (probably just back from sitting for years in Kuwait) for about $240. But I won't know what I actually bought till I pick it up.

When shopping, Google is your friend. You can find Onan parts by Googling for "Onan XXX-XXXX" where the Xs are the Onan part number. A reliable source (but not cheap by any measure) is
www.m-and-d.com . And eBay sometimes has remarkable bargains, and sometimes not. For example, there is one seller who has NOS oil pumps like you need (Onan 120-0547) for $625 each... hardly a bargain unless you are truly desperate.

And the military surplus sellers you see on SS often have parts you need, in this case parts originally manufactured by Onan. Also, check out SmokStak.com.

Good luck; I believe you can make that powerplant as good as new,
Richard
 

RichardR

Member
96
3
8
Location
Austin, TX
Joe,
I didn't mean that you were "
purposefully and maliciously destroying" your genset. I was quoting Stan's comment about the SOB that left him the extra 7/16" nut. Your advice about parting out Stan's genset is very good advice given his current circumstances. It's just that I wouldn't go there quite yet. If he can get the parts to fix it easy enough, then fixing his might be the better way to go. But I fully agree with you that he should consider all options, and your suggestion is a very good one. Now I'm confused :?. Anyway, have a Merry Christmas.
Richard


NJ_Toolnut

New member
83
0
0
Location
Bloomsbury, NJ
Hi Everyone,

Happy New Year!

Thanks for your responses and encouragement.

It’s high time I updated this thread to report my progress to date. As you can well imagine, I also have a few questions.

The Wednesday before New Years day, my daughter and I drove the 300+ miles down to storeman’s MEP heaven in VA, purchased his short block for a very reasonable price, sat down to a delightful meal prepared by his wife, and thoroughly enjoyed their wonderful hospitality. Thanks, Jerry!

Once we got back home, I continued tearing down my current engine to a bare short block. Separating it from the generator was an exercise in patience. I hated unbending all of those little bent over lockplate tabs. After struggling with a small cold chisel and small hammer and being unable to get the correct angle for unbending them, I rethought the process and through experimentation, found that the best way to at least initially begin to straighten them was with a 2 foot length of 1” x 1/8” CRS bar, with one end cut off a little out of square. I was able to insert this bar, out of square end first, into a slot in the generator housing on the opposite side of the unit so that the acute angle on the end of the bar came to rest directly on top of the bolt head and behind the bent over lockplate tab I was trying to straighten. Gentle tapping on the exposed end of the bar then allowed me to unbend the tab enough to be able to insert the cold chisel between the partially unbent tab and the edge of the bolt head hex and then finish straightening it enough to be able to fit a wrench on the head of the bolt. This was a remarkably slow process, but it worked very well. Removing the bolts themselves was also very slow, given the very limited access. During the rebuild, I’m tempted to reinstall these bolts without the lockplates, substituting Grade 5 lockwashers in case I ever need to repeat the generator/engine separation procedure again. What do you think of this proposal?

When I reached the point during disassembly when it was time to remove the cylinder heads, I disconnected the injector lines at the IP only, and left them attached to the injectors. I disconnected the two return lines on the front cylinder head from the injectors in order to be able to remove the cylinder heads separately, but left the return lines as well as their junction block connected to the rear cylinder head. Hopefully, leaving as many lines as possible still connected will minimize the potential for ingress of crud into the injection system.

Upon removal, I found that the cylinder head bolts had been very liberally dipped in anti-seize. I carefully cleaned the bolts using a fine wire wheel on a bench grinder and will recoat them with fresh anti-seize prior to installation. I found that the two center cylinder head bolts were rather badly rusted, and I'm considering replacing them. Will any Grade 8 bolt work as long as it is the correct length and thread pitch?

I found it difficult to remove the pushrod tubes because they had been glued in place at both ends with gobs of RTV sealant. This was done (apparently during the Tier 2 reset) in spite of the fact that oil leaks are apparently intended to be prevented by the use of o-rings on both ends of each pushrod tube. I wound up cracking one pushrod tube while trying to remove it from the block due to the use of excessive force. It cracked in a transverse direction on two sides of the tube along the sharp bend on the upper half of the flange that retains the spring at the lower end, but luckily I felt it yield just as it started cracking and therefore quit pulling on it in time to avoid damaging it further. I intend to repair the crack with JB Weld in order to avoid an oil leak. These tubes are made of very thin soft aluminum. I'm thinking the RTV sealant is not necessary and intend to reinstall them without using it. What do you think?

The rest of the teardown was relatively uneventful. I carefully tagged all of the connections and bagged the nuts and bolts into labeled zip-lock bags.

Check pushrods. All diesels are interference and if the camshaft broke near the drive gear, chances are one or more valves were open causing piston to valve contact. Being a flat head OHV with flat-top pistons, the valves should be fine, the pushrods take the abuse.
Keith, you were prophetic. I rolled each of the pushrods on a surface plate and discovered two severely bent ones, #1 intake and #2 exhaust. Valve stems appear to have not bent, but I won't know for sure until I reassemble the valve train and bar the engine over when lashing the valves.

My tractor/front end loader easily handled rigging the old short block from the M116A2 trailer into my workshop as well as rigging the replacement short block from the back of my pickup truck into my workshop. I simply attached a length of chain between cylinders #1 and #4 using two of the short cylinder head bolts inserted through chain links and threaded into the block, then looped the middle link of the chain through the hook welded to the top of my loader bucket.

The next step was to clean up the replacement short block. I used some 400-grit wet or dry sandpaper and a very small amount of WD-40 to remove the minor amount of surface rust that had accumulated on the walls of cylinders #1 and #2, being careful to not allow the rust and silicon carbide particle-laden spent WD-40 to run down the cylinder walls far enough to reach the pistons. The cylinder walls cleaned up very nicely. I also removed some sludge that had accumulated on the backplate at the front of the engine. I don’t know what may have caused this sludge accumulation or how many hours this engine had on it, but I “snugged up" all of the gear cover bolts (none were loose) and will monitor this location for potential oil leaks.

I used a sharp single-edged razor blade in a holder to remove the remnants of the head gaskets, rocker arm cover gaskets and intake manifold gaskets (and accompanying RTV gasket sealant) from their mating surfaces, and I’m now ready to start “dressing up” the replacement short block.

Meanwhile, I tackled sourcing replacement cylinder head, rocker arm cover and intake manifold gaskets, as well as pushrods.

And if you haven't discovered it yet, many of the part numbers in the -24 and -34 are Onan part numbers, which can lead you quickly to a source, but almost surely a very expensive source.
I had thought about this and previously tried to figure it out, but I'm still not sure I understand exactly which numbers in the TM-24 are Onan part numbers and I would very much like to. So that you fully understand exactly what clarification I am seeking, please look at Figure 45 on page 142 of TM-24 which provides an exploded drawing of the rocker cover, rocker arms and pushrods followed by a tabular listing of the parts on page 143. If you take Item 3 in the exploded drawing as an example and look at the line for this item on page 143 you will see it described as "cover assembly, rocker 115-0134 (44940). I know that 44940 is Onan's manufacturer code, but can you confirm that 115-0134 is the Onan part number of the rocker arm cover assembly?

You have the mechanical expertise, but lesser experience just yet, to make your unit good as new. But you need to learn where and how to shop.

When shopping, Google is your friend. You can find Onan parts by Googling for "Onan XXX-XXXX" where the Xs are the Onan part number. A reliable source (but not cheap by any measure) isLawnmower parts. Parts for Generators, Pressure Washers, Power Tools, Chainsaws, Trimmers, Leaf Blowers, Snow Blowers, ATVs . And eBay sometimes has remarkable bargains, and sometimes not. For example, there is one seller who has NOS oil pumps like you need (Onan 120-0547) for $625 each... hardly a bargain unless you are truly desperate.

And the military surplus sellers you see on SS often have parts you need, in this case parts originally manufactured by Onan. Also, check out SmokStak.com.
Richard
Yes, I probably have the mechanical expertise, but that's the easy part (for me). Google is also easy for me, almost second nature these days. It is more difficult to source with the confidence that whomever I'm contacting will have what I need so I won't waste my time (my most precious commodity) and that I won't get fleeced. I think I'm only barely up to the steep part of the learning curve pertaining to where and how to shop, but at least I'm learning!

you could try delks surplus 1-336-629-0991 for parts they have new and used colmans surplus may also have some parts as for the gaskets you could mike the thickness of the old gasket meterial and go to napa and get a roll of the same thickness and use a ballpeen hammer lay the gasket meterial over the area of the part you want to make the gasket for and use the rounded end of the ballpeen hammer to lightly tap out the holes then put some of the bolts in the holes and tap around the edges and you have a new gasket napa might be able to get gaskets for you
Thanks, coyote. I talked with William Delk last week. At the time we talked, he told me his hands were all wet with diesel fuel, and I liked that! I also liked your discription of gasket making. In fact, I've made gaskets that way many times for old machines for which gaskets were unobtianable. I even bought a set of leather punches to more easily make the bolt holes. But since my time is probably more valuable than my money (at least up to a point in this case, since grid power was off again this morning for 6 hours due to a relatively minor storm) and since manufactured gaskets for these gensets are still available, I've decided not to make them myself.

I sourced gaskets from Ebay seller equipmentpartsservice, and pushrods from Ebay seller smw70ss. I also ordered a second set of replacement head gaskets over the phone from William Delk in order to have “just in case” and also to establish contact with another supplier. The set of two each of head, rocker arm cover and intake manifold gaskets from equipmentpartsservice cost $74 plus shipping. Delk's charged me $28 plus shipping for a set of head gaskets, a little cheaper than the eBay supplier. Four pushrods from smw70ss cost $29, again not counting shipping. I don't think I got fleeced, but if I was wiser about sourcing I probably could have saved some $.

If the gaskets and pushrods arrive by this weekend then I should have everything needed to fully reassemble and test, although I think it would be a stretch to get that far in one weekend. Meanwhile, I’ve been installing minor parts to the replacement block, including the high temperature sensor, low oil pressure sensor, start control switch, etc. I’ve also been thinking hard, trying to anticipate any issues not yet considered, more on this later.

I’d like to share with you the images of the carnage, as I promised in an earlier post. You can click on each image for a larger version.

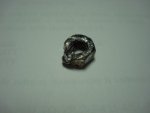
This first image shows the mangled 7/16” hardened nut that caused the mayhem:

Errant nut.jpg

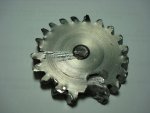
The second image shows the sheared off oil pump gear. You are looking at the inside (backplate side) face of this gear. Note the large deformed area and missing teeth.

Inner face of oil pump gear.jpg

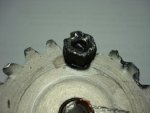
The third image shows how the errant nut fits perfectly in the large deformed area of the oil pump gear. This perfect fit leads me to believe that the nut flew up from where it had previously been lodged within the gearbox, somehow got bound up between the backplate and oil pump gear, which caused the oil pump shaft to begin to shear off. As the oil pump shaft sheared off, this nut then appears to have slid off the oil pump gear to lodge between the camshaft and crankshaft gears, binding them.

Nut setting in impression on oil pump gear.jpg

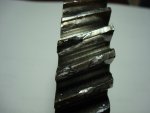
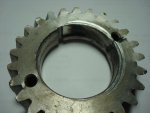
The fourth and fifth images show the crankshaft gear. The teeth are badly deformed, the ID is severely scored and the entire gear is cracked through one of the threaded holes intended to facilitate gear removal via a puller.


Mangled teeth of crankshaft gear.jpgCrankshaft gear crack and scored ID.jpg

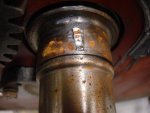
The sixth image shows the scored crankshaft journal beneath the attachment location of the crankshaft gear. The Woodruff key has been sheared off and it also appears that the slot in the crankshaft for the Woodruff key has been cracked and deformed. The crankshaft may be scrap, but I won’t know for sure until I pick out what is left of the Woodruff key. I may be able to have it electrospray welded and then turn it down to the correct OD and re-machine the slot for the Woodruff key.

Crankshaft journal with sheared Woodruff key.jpg

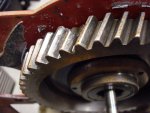
The seventh image shows the damaged camshaft gear, including the broken tooth.

Camshaft gear with broken tooth.jpg

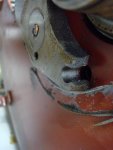
The eighth image shows the cracked oil pump base.

Cracked oil pump base.jpg

It seems amazing that one small nut could have caused all this damage.

The ninth image shows the two bent pushrods.

Bent pushrods.jpg

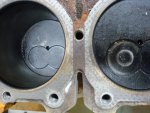
The tenth image shows the tops of the pistons in cylinders #1 and #2 of the old block. You can see the impressions the two valves faces left in the carbon deposits on the tops of their respective pistons after the pistons hit the two open valves.

Tops of Pistons 1 and 2 in old block.jpg

As I noted earlier, I’ve been thinking about what I may not have previously considered. One thing I came up with is the issue of retiming the IP. I will write more about this in my next post, since I have now reached my quota per post of ten images and I need to provide more of them to illustrate some aspects of this additional topic.

Best regards,

Stan
 

NJ_Toolnut

New member
83
0
0
Location
Bloomsbury, NJ
Hi again everyone,

As I noted earlier, I’ve been thinking about the issue of what must be done to retime the IP in my particular situation. I re-read the relevant section in the TM-34 several times, and also reviewed many past posts herein on IP timing. There appear to be two potential issues. The first is getting the correct lash between the cam and face gears and the second is making sure the port closing mark on the flywheel matches actual IP port closing. It seems to me that in my particular situation, if the gear lash is correct (i.e., if the correct shim is used) then the port closing timing will also be correct, unless I’m overlooking something. Regarding the gear lash and the shims, the old block has 0.012” stamped on the boss above the IP and used two 0.006 shims, while the replacement block has 0.014” stamped on the boss above the IP and uses one 0.014 shim. I intend to install the IP to the replacement block using the 0.014 shim storeman included when he sold me the replacement block. Do you agree that this will provide the correct gear lash?

Regarding the IP port closing timing, if I am not correct in my assumption above about the relationship between shim thickness and timing button thickness and that the currently installed timing button remains correct for the replacement block, I would greatly appreciate your advice regarding how to correctly time IP port closing. It is not clear to me which method (Method 1 or Method 2) is appropriate for my situation (both methods are discussed on pages 7-38 through 7-40 of TM-34). Figure 7-33 on TM-34 page 7-31 shows where the port closing dimension and installed timing button information is stamped on IPs. The image below shows the port closing dimension that was scribed on my IP: it is 1.085”.

PC dimension engraved in IP.jpg

The image below shows the installed timing button information that was stamped on my IP. This information is equivocal, since both a “1” and a “3” are stamped on the IP at this location.

Button numbers stamped on IP.jpg

I suspect you will inform me that there is no direct relationship between IP shim and button thickness and that the only way assure correct timing in my situation will be to flow the IP (Method 2). If this is true and I wind up needing a different button than the one currently installed, where will be the best place to source one, AMBAC?

It will be great to read your responses.

I’d like to thank you all again for your interest in this thread as well as for all of the good advice you have provided to allow me to very quickly climb the learning curve. Although it was unfortunate that this small nut happened to be in the wrong place at the wrong time, I have benefited from it, since what happened forced me to very rapidly learn these gensets and how to source parts for them. What happend has also resulted in my having met some very helpful and nice people, both in cyberspace and in person.

Best regards,

Stan
 

RichardR

Member
96
3
8
Location
Austin, TX
Stan,

Sounds like you are well on your way to making your engine good as new. As you are now aware, your engine is the military-tagged version of the civilian Onan DJF and almost all parts (maybe ALL parts) are interchangeable between your engine and an Onan DJF. The DJF is one version of the Onan J-Series engines that were manufactured beginning in about 1970, including the DJB, DJC, DJE and DJF. And some of the parts, such as the oil pump, are common to all the J-series engines. These were a very popular and long-lasting series of engines so there must be many, MANY thousands of them out there. The ones that are no longer being used for their intended purpose are waiting quietly in scrap heaps, warehouses and barns to supply you the parts you need at a very reasonable price. You just have to find them!

Yes, you have broken the code on part numbers listed in the TMs. Most parts have both military (NSN) and civilian part numbers. For the Rocker Cover Assembly, the Onan (CAGE code 44940) part number is 115-0134 and the NSN is 2805-00-484-7493. There may be multiple manufacturers listed, each with unique manufacturer CAGE code and part number, but you can be sure they are all functionally equivalent if they have the same NSN.

I have to admire your thorough "make it like new" approach to fixing your engine. It looked to me like you could have simply cleaned things up, replaced a few broken/bent parts like the gears, keys, pushrods, oil pump, etc., and been back in business. But you are really doing a thorough rebuild. Well, after all, that's a big part of the attraction of Green Iron. If you had just wanted a generator to make electricity, you would have gone to a big box store and bought some Imported Junk. This way you will have something to be proud of, and to give you something to tinker with forever.

Best regards,
Richard
 
Top
AdBlock Detected

We get it, advertisements are annoying!

Sure, ad-blocking software does a great job at blocking ads, but it also blocks useful features of our website like our supporting vendors. Their ads help keep Steel Soldiers going. Please consider disabling your ad blockers for the site. Thanks!

I've Disabled AdBlock
No Thanks