• Steel Soldiers now has a few new forums, read more about it at: New Munitions Forums!

  • Microsoft MSN, Live, Hotmail, Outlook email users may not be receiving emails. We are working to resolve this issue. Please add support@steelsoldiers.com to your trusted contacts.

Fixing the 1998 HMMWV

mrandig

Active member
Steel Soldiers Supporter
125
146
43
Location
Houston, TX
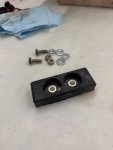
Going through my parts tonight, I came across something I seem to be missing.

I don't think this is something that got dropped during disassembly; I don't think I ever had this installed.

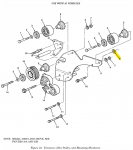
Can someone tell me anything about this (#8 in diagram)?
1746419882355.png

The TM -24P (Figure 33) lists this item as "washer, shouldered", but I've also seen them listed online as an "alignment washer". It's not shown in the -20, only the -24P.
1746418935367.png

Thanks in advance. If I need to buy it, then obviously I need to get one before I start putting things back together.

The only problem with a $1.25 part order is the $18.00 to get it mailed out.
 
Last edited:

TNDRIVER

Well-known member
Steel Soldiers Supporter
356
557
93
Location
Cleveland,TN
Going through my parts tonight, I came across something I seem to be missing.

I don't think this is something that got dropped during disassembly; I don't think I ever had this installed.

Can someone tell me anything about this (#8 in diagram)?
View attachment 946021

The TM -24P (Figure 33) lists this item as "washer, shouldered", but I've also seen them listed online as an "alignment washer". It's not shown in the -20, only the -24P.
View attachment 946020

Thanks in advance. If I need to buy it, then obviously I need to get one before I start putting things back together.

The only problem with a $1.25 part order is the $18.00 to get it mailed out.
I think there is a hardware store in Houston...................................................................
 

mrandig

Active member
Steel Soldiers Supporter
125
146
43
Location
Houston, TX
I think there is a hardware store in Houston...................................................................
I don't know about TN, but here in TX finding random hardware like this is becoming more hopeless by the day. The mom and pops have all closed, ACE must be going bankrupt as it never restocks any more, and HD, well HD never fails to disappoint.

My chances of finding this, in the correct size and dimensions, is very low. Unless I'm looking for something very, very common, I could spend hours looking for this, beyond any time already spent.

Easier to just order online, add a couple extras to justify the shipping, and work on other tasks until it arrives.
1746463188526.png
 
Last edited:

mrandig

Active member
Steel Soldiers Supporter
125
146
43
Location
Houston, TX
Power steering cooler, hydro-booster, and fan clutch hydraulic lines

Since I've got some room to work now, I'm going to replace the power steering cooler, hydro-booster, and fan clutch hydraulic lines. Once this is done, we'll replace and connect the hydro-boost unit, then replace any remaining hoses connecting to the power steering pump, since we still need to replace that unit also.

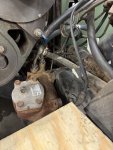
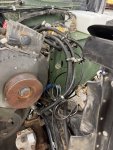
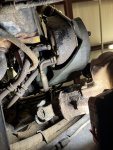
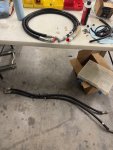
First, we'll replace the hoses at the steering box. The blue hose goes up to the hydro-boost, the plain rubber hose routes forward to the steering cooler.
20250505-124951-001.jpg

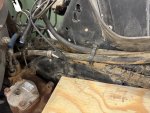
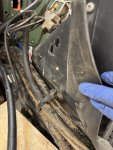
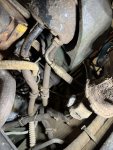
Hoses running along the frame to the cooling stack.
20250505-125210-002.jpg

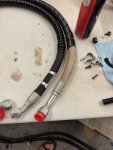
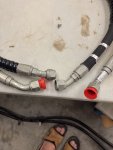
In addition to the high-pressure hoses, I've got a whole box of 3/8" transmission oil cooler hose. For this exercise, 25' should be plenty for anything that's identified as "make from hose" in the TM-24P.
20250505-130418-004.jpg

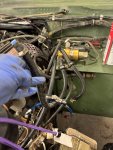
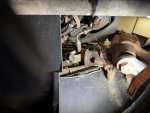
At the Cadillac valve, the left hose routes forward to the steering cooler, the center hose goes to the fan clutch, and the right hose will go to the hydro-boost, which we'll get installed here in a few.
20250505-130807-005.jpg

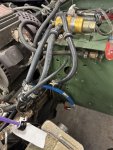
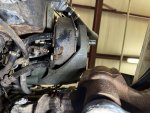
The two thick hoses go to the oil cooler. We'll also replace these hoses while we're down here.
20250505-131157-006.jpg

The fan clutch hose that's installed here matches TM-20 but not TM -24P. Per the later, this should be a different hose and have a tee with a bleeder and cap at the Cadillac valve, but that's not the case.

Since it all works as is, I'm not going to over-think differences between the two TM's. I just made that mistake in my last post. I'm just going to replace the hose and move on.
20250505-132038-008.jpg

It's hard to see here with so much clutter, but progress is being made. We'll put in the hydro-boost next.
20250505-132310-009.jpg
 
Last edited:

TNDRIVER

Well-known member
Steel Soldiers Supporter
356
557
93
Location
Cleveland,TN
I don't know about TN, but here in TX finding random hardware like this is becoming more hopeless by the day. The mom and pops have all closed, ACE must be going bankrupt as it never restocks any more, and HD, well HD never fails to disappoint.

My chances of finding this, in the correct size and dimensions, is very low. Unless I'm looking for something very, very common, I could spend hours looking for this, beyond any time already spent.

Easier to just order online, add a couple extras to justify the shipping, and work on other tasks until it arrives.
View attachment 946062
That washer is about as unique as can be. I have a suspicion its function is to locate the washer behind the plate as it is reinstalled. Simply a spacer. I would dry fit the plate and see if there is a space at the point where this washer resides. If so, any old washer will do. Epoxy one to the back and forget about it. My 2 cent .
 

mrandig

Active member
Steel Soldiers Supporter
125
146
43
Location
Houston, TX
Power steering pump removal

Not my finest hour. But as I keep finding myself saying, at least it's done now.

I was going to install the hydro boost unit and master cylinder, but I suppose I need to get this power steering pump out first. I need a new pump, as well as new hoses. I didn't want to remove everything all at once, as I'd never be able to figure out how to put things back together if I did. You eat the elephant one bite at a time...

The power steering pump slides up and out, but before that can happen, there's two low pressure hoses and one high pressure hose that needs to be disconnected. The pump will not come out with these installed.
20250506-131128-005.jpg

For the low-pressure hoses, the center one goes to the Cadillac valve, the other goes to the hydro boost unit. The high-pressure hose goes to the hydro boost unit also.
20250506-131244-006.jpg

Unfortunately for those of us wanting to stay clean, these hoses need to be removed from underneath the vehicle.

The low-pressure hoses are just 3/8" with regular hose clamps; the high-pressure hose needs a 19mm flare nut wrench.
20250506-132415-007.jpg

If you thought there was no more fluid left in the system, you'd be wrong. Watch your eyes, as not only is almost pint of fluid about to come out, there's also a lot of debris that likely to drop with it.
20250506-132947-008.jpg

Now I've got ATF on my hands, on my arms, on my coveralls, up my sleeves and all over the floor; but like I said, it's done now.
20250506-133244-009.jpg

There's a total of four bolts (15mm) the mount the pump into a "u-shaped" bracket. To remove, it's then up and out. Installation would then be the same process in reverse.
20250506-133434-010.jpg

Now I'm officially out of things to remove. In addition to the hydro boost unit and master cylinder promised earlier, we'll get the replacement power steering pump installed tonight also.
 
Last edited:

mrandig

Active member
Steel Soldiers Supporter
125
146
43
Location
Houston, TX
That washer is about as unique as can be. I have a suspicion its function is to locate the washer behind the plate as it is reinstalled. Simply a spacer. I would dry fit the plate and see if there is a space at the point where this washer resides. If so, any old washer will do. Epoxy one to the back and forget about it. My 2 cent .
Agreed. I'm going to put everything back together and see how it fits without. If it needs a shim, that's easy enough.
 

mrandig

Active member
Steel Soldiers Supporter
125
146
43
Location
Houston, TX
Torque wrenches

Time to start putting things back together. But first, we need to begin by setting the table. My take on setting the table is somewhat different than my wife's version, which involves multiple forks, as well as spoons I don't know what to do with. I also don't need to worry about whether the knife is facing in the wrong direction.
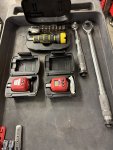
20250506-122349-001.jpg

These are all different types of torque wrenches, for different applications. TBH, it took me more years than I'd care to admit to start using these, and as a result, I always had leaks or worse. "Tight enough" usually wasn't, or alternatively, I'd just "wrench down" on whatever I was tightening until it either stripped or broke.

These wrenches can be digital, break-away or beam-type. The digital ones are nice, not only because you can see the torque value in either in/lbs., ft/lbs., Nm, etc. (I can't, because old eyes), but also because they have an alarm, and/or flashing light(s), indicating when you should stop tightening and move along.

What I'm doing is making sure we have the correct tools to ensure that all of our fasteners get tightened correctly. Where needed, the TM-20 includes not only has removal and installation instructions but also gives torque values in both ft/lbs. and Nm.

Just to state the obvious, including to my previous, current, and future self, make sure to use the torque specs provided.


Inch-pounds

The small screwdriver-style is for in/lbs. and is great for small parts. These are ideal for hose clamps, valve covers, carburetors, etc.
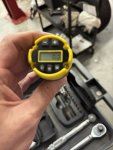
20250506-122417-002.jpg


Foot-pounds

The 3/8" drive will cover most jobs from about 15-75ft/lbs. Beyond that, we have the 1/2" drive, which is good for about 500ft/lbs. The larger one shouldn't be needed today, since we're not doing suspension work or anything too heavy-duty.
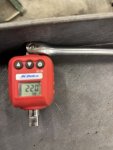
20250506-122623-003.jpg

I'm using this adapter with a breaker bar, as a regular ratchet adds more slack than I like and can affect accuracy. Also, these are not for initially tightening down fasteners, only for the final tightening.
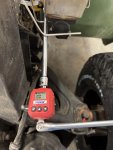
20250506-122801-004.jpg


Validation

As a final note, cheap tools and/or mishandled tools can give bad results. When in doubt, replace or at least compare to another tool (or reference) that's known to be accurate. More expensive tools can be sent out periodically to be checked, but most don't justify the cost involved.

Certificate of calibration attached. Any decent device should be checked at the factory when it's made; in this case, mine even came with a certificate. That said, the date on this one was years old when new, and looks more than a little suspicious, but since we're just talking about tools for home use, no worries. I'd still check this myself prior-to-use however, and then periodically thereafter.

I know, I know - it's a bit over the top, and having a certificate is not going to make any difference, but it came with the device. Almost makes the 145% tariff worthwhile. Tommy Lee says my torque wrench is A-O-K!
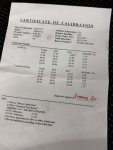
20250507-083743-004.jpg
 
Last edited:

mrandig

Active member
Steel Soldiers Supporter
125
146
43
Location
Houston, TX
did it go swimming???
Swimming? As in with or without a DWF kit?

That actually explains many of these issues. Dirt where there shouldn't be, rust where there couldn't be, random electrical corrosion, etc. Definitely a swimmer.

I was actually considering re-assembling the DWF kit, so it was functional. Seems like a lot of hassle and cost for something I'll likely not use.
 

mrandig

Active member
Steel Soldiers Supporter
125
146
43
Location
Houston, TX
Torque values (1)

As I'm putting everything back together, I'm just going to note the torque values (and wrench sizes). The torque specs below are from TM-20 unless otherwise noted.


Hydro Boost Unit
20250508-123323-008.jpg

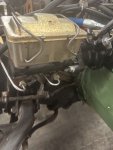
Four nuts total; mount to firewall. 15mm wrench size. Torque to 21 ft/lbs.
20250508-120918-002.jpg


Master cylinder
20250508-120943-003.jpg

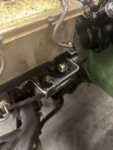
Two nuts total; mount to the hydro boost unit. 15mm wrench size. Torque to 22 ft/lbs.

*Note: two additional nuts are used for mounting the left side-shield bracket and brake proportioning valve.
20250508-121007-004.jpg


Power steering pump
20250508-123312-007.jpg

4 bolts total; two short / two long for mounting pump. 15mm wrench size. No torque specs given in TM-20.
20250508-121716-006.jpg

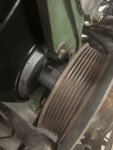
3 bolts total; two bolts for pulley cover, long bolt for securing pulley. 15mm wrench size. Torque to 37 ft/lbs.
20250508-121707-005.jpg
 
Last edited:

mrandig

Active member
Steel Soldiers Supporter
125
146
43
Location
Houston, TX
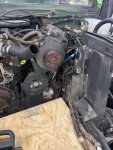
When we started working on this truck, time was measured in the number of days this project should take; now we've reached a point where time is measured by growing season. For a 10-day project, we are now at 120 days and counting.

I guess we'll try to get everything done by the summer solstice.

How it started:
20250325-161953-002.jpg

How its going:
20250508-173207-012.jpg
 
Last edited:

mrandig

Active member
Steel Soldiers Supporter
125
146
43
Location
Houston, TX
Torque values (2)

Some oldies but goodies. Before we get this truck buttoned up and ready to roll out, I wanted to check some of the work done previously, just in case something was done incorrectly or was left incomplete.


Oil drain plug

Plug only; 14 mm wrench size. Torque to 20 ft/lbs.
20250508-175335-020.jpg


Transmission drain plug

Plug only; T55 wrench size. Torque to 20 ft/lbs.
20250508-175348-021.jpg


Transfer case

Includes both upper and lower plugs; 1-3/16" wrench size. Torque to 35 ft/lbs.
20250508-175359-022.jpg


Front and rear differentials

Includes both upper and lower plugs; 3/8" HEX wrench size. Torque to 13-18 ft/lbs.
20250508-175411-023.jpg
 

mrandig

Active member
Steel Soldiers Supporter
125
146
43
Location
Houston, TX
Water pump installation

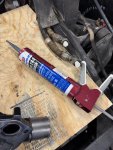
Time to break out the caulking gun again. I guess it's probably more appropriate at this point to just call it a sealant gun. I've got it loaded up with Black RTV this time.
20250509-084807-002.jpg

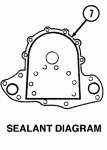
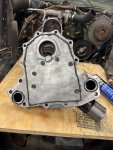
The TM-20 gives a diagram of how sealant should be applied to the back of the water pump adapter plate. In my case, the water pump and adapter plate come as an assembled unit, so it's one less thing I have to put together.
1746807998394.png

20250509-084816-003.jpg

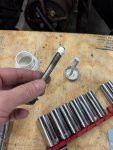
It's not prescribed in the TM-20, but any place I've got a bolt that threads into either a water passage or directly into the crankcase, I'm using some thread sealant. Better to be safe, than to have to re-do later.
20250509-090322-005.jpg

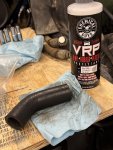
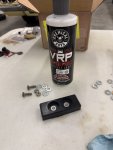
There are a few pieces that will need to go on here at the same time. This includes the crossover hose, heater hose, and oil filler tube. I'm just giving everything that's rubber a quick wipe down with VRP so it's clean.
20250509-090954-007.jpg

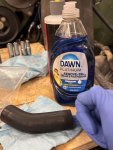
For any coolant hoses involved, I'm using Dawn dish soap in the inner diameter (ID), just so they slide on easier. My wife says the "new" Dawn formula doesn't clean as well as the "old" Dawn used to. That's not what I'm using it for, so I don't care.
20250509-091038-008.jpg

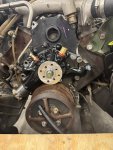
It's not a terribly hard trick, but everything here basically needs to be installed before the RTV sets for good. The black RTV gives me a little time to work, which is partially why I'm using it. Since the water pump is a bit heavy, an extra set of hands is helpful to make sure the pump goes on straight and doesn't mess up the sealant.
20250509-094851-009.jpg

Make sure everything looks OK, all parts are present, all clamps are tightened, all bolts are torqued. Once the mounting plate goes on, it's probably going to be too late.
20250509-102054-010.jpg

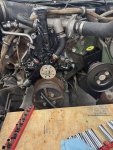
The mounting plate is the final piece here, as it bolts into the water pump on the passenger side. This is a water passage, so I'm using sealant on these bolts as well.
20250509-103959-011.jpg

Easy peasy. I need to stop here for a lunch date (early Mother's Day), so I'll come back to this a little later.
 
Last edited:
Top
AdBlock Detected

We get it, advertisements are annoying!
Sure, ad-blocking software does a great job at blocking ads, but it also blocks useful features of our website like our supporting vendors. Their ads help keep Steel Soldiers going. Please consider disabling your ad blockers for the site. Thanks!

I've Disabled AdBlock
No Thanks