• Steel Soldiers now has a few new forums, read more about it at: New Munitions Forums!

  • Microsoft MSN, Live, Hotmail, Outlook email users may not be receiving emails. We are working to resolve this issue. Please add support@steelsoldiers.com to your trusted contacts.

FLU419 SEE HMMH HME Owners group

Migginsbros

Well-known member
2,182
6,592
113
Location
Berlin-Germany
I am planning to get some work done on the SEE this weekend. I have some questions I am hoping that you all might have some answers that so far I have not been able to find in the manuals. I decided to break up the questions to individual posts so that they don't get jumbled up. So Question #1

I think that this throttle linkage should not be bent like this. The parts manual is not clear, but I am pretty sure from the picture it should not be. This is on the right side. 224-24P-1 0039-01 kind of shows it.


View attachment 702663

Is there any reason not to straighten it?
Its bend.
SEE Schubrohrmanschetten Endres 014.jpg
 

The FLU farm

Well-known member
Steel Soldiers Supporter
3,338
1,319
113
Location
The actual midwest, NM.
I have considered taking the radiator to a shop to have it checked out, but it seems like chasing shadows. Do any of you have any advice other than hook it up and run it a long time with the new fan belts to diagnose any potential issues?
I would pressure test it, and if it holds the next step would be to straighten out the fins before installing it. Good radiator shops are getting hard to come by, so why spend money on something that probably isn't needed?
 

rtrask

Well-known member
342
251
63
Location
San Luis Valley, Colorado
I will probably break when bent back , but will be necessary. You'll need to verify why it bent in the first place before it possibly happens agin after the repairs
I will try to be careful and heat it up, and anneal it so not brittle, but breaking is a strong possibility.

Sent from my SAMSUNG-SM-G935A using Tapatalk
 

rtrask

Well-known member
342
251
63
Location
San Luis Valley, Colorado
rtrask's questions

Next Question

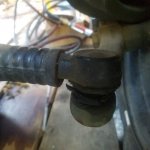
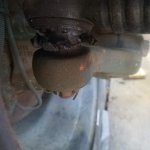
The boots on the ball joints are all trashed. The ball joints themselves seem to be in good shape.Has anyone replaced the boots on their joints, and does any one have a good source for ones that will fit? It looks like two sizes.

20171007_083609.jpg20171007_083624.jpg
 

rtrask

Well-known member
342
251
63
Location
San Luis Valley, Colorado
I would pressure test it, and if it holds the next step would be to straighten out the fins before installing it. Good radiator shops are getting hard to come by, so why spend money on something that probably isn't needed?
I am not sure how to pressure test it. Should I just get some hose, to block the openings and rig a Schrader valve to one hose and put 20 lbs in to see how long it lasts?
 

Migginsbros

Well-known member
2,182
6,592
113
Location
Berlin-Germany
I am not sure how to pressure test it. Should I just get some hose, to block the openings and rig a Schrader valve to one hose and put 20 lbs in to see how long it lasts?
You can fill a tub with water. Great enough for the radiator. Plug the hose fittings with cork or build some plugs with wood and duck tape. One of them to get compressed air in.
But be carefull, 7-14 PSI (0,5-1 bar)are enough. Look for bubbles.
 

The FLU farm

Well-known member
Steel Soldiers Supporter
3,338
1,319
113
Location
The actual midwest, NM.
I am not sure how to pressure test it. Should I just get some hose, to block the openings and rig a Schrader valve to one hose and put 20 lbs in to see how long it lasts?
I'd use the radiator pressure tester, with the hose connections plugged. But I get the impression that you don't have one.
So the Migginsbros method may be your best bet.
 

rtrask

Well-known member
342
251
63
Location
San Luis Valley, Colorado
Wouldn't it be better to make a new one? A piece of suitable rod and a bit of threading would be all it'd take.
Probably right, but finding metric rod, and buying the right size die will take some running around. Maybe the local auto parts store or Ace will have it all, but it will only take a few minutes to try heating it up. So for now the manufacture route is plan B.

Sent from my SAMSUNG-SM-G935A using Tapatalk
 

rtrask

Well-known member
342
251
63
Location
San Luis Valley, Colorado
I'd use the radiator pressure tester, with the hose connections plugged. But I get the impression that you don't have one.
So the Migginsbros method may be your best bet.
You are right I don't have a pressure tester, but even if I did the ones I have seen just replace the radiator cap, with one that is attached to a hand pump. I am doubtful that could be made to work in this instance.

Sent from my SAMSUNG-SM-G935A using Tapatalk
 

The FLU farm

Well-known member
Steel Soldiers Supporter
3,338
1,319
113
Location
The actual midwest, NM.
Probably right, but finding metric rod, and buying the right size die will take some running around. Maybe the local auto parts store or Ace will have it all, but it will only take a few minutes to try heating it up. So for now the manufacture route is plan B.
Next time you're at the hardware store, pick up regular rod in the closest size (which for a FLU would be 1/4 inch).
If you don't want to buy a die, buy two bolts - or better yet studs - with the correct thread and weld them to the rod's ends. That way you have a fully functional replacement rod in case the straightened stocker gives up, again.
 

The FLU farm

Well-known member
Steel Soldiers Supporter
3,338
1,319
113
Location
The actual midwest, NM.
You are right I don't have a pressure tester, but even if I did the ones I have seen just replace the radiator cap, with one that is attached to a hand pump. I am doubtful that could be made to work in this instance.
Forgot about that part. But it'd still work fine, as long as you connect the overflow tank to the radiator. Or most any pressurized overflow tank, for that matter.
 

FarmMOG

Member
42
1
8
Location
Texas/Oklahoma
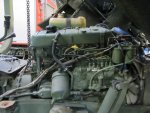
I finally changed the transmission fluid last week. Three drain plugs, two of which are magnetic and on the front and back of transmission, and the non magnetic middle plug. The oil coming out of the front and back drain plugs looked OK, but the middle plug had a lot of dark sludge mixed in with the oil. I reached up into the bottom of the transmission and removed all sorts of sludge. It makes me wonder why the middle plug is not magnetic, as are just about every other drain plug on the Unimog. Hopefully the GL4 synthetic fluid I used will keep everything working good for many years to come.

Every fluid I have changed has not looked real bad, but the magnetic drain plugs have been loaded with dark sludge. Makes me happy I listened to the advice on here and changed them. The only fluids I haven't changed are the power steering and antifreeze. My hydraulic tanks had leaks so I have added many gallons of AW32 to them, so they have almost been changed, especially the front system. Thankful that I was able to stop the leaking fairly easy.
 

FarmMOG

Member
42
1
8
Location
Texas/Oklahoma
I am planning to get some work done on the SEE this weekend. I have some questions I am hoping that you all might have some answers that so far I have not been able to find in the manuals. I decided to break up the questions to individual posts so that they don't get jumbled up. So Question #1

I think that this throttle linkage should not be bent like this. The parts manual is not clear, but I am pretty sure from the picture it should not be. This is on the right side. 224-24P-1 0039-01 kind of shows it.


Is there any reason not to straighten it?

I have been adjusting the throttle linkage on mine and found a few problems. The metal bracket coming off the foot throttle was bent, along with the bracket with the roller on it from the hand throttle. After straightening them both out, it really changed the adjustment of the whole linkage, and I am still working out all the fine tuning. If that rod is bent, then you might check the brackets on the other side, as this seems to be a weak point in the system.
 

rtrask

Well-known member
342
251
63
Location
San Luis Valley, Colorado
I have been adjusting the throttle linkage on mine and found a few problems. The metal bracket coming off the foot throttle was bent, along with the bracket with the roller on it from the hand throttle. After straightening them both out, it really changed the adjustment of the whole linkage, and I am still working out all the fine tuning. If that rod is bent, then you might check the brackets on the other side, as this seems to be a weak point in the system.
Yeah, have been wondering about what straightening it will do to the throttle adjustment, and wondered if it might have been bent intentionally as a way to adjust it in the field. The threads were "rust welded" pretty tight. I will use anti seize after annealing it. I may go ahead and manufacture a new one as FLU farm suggests, but I will use a die rather than weld it. I am afraid that would be too brittle and not last too long.

Sent from my SAMSUNG-SM-G935A using Tapatalk
 

The FLU farm

Well-known member
Steel Soldiers Supporter
3,338
1,319
113
Location
The actual midwest, NM.
With overnight temps now in the mid 20s, it was time to put away the mowers for the season. And when it involves using a FLU, that's not all bad.
Unfortunately, the reach of the HMMH was a about five feet too short for plopping the little mower in it's place.DSCN0847[1].jpg
 

The FLU farm

Well-known member
Steel Soldiers Supporter
3,338
1,319
113
Location
The actual midwest, NM.
Not sure how I got through life, until recently, without a craneDSCN0858[1].jpg. Okay, there are other ways to accomplish tasks like this, but it's so much quicker and easier with the HMMH.
 
Top