• Steel Soldiers now has a few new forums, read more about it at: New Munitions Forums!

  • Microsoft MSN, Live, Hotmail, Outlook email users may not be receiving emails. We are working to resolve this issue. Please add support@steelsoldiers.com to your trusted contacts.

HanksDeuce: 8" Lift, Bobbed, External Cage, A/C and more Project!

HanksDeuce

Well-known member
1,082
246
63
Location
Prairieville, LA
CDR: Thanks for the kind words. Believe me the talent behind my truck is definitely Kyle at BlackRockFab. I take the measurements and send Kyle the sketches. He adds his magic touch and fabs the parts.

The more I researched the WMO the more I wanted to get away from it. Louisiana and the feds have a lot of regulations that hinder using WMO as an alternative fuel (pay road tax, HAZMAT area if over a certain amount stored on your property, etc). At one time I had about 500 gallons of free WMO at my house. I tried a centrifuge kit from a very popular website, but it never cleaned the WMO enough that I would have put it in my deuce multi-fuel. Others have had great success in using WMO in their multi-fuels. One batch of WMO I put through the centrifuge I had cleaned the bowl like 10-12 times over the course of an entire day. Every single time the bowl had a heavy film in it. I think the centrifuge kit was too small for that application. Maybe it was meant for veggie oil or something else? Anyhow, the vendor gave me my money back. I got rid of the WMO to a guy on craigslist that uses a ditchwitch for his plumbing business. I do not have plans to convert the Cummins 6BT to be an oil burner.

My thoughts on ditching the multi-fuel and Spicer 3053A are twofold:
1) No automatic transmission that I could find would fit behind the multi-fuel without major surgery of relocating the transfer case. And I didn't want to do that.
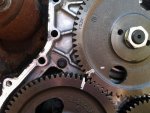
2) The consensus is the multi-fuel engine lives on borrowed time. I have read numerous threads where they just throw a connecting rod or explode for no reason. The owners took great care of them, but somewhere along the line the multi-fuel didn't like what they were doing and decided to pop. I haven't heard of any catastrophic Cummins 6BT failures other than minor issues with the killer dowel pin on the front timing cover. I took care of mine for less than $5.
 

HanksDeuce

Well-known member
1,082
246
63
Location
Prairieville, LA
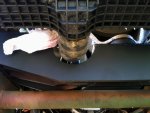
Took my Hydroboost brake pedal to a local metal fabricator and had it bent in 2 places to move it closer to the accelerator pedal. No charge.

IMG_3134.jpg

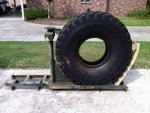
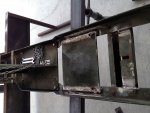
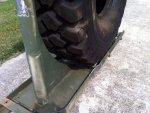
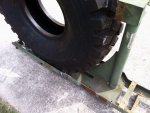
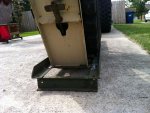
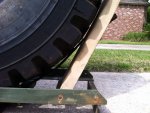
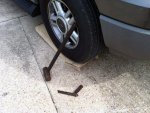
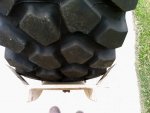
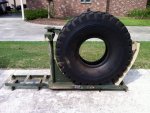
Next I took my spare tire rack (from CSM DAVIS) to a guy from work that dabbles in metal wizardry. Not everything I have can be fabbed by Kyle at Black Rock because shipping would kick my butt. The guy from work widened the spare tire rack in the area where my 16.00R20 Michelin XZL tire wanted to reside. This involved cutting the middle plates out, cutting and bending the rails out, and welding everything back in. And he only charged me $50! When I got the rack home I had to put a double bend in the bar that holds the end plate against the tire. The last modification was to bend the ears out from the end plate to mate up against the edge of the wider Michelin tire. I drove over the end plate with my Ford Expedition and beat the ears down with my trusty sledge hammer. Although I didn't take pictures of it the angled supports that attach the davit base to the bottom base do require spacers on both ends to clear the sidewall of the tire. No worries there.

IMG_3139.jpg IMG_3138.jpg IMG_3140.jpg IMG_3141.jpg
IMG_3142.jpg IMG_3144.jpg IMG_3145.jpg IMG_3146.jpg
 

HanksDeuce

Well-known member
1,082
246
63
Location
Prairieville, LA
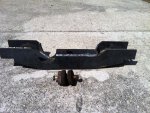
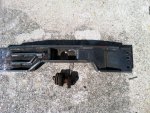
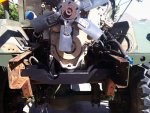
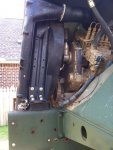
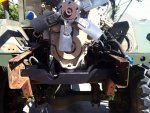
Next up was to install the Black Rock Fab beastly front engine mount for the last time. And no the final color won't be black. In typical Kyle fashion he adds tons of support in places that would otherwise be weak. In this example he welded flat bar to the bottom of the engine mount to strengthen the area that was weakened by coping out the half circle to fit the lower radiator pipe through.

Before / After Shots

IMG_3108.jpg IMG_3109.jpg IMG_3166.jpg IMG_3167.jpg

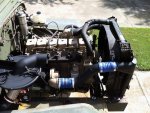
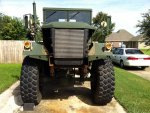
The metal wizard from my work stopped by and helped me with fitment of the large Freightliner radiator / intercooler assembly. Sure I could have gone with the smaller Dodge truck version, but what fun would that be? The wizard hacked off the factory Freightliner radiator side mounts, lowered them 6-3/4", then bolted them back to the radiator side rails. This relocated them perfectly to sit on the factory Freightliner rubber mounts that bolt to the top of the deuce frame. I need to fabricate two 1/8" shims (1 for each side) to keep the proper height of the radiator on those rubber frame mounts. You will see a washer on both sides in the pictures for mock-up purposes.

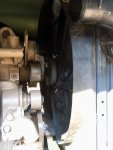
The hood still sits a little high (1/2" or so), but a little trimming, welding and painting on the hood will solve that. The radiator / intercooler assembly had this same angle of attack in the bus chassis I removed it from. The fan has plenty of clearance at the top and bottom. Remember, I removed the 3" hub spacer so the fan clutch is bolted directly to the fan pulley. There are 2 support bars that come down at a 45 degree angle to keep the radiator / intercooler assembly at the correct angle. The metal wizard took the support bars with him to make them longer. By God's grace and a metal wizard the radiator sits perfectly in the chassis so I don't have to grind on the front engine mount to make the radiator neck fit. Plenty of clearance Clarence.

Next up will be the intercooler pipes, lower radiator pipe, and turbo inlet pipe. I need to order a few silicone elbows for that.

IMG_3172.jpg IMG_3173.jpg IMG_3174.jpg IMG_3178.jpg
IMG_3176.jpg IMG_3175.jpg
 
Last edited:

HanksDeuce

Well-known member
1,082
246
63
Location
Prairieville, LA
Sorry for the lack of updates. I had a few websites to construct for clients, holiday trips, chemical plant outage work, etc.

1) I decided to abandon the idea of modifying the hood to make things work for the radiator/intercooler combo.
2) To keep the hood stock I need to cut 2 rows off the top of the factory Freightliner intercooler and blend the cast aluminum end tanks. Plenty of rows left for cooling.
3) I ordered a replacement turbo oil supply line ($50), transmission external filter housing ($40), & spin-on filter ($15) that come in tomorrow.
4) I replaced all of the radiator hoses ($26) and purchased new constant tension hose clamps from Freightliner ($5 each).
5) Rubber House provided 20ft of hoses for the tranny to external filter then to core below the radiator & back ($320 ouch). 100psi/300F rated, SS fittings
6) I finished all of my fuel lines ($140). I used stainless tubing & fittings (1/2" for supply, 3/8" for return & vent). At the 2 engine fuel line tie-points I converted to clear braided teflon (shows bubbles, cool factor, compatible with diesel fuel).

Pictures are coming soon!
 

HanksDeuce

Well-known member
1,082
246
63
Location
Prairieville, LA
I updated my HanksDeuce.com website to show the install of the Cummins engine + Allison transmission (50 pictures to view!).

Recent completions:
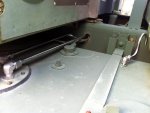
1) Finished manual shutdown cable install. I removed the factory electric shutdown solenoid crap.
2) Installed a new throttle pedal and cable.
3) Finished plumbing all of the Hydroboost. I just need 2 more fittings to connect the Deuce brake lines to the master cylinder.
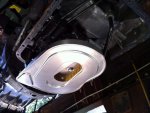
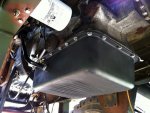
4) I replaced the Allison AT545 internal filter and I put a replacement 5.3" deep pan to replace the rusted one.
5) The intercooler was modified for the hood to sit flat when it's shut.
6) Fuel system is now 100% complete. The return line was bent today and put in.

Coming soon:
-Wiring mods
-Gauges
-Transmission shifter and tower assembly
-Cranking!!!

More updates to come soon.
 

M920

Member
892
25
18
Location
chama/nm
The truck looks AWESOME Hank and I really need to commend you on this project and your attention to detail!
As everybody else here on the board, I am very much looking forward to seeing the project finished, but in the mean time.....
please keep the pics coming!!!!

Soni
 

HanksDeuce

Well-known member
1,082
246
63
Location
Prairieville, LA
I really appreciate the kind words, Soni. Especially coming from a master military vehicle fabricator such as yourself. If I knew how to weld I would be a little more useful.

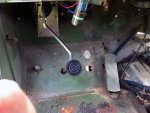
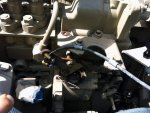
Below is a picture of the solution for using the factory Deuce shutdown cable on the Cummins 6BT. It cost $0.34 for the two 3/16" cable clamps from Grainger. The cable stops were bought from O'Reilly's in a box of 6 for $3.00. Guy from work stopped by and gave me some insight. We flipped the injection pump shutdown lever around and bent one of the ends down to clear the underside of the shutdown solenoid bracket. Make sure to use red thread locker on the cable stop screws. Before he left John even took the time to break off one of the shutdown solenoid bracket bolts in the intake manifold. What a guy!
 

Attachments

HanksDeuce

Well-known member
1,082
246
63
Location
Prairieville, LA
I updated HanksDeuce.com with a gallery for each of the following modifications:
-Killer Dowel Pin Fix
-Fuel System Mods
-Engine Painted
-Hydroboost Install

Just a few teasers...
 

Attachments

HanksDeuce

Well-known member
1,082
246
63
Location
Prairieville, LA
I updated Hanksdeuce.com with a picture gallery for each of the following modifications:
-5 ton Spare Tire Rack
-Front Engine Mount
-Intercooler Modifications
-Allison AT545 Internal Filter Swap

I'm now caught up on pictures. I need to get off my butt and finish the truck!

A few teasers...
 

Attachments

Section8

Member
503
6
18
Location
Little Fort, B.C., Canada
Well you have been running your rig for a bit now. I have a question. How do you feel your rig performs?
I am looking to swap my cummins in to my rig soon and thinking about 1600 tires as well.
My curiosity lays in how your cummins handles the 1600 tires. Do you feel your 6bt struggles to get the big rubber rolling? Did you end up with the 3200 give her springs?
I have a hydro boost brake master cylinder with 2 inch bore so according to your posts no problem stopping the big rubber.
Just don't want to have to wind the 5.9 cummins to red line just to get my rig rolling.
Anything you would have done different?
 

HanksDeuce

Well-known member
1,082
246
63
Location
Prairieville, LA
Unfortunately, the truck isn't running on the road yet. However, a major milestone was reached yesterday - I bumped the starter for the first time.

I'm trying to prime the fuel system, bleed the Hydroboost brakes, and finish installing a reconditioned transfer case. Good thing I have 26 days off in December...
 

HanksDeuce

Well-known member
1,082
246
63
Location
Prairieville, LA
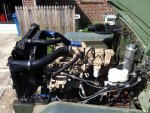
With help from a friend we got the Cummins engine running in the deuce today. Sorry, no video.

First, I tightened the clear reinforced hose on the mechanical lift pump inlet (driver side of engine) and pressed the primer bulb. About 50 thumb presses later I had fuel to the top of the fuel filter. I loosened 3 of the 6 injectors and my buddy watched them while I bumped the starter with the fuel shutoff pushed in. I pressed the ignition button until the engine tried to fire off. We tightened those injectors and loosened the other 3. I turned the engine over and just when it went to start I shut it down. My buddy tightened the injectors to avoid high pressure squirts on top of my roof. :D

After he tightened all of the injectors I pressed the starter button. The truck fired right up like it had been shut off an hour before. No smoke. No run away. I had my ladder setup to pull the safety pin on the air shutoff valve just in case. We let the engine run long enough for the thermostat to open. Good oil flow. Coolant level dropped a bit in the reservoir so the air in the engine bled out to the high spot (reservoir). I tested the power steering and it works just like the deuce engine with the Waterloo Specialties pump. I previously eliminated the 12v shutdown solenoid that all Cummins engines have. Instead, I'm using the factory deuce shutdown cable. My buddy helped me flip the factory shutdown bracket around and connect it to the shutdown cable. Works perfectly! Yesterday, I connected the push button ignition switch in-line with the Allison AT545 neutral safety switch. This will not allow the starter to be engaged unless the Allison is in neutral.

Next things to do:
1) install reconditioned transfer case
2) bleed Hydroboost brakes
3) order and then install all Autometer gauges
4) install 50 amp Vanner equalizer and run a circuit for the 12v Horton fan clutch (3 amp draw)
5) replace driver side front axle boot
6) install front bumper and attempt to make factory brush guard fit
7) tweak the side panels to work with the longer hood & fix the gaps

Things on the to-do list that will take a while:
1) install 24v 18k Warn winch
2) remove M105 bed and shorten it to give room for 5 ton spare tire rack
3) repaint the entire deuce desert tan
 
Last edited:
Top
AdBlock Detected

We get it, advertisements are annoying!

Sure, ad-blocking software does a great job at blocking ads, but it also blocks useful features of our website like our supporting vendors. Their ads help keep Steel Soldiers going. Please consider disabling your ad blockers for the site. Thanks!

I've Disabled AdBlock
No Thanks