• Steel Soldiers now has a few new forums, read more about it at: New Munitions Forums!

  • Microsoft MSN, Live, Hotmail, Outlook email users may not be receiving emails. We are working to resolve this issue. Please add support@steelsoldiers.com to your trusted contacts.

HanksDeuce: 8" Lift, Bobbed, External Cage, A/C and more Project!

HanksDeuce

Well-known member
1,082
247
63
Location
Prairieville, LA
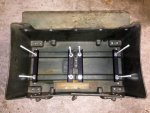
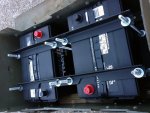
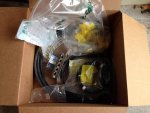
I updated Hanksdeuce.com with a picture gallery for each of the following modifications:
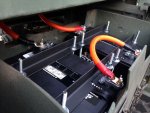
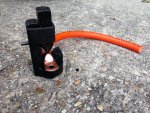
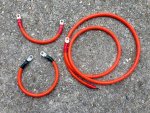
-Batteries & Cables
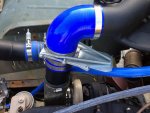
-Air Shutoff Valve

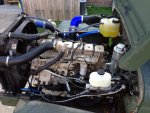
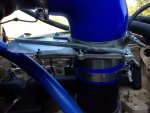
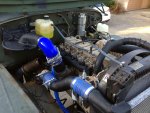
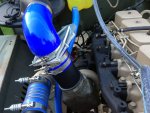
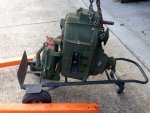
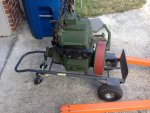
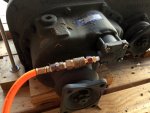
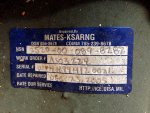
A few teasers... Tons more pictures on my website link above.
 

Attachments

HanksDeuce

Well-known member
1,082
247
63
Location
Prairieville, LA
Things completed:
- bled Hydroboost brakes (brake lines and Hydroboost unit) - stayed with silicone Dot5 fluid for brake lines and Synthetic ATF for Hydroboost side
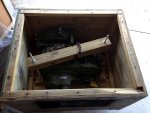
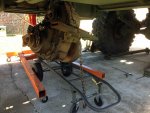
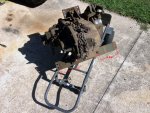
- transfer case swapped today. What a pain. Soldier B would have been a good idea. I should have sent a few memos out requesting one.
- Vanner 50 amp equalizer installed behind passenger seat (waiting on box from Amazon to complete install)

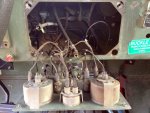
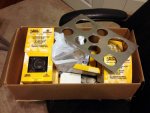
My Autometer gauges came in this week. I need to finalize a tach. Thinking about an ISSPro, but it may not work with my flexplate magnetic sensor. I ordered Blue Sea Systems fuse boxes, breakers, and a few more goodies from Amazon to finish the 12v + 24v add-ons.

Things to do:
- Install Autometer gauges
- Finish 12v + 24v wiring
- Install bumper + brush guard?
- Install replacement engine side cover
- Install driveshafts (all 3)
- Top off fluid in transmission
- DRIVE IT!
 

HanksDeuce

Well-known member
1,082
247
63
Location
Prairieville, LA
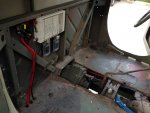
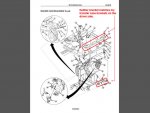
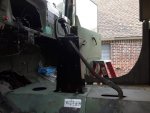
So it turns out a few days ago I installed one of my transfer case brackets backwards (long tubing on driver side). I didn't catch it until I tried to bolt up the transfer case shift handle. No harm done. I didn't bend or break anything. The TM doesn't show brackets like I have on the driver side. The rectangular tubing has 2 large holes for rubber bushings, but they aren't equally spaced from the ends. One hole is 8-3/4" from the end holes, and the other is 8". Make sure the shorter section is towards the front. In the pictures you can also get a sneak peek at the Vanner equalizer, 12v/24v fuse boxes, circuit breakers, and wiring. More to come!

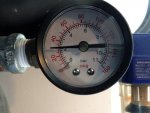
Before I installed the reconditioned transfer case I did a little experiment. When I hooked my shop air compressor up to the air piston on the transfer case it didn't budge until my regulator reached 30 psi. Food for thought. I know my Holset QE296B compressor cuts in at 105 psi and cuts out at 125 psi.

I updated Hanksdeuce.com with a picture gallery for the following modification:
-Transfer Case Swap

A few teasers... Tons more pictures on my website link above.
 

Attachments

HanksDeuce

Well-known member
1,082
247
63
Location
Prairieville, LA
In the past few weeks I have completed a few more big hurdles on my deuce project. No website updates just yet...

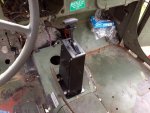
- installed new transmission shifter + tower assembly
- attached new 72 inch transmission shifter cable to Allison AT545 and tower (custom cable $53)
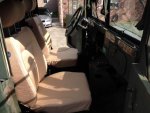
- installed two new USSC Group/GSS 9110 Air Ride Seats (no more lap belts or fixed seats!)
- bought 6 port manifold, DOT tubing, fittings, etc. to finish air system (xfer case, 2 seats, quick connect, horn, air gauge)
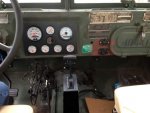
- removed instrument panel (gauge cluster), fabricated new dash panel for 7 Autometer gauges + 1 Tach (TBD)

More is on the way. Merry Christmas and Happy New Year to everybody that keeps up with my progress!
 

Attachments

HanksDeuce

Well-known member
1,082
247
63
Location
Prairieville, LA
I decided to replace the two leaky rear hardtop rubber seals on my deuce today. 3M Ultrapro Autobody Sealant #8300 is what I used.

A single tube from O'Reilly Auto Parts was $30. I can't believe it, but a single tube was more than enough to complete the job.
http://www.oreillyauto.com/site/c/d....oap?ck=Search_N2356_-1_-1&pt=N2356&ppt=C0171

There are upper and lower gaskets on the rear of the hardtop. I talked to m-35tom today and he recommended 2 passes on each level of the hard top mating surfaces.

To start I removed all of the bolts on the top rear gasket of the hardtop. I left the 2 bolts in the front windshield frame alone. A few 4x4 blocks were stacked on top of the transmission tunnel, and I capped it off with a scissor jack and a 2x2x24" block that pressed against the insulated hardtop roof. For reference it was ~50 inches from the top of the transmission tunnel to the underside of the insulated roof. I cut the sealant tube at the 5/16" mark and made a nice fat bead on the back edge and then a second pass on the inner side of the bolt holes. Work as fast as you can because this stuff sets up pretty quickly. I slowly lowered the roof back to the top mating surface and I installed/tightened all of the bolts. 1/4" drive ratchet with a short 7/16" socket on top and 7/16" box end on the bottom.

After I removed all of the lower mating surface bolts I raised the roof (slowly) again as I loosened the factory gasket with a flat blade screwdriver. The scissor jack and 4x4 blocks pushed the hardtop towards the bed as I raised the roof from the lower section. I removed the lower gasket and cleaned the mating surfaces. After I made 2 more beads of the sealant I slowly lowered the scissor jack. Just before the hardtop touched the sealant beads I pulled it into place at each bolt location (from inside) and dropped in a bolt/washer. Some tugging is required at all spots to align the hardtop lower section. Not much tugging required when you are doing the upper section first. Finish the job by lowering the hardtop and tightening the lower bolts.

No pictures this time because I was trying to beat the rain. After I came back from dinner it started raining pretty hard. No leaks to speak of. Wooo who!
 

HanksDeuce

Well-known member
1,082
247
63
Location
Prairieville, LA
A few updates from the past few weeks:

-modified headlight housings
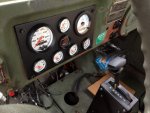
-new instrument cluster/gauges
-installed 12v accessory plug in dash
-installed dual USB charger plug in dash
-filled transfer case with 7 quarts of GL-1 (royal PITA)

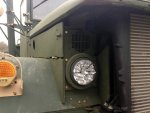
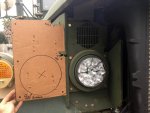
I modified the factory headlight housings to fit around the massive Freightliner radiator + intercooler on the Cummins 12v. In order to get the second set of LED headlights in the housings I had to flip the housings upside down. The primary LED headlights mount below the front bumper at maximum legal height for Louisiana (53 inches). I finished both headlight housings, but I'll leave a teaser of just the passenger side for now.

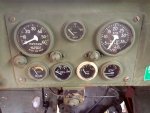
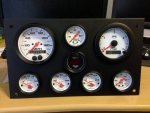
Next up was total replacement of the instrument cluster. I started with a sheet of bare aluminum and $800 in Autometer gauges. Quite a few holes later, aluminum primer, flat black top coat and a few prayers got me to where I am now. Just a few more days of wiring and the gauges will work.

Coming soon:
1. 3 digital volt meters (embedded in dash above instrument cluster) will provide voltage of each battery as well as total 24v voltage (including alternator).
2. Note: Pyrometer is on top of steering wheel in a separate pod.
3. I may install the factory fuel gauge in the dash by itself. People don't normally trust them, but mine has been very accurate.
4. Waiting on 4th and final 24v relay to finish battery equalizer, 12v fuse panel, 24v fuse panel installation. No parasitic draw will occur. All 3 come on with ignition only.
5. Steve6x6x6 made me bumper extensions and a winch plate for my 24v 18k Warn winch. I won't get them until 01/18/15.
 

Attachments

Csm Davis

Well-known member
4,167
394
83
Location
Hattiesburg, Mississippi
I decided to replace the two leaky rear hardtop rubber seals on my deuce today. 3M Ultrapro Autobody Sealant #8300 is what I used.

A single tube from O'Reilly Auto Parts was $30. I can't believe it, but a single tube was more than enough to complete the job.
http://www.oreillyauto.com/site/c/d....oap?ck=Search_N2356_-1_-1&pt=N2356&ppt=C0171

There are upper and lower gaskets on the rear of the hardtop. I talked to m-35tom today and he recommended 2 passes on each level of the hard top mating surfaces.

To start I removed all of the bolts on the top rear gasket of the hardtop. I left the 2 bolts in the front windshield frame alone. A few 4x4 blocks were stacked on top of the transmission tunnel, and I capped it off with a scissor jack and a 2x2x24" block that pressed against the insulated hardtop roof. For reference it was ~50 inches from the top of the transmission tunnel to the underside of the insulated roof. I cut the sealant tube at the 5/16" mark and made a nice fat bead on the back edge and then a second pass on the inner side of the bolt holes. Work as fast as you can because this stuff sets up pretty quickly. I slowly lowered the roof back to the top mating surface and I installed/tightened all of the bolts. 1/4" drive ratchet with a short 7/16" socket on top and 7/16" box end on the bottom.

After I removed all of the lower mating surface bolts I raised the roof (slowly) again as I loosened the factory gasket with a flat blade screwdriver. The scissor jack and 4x4 blocks pushed the hardtop towards the bed as I raised the roof from the lower section. I removed the lower gasket and cleaned the mating surfaces. After I made 2 more beads of the sealant I slowly lowered the scissor jack. Just before the hardtop touched the sealant beads I pulled it into place at each bolt location (from inside) and dropped in a bolt/washer. Some tugging is required at all spots to align the hardtop lower section. Not much tugging required when you are doing the upper section first. Finish the job by lowering the hardtop and tightening the lower bolts.

No pictures this time because I was trying to beat the rain. After I came back from dinner it started raining pretty hard. No leaks to speak of. Wooo who!
Hope you had your new doors and windows in place before you did this.
 

HanksDeuce

Well-known member
1,082
247
63
Location
Prairieville, LA
I wish some of you morale boosters would live closer to me. Heck, I'd buy the beer just to have you sit in the driveway on a couch and cheer me on. I probably would have finished months ago! Thanks for the positive feedback. I know most that browse the hot rod forum probably hate what I've done to the old girl, but to each their own I guess...
 

welldigger

Active member
2,602
16
38
Location
Benton LA
I wish some of you morale boosters would live closer to me. Heck, I'd buy the beer just to have you sit in the driveway on a couch and cheer me on. I probably would have finished months ago! Thanks for the positive feedback. I know most that browse the hot rod forum probably hate what I've done to the old girl, but to each their own I guess...
I might take you up on that beer offer.
 

gimpyrobb

dumpsterlandingfromorbit!
27,786
758
113
Location
Cincy Ohio
I love seeing others ideas and how they get things done. I try to have an open mind for most things, its hard to learn when you are un-willing to listen(or read).
 

HanksDeuce

Well-known member
1,082
247
63
Location
Prairieville, LA
I made some calls today to discuss the 12v illumination circuit for both the Autometer GPS speedo and ISSPro EV2 tachometer. Neither gauge has a separate light bulb harness like most gauges do. The Autometer GPS speedo has a rubber cover on the back, and the twist lock 12v bulb sits in a socket that gets power from the gauge itself. No go on a 24v bulb here. The ISSPro tachometer has an internal bulb of some sort as well. It may be a green LED for all I know because there isn't any cover on the rear to remove.

The solution I ordered today is a Hossen DC/DC Converter Regulator that steps down from 24v to 12v that's rated at 20A / 240W. $20 plus shipping. I will tap into the factory deuce instrument panel lighting hot wire (#49) and ground both black wires to the dash. The fourth wire splits off and goes to the illumination tab of the GPS speedo and tachometer.

Link to the Hossen converter:
http://www.amazon.com/HOSSEN%C2%AE-Converter-Regulator-Step-Down/dp/B00BWKXTUU

In other news my fan thermal switch came in today. Now I can drain a few gallons of coolant, install the Autometer coolant temp sensor, install the fan thermal switch, wire them both, and put the coolant back in.
 

HanksDeuce

Well-known member
1,082
247
63
Location
Prairieville, LA
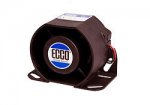
My backup alarm came in. 112 dB. $55
ECCO model 850N

I called Warn today and their customer service rep said they actually make a cover that will fit my Severe Duty 18 24v winch. $40 from Amazon. Part number is 91416. It's made out of neoprene. Should last a few years in the sun. Some of the reviews say the color changes from black to purple, but I don't mind buying a cover every couple of years.

Steve6x6x6 gave my wife the bumper extensions, backing plates, and winch plate today in Florida. I should be able to put my winch on next weekend after she gets back.
 

Attachments

Top
AdBlock Detected

We get it, advertisements are annoying!

Sure, ad-blocking software does a great job at blocking ads, but it also blocks useful features of our website like our supporting vendors. Their ads help keep Steel Soldiers going. Please consider disabling your ad blockers for the site. Thanks!

I've Disabled AdBlock
No Thanks