• Steel Soldiers now has a few new forums, read more about it at: New Munitions Forums!

  • Microsoft MSN, Live, Hotmail, Outlook email users may not be receiving emails. We are working to resolve this issue. Please add support@steelsoldiers.com to your trusted contacts.

IL - M1009 Will Not Start

48cj2a

Active member
311
34
28
Location
Central, IL
I reconnected the battery terminals and I moved the disconnect from the front battery negative to the center battery negative. I no longer have the 12v on the orange GP terminals of the GP Relay with the disconnect in the open position.

I tested the Push Button GP Relay Button and get the 12v on the orange GP feed as required.

I needed a second hand to bleed and prime the fuel system so hopefully can attempt that tomorrow after work. Can fuel be pulled through the system if I connect a pump to the IP return line and get a better prime and air bleed?

I did try about 4 cycles of starting with the new manual switch but no firing as of yet.

I want to confirm this...
Post #25 - They were all 2.8ohms during the #19 troubleshooting steps.
Post #45 - Glow Plugs all test nice and bright with the test light ground on the the GP terminal and the touching battery + with the probe.
Is there any other tests to confirm good or fried?
 
Last edited:

48cj2a

Active member
311
34
28
Location
Central, IL
I was reading over on Diesel Place and a guy suggests appying a 4 psi pressure on the return line hose to pressurize the entire fuel system and then you can also search for leaks of air or fuel.

My problem is getting my compressor regulated that low. Checking HF for cheap regulators in the paint supply area but most don't show gauges with good measuring between 0-20 psi. Guess I could try and work a valve stem in and check with a tire gauge to get it right.
 

cucvrus

Well-known member
11,474
10,441
113
Location
Jonestown Pennsylvania
You need the Mighty Vac pump. It will pressurise and vacuum. It will handle small PSI. It is also handy for bleeding brakes and fuel systems. Just a suggestion. I have 2 of them and use them regularly.
 

tim292stro

Well-known member
2,118
41
48
Location
S.F. Bay Area/California
Since GM didn't think the fuel priming issue through - you could install somthind like a marine priming bulb inline.

Others have installed fuel filter replacement bases with a priming pump built-in.

Which does bring up the fuel filter issue - are you still using the square fuel filter base? That is especially prone to leaking and causing the system to loose prime.
 

48cj2a

Active member
311
34
28
Location
Central, IL
Since GM didn't think the fuel priming issue through - you could install somthind like a marine priming bulb inline.

Others have installed fuel filter replacement bases with a priming pump built-in.

Which does bring up the fuel filter issue - are you still using the square fuel filter base? That is especially prone to leaking and causing the system to loose prime.
Yes still using the original base, I pulled the filter off to check the pressure switch area and it did look pretty wet so I removed it, tapped and inserted a stainless screw with Teflon tape in the hole.

I need a second hand to prime now and that is what brought me to the whole priming ideas of air pressure into the return line back to the tank and forcing the fuel through the entire system.
 

48cj2a

Active member
311
34
28
Location
Central, IL
Ended up taking the filter assembly off and and putting 10 psi of pressure between the the supply and return ports. Leaking at the heater at the top for sure. Put the cheap inline filter from the repair shop back on and applied 10 psi to the return line to pressurize the system but getting nothing out.

Completely removed #1 and #2 injector lines from the injectors and performed 5 cycles of cranking. I'm getting nothing out the injector lines. Is it possible to airlock the system?

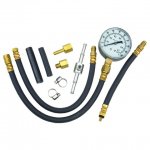
I need to get a low pressure gauge and recheck the lift pump again but my higher fule injection gauge was showing some movment between "0" and "10" about mid range so I assume its close to 5 psi.

fuelpressure.jpg

Any other ideas on fuel system diagnosis or pressurizing the system?

Whats the easiest method of removing and replacing the IP input hose without taking the intake off?
 

m1010plowboy

Well-known member
Steel Soldiers Supporter
3,924
2,767
83
Location
Edmonton, Canada
Ended up taking the filter assembly off and and putting 10 psi of pressure between the the supply and return ports. Leaking at the heater at the top for sure. Put the cheap inline filter from the repair shop back on and applied 10 psi to the return line to pressurize the system but getting nothing out.

Completely removed #1 and #2 injector lines from the injectors and performed 5 cycles of cranking. I'm getting nothing out the injector lines. Is it possible to airlock the system?

I need to get a low pressure gauge and recheck the lift pump again but my higher fule injection gauge was showing some movment between "0" and "10" about mid range so I assume its close to 5 psi.

View attachment 596077

Any other ideas on fuel system diagnosis or pressurizing the system?

Whats the easiest method of removing and replacing the IP input hose without taking the intake off?
I'm on the learning curve too and your thread is helpful. Somewhere in the pile of text I read that leaving the glow plugs out to prime the system makes things easier. My 1010 had an electric in-line pump added but the thought is, a healthy fuel system shouldn't need it.

http://www.steelsoldiers.com/showthread.php?48444-Electric-fuel-Pump-install
http://www.steelsoldiers.com/showthread.php?76287-Electric-fuel-pump-recommendation/page2


The only thing that can go wrong is fuel, tank, in-tank pick-up, filter, Lift pump, injector pump, injectors, glow plugs and all the wires, fuses, relays, fusable links and tubing in between them....how hard could it be? :wink:

Being on the learning curve I've had mechanical help and watched a few boys go through the priming process. It can take a while so the best advice is just keep at it.
Removing one glow plug, as per TM, will let you see if an injector is working. I'll wager a Turkey dinner she's running this weekend.

I couldn't find the info on reaching the IP lines from the back, behind and underneath the intake but I did find a custom wrench that could make things easier. Hope it works out and thanks for walking us through the electrical and glow plug battle info, very helpful.

http://www.steelsoldiers.com/showth...-Flare-Nut-Wrench-for-IP-Removal-Installation
 

rsh4364

Active member
1,372
15
38
Location
greensprings ,ohio
On both my 1009s the IP feed line is 1/4" rubber line.It takes small hands and arms to replace without removing intake,but not impossible.I would do a spin-on fuel filter and add a fuel pressure gauge also.It just makes sense.Now that you have GP situation taken care of you can move on to the fuel system.Lots of info here on that subject if you use search function.You either start at the the tank and work towards injectors,or start at at injectors and work towards tank.If you have decent compression,working GP system,fuel, and decent starter spinning speed it will start down to 0 degrees.
 
Last edited:

cucvrus

Well-known member
11,474
10,441
113
Location
Jonestown Pennsylvania
OK first off I don't have any fancy gauges to check for fuel. i remove the filter or open the bleed valve. Crank it over it is either pumping fuel or not. If not remove the feed line from the pump. Does it have fuel? If not change pump. A less then $25. repair. no need to change the fuel filter and add extra expense. Unless you have the money to burn you will gain nothing.
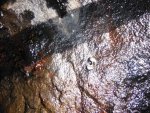
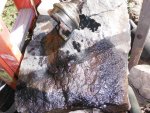
Real life experience: I have a truck that I did extensive rebuilding on. I changed everything and painted and fixed everything I could see needed fixed and painted. The truck was driven to my shop/barn. I completed all the work put new batteries in it and attempted to bleed the fuel system. Remember I drove this truck to the spot it is at in my garage/barn. I had the fuel tank out and replaced it all the fuel lines feed and return. I blew air through every line during reassembly. I could not get fuel up to the filter. I went to the pump feed line (in). Good fuel flow. I removed the flare nut from the lift pump (out) no fuel flow. Now i stand and think how can that be I drove this truck to my shop/barn from several miles away and I drove it into my shop/barn. ??????010.jpg009.jpgThe lift pump had some how decided it was time to quit working. The second picture shows the end of the lever on the fuel pump inside at the diaphragm. Just an idea to help you out. And really keep it simple no need to go wild and add and change things that are not needed. Fix the current problem not add to it. The more you change the harder it gets to diagnose and repair. And recently all I do is change things back to original when people bring me the their CUCV"s that are not starting and running. Many people think hey I read this on the internet and a friend told me to do this and that. Hogwash. So far so good. You have a minor issue. Don't add more expense unless that's what you like doing. Hey it is a nice day in south central Pennsylvania and I have lots of work to do on CUCV's and the like. Maybe even a little house breaking and burning to do. All in a days work here. Keep it safe and have a great day.
 

48cj2a

Active member
311
34
28
Location
Central, IL
Well the fuel heater is leaking for sure, as was the pressure switch, and the lower bleed screw was missing so fuel filter as it hangs is toast as is. I don't have a spare, so filter swap is needed for sure whether stock (which is notorious for leaking) after market spin on, or inline it came to me with which I don't think is big enough.

I'm not getting fuel to the #1 and #2 disconnected injector lines. Will fuel make it here with the green and pink wires disconnected from the IP?
 

48cj2a

Active member
311
34
28
Location
Central, IL
HOUSTON WE HAVE IGNITION!!!!!!!!!!!!!!!

I put the pink and green wires back on the IP and did a half dozon cycles of cranking and finally began to get a little fuel out the #1 and #2 injector lines so I put them back on. Another half dozen cycles and the batteries were slowing down so put it back on the charger and ran some errands.

Came back home and did another half dozen cycles this time with glow plug push button and it hit. Died immediately but I knew it was all air at this point. A few more 20 sec cycles of glow plugs, cranking, dying it finally took off. Bit of smoke and high idle, but after about 5 mins in slowly idled down.

I shut it off and restarted about 4 more times and put it back on the charger for the night. I have a few loose ends to tie up on the auxillary wires to the fuse box now and he wanted me to drive it for a week to make sure there are no issues before I give it back to him.

I think our glow plug and fuel issues are all resolved for the most part except what we end up with on a fuel filter alternative.

I had pulled the instrument cluster to get some access to tracing the wires and pulled each bulb to test them (replaced the 24v gauge bulb). I noticed on todays ignition cycles that the glow plug light was no longer illuminating so need to double check that circuit or bulb contacts (GP Controller Card is still installed but I'm not getting the ground to the solenoid). Also I never noticed before but what dash lights should be on at ignition on position (I have GEN1 and Oil Pressure only no GEN2), nothing while running.
 

tim292stro

Well-known member
2,118
41
48
Location
S.F. Bay Area/California
Everything should turn on for about a second or two as a lamp test. Once that's over, oil pressure, brake, and your gen lights should stay lit until the engine is running. Wait, low coolant, and W.I.F. shoulds be off during normal running - basically there should be no idiot lights on after you've gotten to idle.

Glad to hear the beast is breathing fire. [thumbzup]
 

48cj2a

Active member
311
34
28
Location
Central, IL
Could not have done it without your patience and consistance with coming back to the thread each day, as well as the others too who helped. I will say I learned a lot during the troubleshooting on this CUCV that I did not know or have problems with on my own when I swapped a Civy 6.2 in from a donor truck.

I'll pull the cluster again in the morning and check all the connections to the printed circuit overlay and then test with some power to ensure I have continuity for each of the lamps. I noticed tonight I wasn't getting high beam either. I'd also like to work something in to light up when I hit the GP Push Button too.

I still want to try and replace the IP input hose too but not looking forward to that one.
 
Last edited:

48cj2a

Active member
311
34
28
Location
Central, IL
Got the dash back together and did another little custom touch...

While I had the cluster out and was testing the different bulb circuits, I took the Seat Belt/Brake Warning window out and lightly scaped the seat belt lettering off the plastic lense. I then printed a new label on clear tape on my Brother label maker - GLOW PLUGS ! FIRED !.

I then I pulled the seat belt buzzer out of the fuse box and ran a wire with a terminal pushed in the second terminal from the left of the four and the other end out the firewall to the glow plug side of the GP Solenoid. Now when you push the GP Button you know for sure there is 12v on that side of the relay.

gpbutton.jpg fired.jpg

In case you didn't catch this in my earlier post: If anyone wants one pm me for my address and send me a SASE and I'll mail you the custom push label and the ISO GP Symbol labels.

cucvlabels.jpg

Still chasing no - GEN2, FWD, WIF, Brake at ignition on (Lamp Test) Getting 14v out of Gen1 and 30v out of Gen2.

Started up again - hesitated quite a bit so don't know if I'm bleeding back down over night but the filter does need addressed so maybe a check valve?
 
Last edited:

48cj2a

Active member
311
34
28
Location
Central, IL
Drove it to work today...noise in the flywheel area trying to start and prgressively getting worse.

Stopped after work to get a quick hair cut (Drill this weekend) and it would not start. Turned over a little then a spinning bendix sound so either the starter is not shimmed right or not engaging the flywheel would be my two guesses.

Pooring rain so had to have it towed 1/2 mile home.

Going to pull the flywheel cover tomorrow after work (weather permitting) and hope to find what I mentioned above or missing teeth on the flywheel but at least its back in the driveway.
 

rsh4364

Active member
1,372
15
38
Location
greensprings ,ohio
You really have a lot of patience with your friends truck,and that's what it takes with these old cucvs,I give you a lot of credit.I remember my first 1009 having a runaway starter and frying my wiring harness 3 days after my mom passed away,I didn't look at it for 6 months.But then I got back on it and loved it again,thanks for your posts.Now Im on my second 1009 and looking forward to a 1008 next year.
 

48cj2a

Active member
311
34
28
Location
Central, IL
Thanks, Its really giving me some great troubleshooting lessons and skills that I can use in the future as I work on my own 9, I just wish I would have gotten it a month sooner as we are beginning to get weather here and it won't be long before the snow is flying.

What sucks is he was going to stop over tonight about 15 mins before the starter issues so i could go over what I found and fixed and then talk about new 60Gs and a filter conversion. His plan is to take this to his vacation home in Colorado but wants to ensure its reliable starting and running before the trip out. I let him know this afternoon that it was making trhe noise and a little hesitate on starter engagement.

He did recently have a new 12v (smoked) and then new 24v starter put on so I'm hoping its just not installed right.
 
Top
AdBlock Detected

We get it, advertisements are annoying!

Sure, ad-blocking software does a great job at blocking ads, but it also blocks useful features of our website like our supporting vendors. Their ads help keep Steel Soldiers going. Please consider disabling your ad blockers for the site. Thanks!

I've Disabled AdBlock
No Thanks