• Steel Soldiers now has a few new forums, read more about it at: New Munitions Forums!

  • Microsoft MSN, Live, Hotmail, Outlook email users may not be receiving emails. We are working to resolve this issue. Please add support@steelsoldiers.com to your trusted contacts.

Locker install

DiverDarrell

Member
Steel Soldiers Supporter
629
24
18
Location
Port orchard, WA
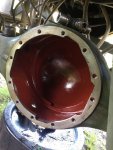
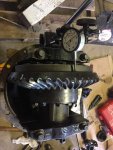
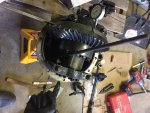
I picked up a locker for the rear of my truck from Bryce. Found a meritor center section takeapart and put back together manual online. Not for our axles but similar construction. Have it installed and put back together, now just need to finish setting the lash. IMG_0922.jpgIMG_0927.jpgIMG_0928.jpgIMG_0929.jpgIMG_0930.jpgIMG_0931.jpgIMG_0932.jpgIMG_0933.jpg
 

Nomadic

Active member
337
79
28
Location
Nevada
Nice. I was just reading that locker group buy thread. How is the locker activated? Is it a Detroit style where its locked when power is applied?
 

ramdough

Well-known member
1,554
1,729
113
Location
Austin, Texas
I am curious to see what you think of it in action. It looks easy enough so far. Now the critical part........


Sent from my iPhone using Tapatalk
 

DiverDarrell

Member
Steel Soldiers Supporter
629
24
18
Location
Port orchard, WA
Got it from Bryce he had them made, eaton/Detroit no spin lockers, I don't have his contact info handy I can send you it later. The best part is that it's 3.07 ratio gears its installed in.
 

ramdough

Well-known member
1,554
1,729
113
Location
Austin, Texas
where did you score the locker was it directly from meritor or someplace else
He got it from Bryce. He is a member here and the source. His info is on a locker thread somewhere. Use search and you will eventually find it. I don't have info off hand.


Sent from my iPhone using Tapatalk
 

DiverDarrell

Member
Steel Soldiers Supporter
629
24
18
Location
Port orchard, WA
Nice. I was just reading that locker group buy thread. How is the locker activated? Is it a Detroit style where its locked when power is applied?
its always on on until one wheel speeds up in a corner and it releases. Wish it was an arb but.. beggars can't be choosers. Only installing one in the rear. I'll post more photos of the gear lash set up. Ran out of time tonight.
 

ramdough

Well-known member
1,554
1,729
113
Location
Austin, Texas
Got it from Bryce he had them made, eaton/Detroit no spin lockers, I don't have his contact info handy I can send you it later. The best part is that it's 3.07 ratio gears its installed in.
This may be an obvious questions,but.......I assume you have a second 3.07 chunk as well for the front?


Who is setting up your backlash?


Sent from my iPhone using Tapatalk
 

DiverDarrell

Member
Steel Soldiers Supporter
629
24
18
Location
Port orchard, WA
This may be an obvious questions,but.......I assume you have a second 3.07 chunk as well for the front?
Who is setting up your backlash?
Sent from my iPhone using Tapatalk
of course I have the second chunk, lol. I actually had the gears before I had the truck. I'm setting the lash myself, using a meritor guide. Looking a the lite wear on the ring the pinion depth is good, now just to left right and preload
 

ramdough

Well-known member
1,554
1,729
113
Location
Austin, Texas
of course I have the second chunk, lol. I actually had the gears before I had the truck. I'm setting the lash myself, using a meritor guide. Looking a the lite wear on the ring the pinion depth is good, now just to left right and preload
I just had to ask..... could not resist.

I wish you luck on the backlash. It does not sound that hard, but the penalty for doing it wrong is huge. I wouldn't have the guts to risk burning a set of 3.07's.

Please post a review when you get everything up and running.


Sent from my iPhone using Tapatalk
 

DiverDarrell

Member
Steel Soldiers Supporter
629
24
18
Location
Port orchard, WA
Setting the gear lash took way longer than expected. FYI check the gear lash in a lot of areas and when setting the left right of the ring gear mark and use the same spots. What I found is that around the diameter of the ring lash varies from .010 to .018. Meritor new spec is .012 to .020 on similar but different axles. Because at first I wasn't using the same spots I kept getting odd readings from what I expected. Chances are I will stew on this tonight and start over tomorrow and double check everything from bearing pre load to drive side wear pattern and lash.
 

DiverDarrell

Member
Steel Soldiers Supporter
629
24
18
Location
Port orchard, WA
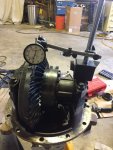
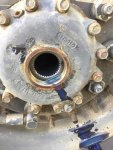
Ok everyone I dug back into it. Started over. First I reset the bearing preload. I did this by loosing the caps more so on the ring side. Then set up the dial indicator on the ring, while using two pry bars to wiggle the ring back and fourth. I adjusted the pinion side cap in until there was no movement on the dial indicator when wiggling. At this point you adjust each cap one more notch. This is proper preload. Then I re set the dial indicator to check lash, I chose 5 points around the ring and marked them. Then adjusted the caps both one notch at a time to move the ring towards the pinion. You must move both caps to keep the bearing preload proper. I did this one notch at a time until I was close to .010 lash. Then I started checking all the marked points. After adjusting, the best I could get was a range from .007 to .016. With a goal of .010 to .015. To answer why my range I checked the ring gear runout and found it to be .009. Worried I did a gear pattern check on all the areas and found them to have the same pattern for drive and coast sides. This center section is ready to install.
IMG_0936.jpgIMG_0937.jpgIMG_0938.jpg
 

DiverDarrell

Member
Steel Soldiers Supporter
629
24
18
Location
Port orchard, WA
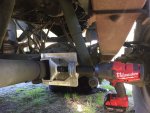
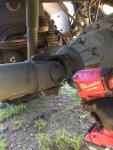
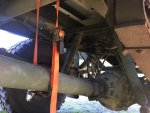
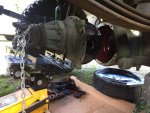
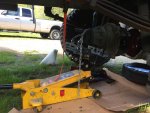
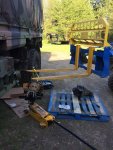
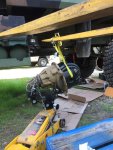
So today brought some much needed sunshine, with that I was able to disconnect the rear drive shaft from the differential and I drained the gear lube. So a couple things to keep in mind when doing this. Gear lube drains out faster than an oil catch pan drains, and its over 4 gallons. I underestimated the capacity but luckily had enough containers to get it all. Going to be a few more days before we have solid sunshine again so I'm on a weather delay.

IMG_0941.jpgIMG_0940.jpgIMG_0939.jpg
 

DiverDarrell

Member
Steel Soldiers Supporter
629
24
18
Location
Port orchard, WA
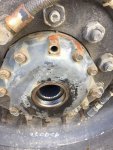
No rain project update. Today I got the rear carrier removed and replaced with the high speed carrier and gears. Hardest part was getting the drive shafts back in. Was not easy to get it all lined up, had to loosen the bolts a touch and jostle the carrier, swear a bunch, second guess myself, figure the locker must have the wrong splines, take it all a apart, check the axles in the locker, swear some more because they fit, goop it all back up with rtv, put it back together. Put the axles in and shake the crap out of them till they slide in. Laugh when they do, and torque it all to spec. Tomorrow the fronts go in.

IMG_1156.jpgIMG_1157.jpgIMG_1159.jpgIMG_1160.jpgIMG_1161.jpgIMG_1162.jpgIMG_1163.jpgIMG_1164.jpg
 

DiverDarrell

Member
Steel Soldiers Supporter
629
24
18
Location
Port orchard, WA
Took a bit longer because the hubs had to come off, and as I was pressed for time working between rain showers I didn't document like I would have liked. I only installed a locker in the rear, but high speed gears all around. Got the tires on today and moved it but still need to double check fluid levels in the axles and hubs. I also had a bad ctis seal in the front hub, that I think may be from someone removing the seals improperly and had scratches there the seal pressed in. This time instead of using grease to fit the seals, I used rtv, not the correct way to do things, but trying to eliminate future leaks.
 

ramdough

Well-known member
1,554
1,729
113
Location
Austin, Texas
I am looking forward to the driving review and final write up.

Do you have any good off-road tracks you can test out?


Sent from my iPhone using Tapatalk
 
Top