• Steel Soldiers now has a few new forums, read more about it at: New Munitions Forums!

  • Microsoft MSN, Live, Hotmail, Outlook email users may not be receiving emails. We are working to resolve this issue. Please add support@steelsoldiers.com to your trusted contacts.

Log of my M1165. Project Joshua.

TOBASH

Father, Surgeon, Cantankerous Grouch
Steel Soldiers Supporter
Supporting Vendor
3,596
3,518
113
Location
Brooklyn, NY
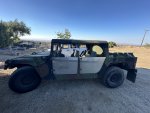
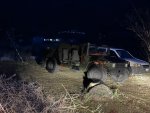
And as the sun sets on this trip visiting Eric and working on my M1165, I’m already planning my next trip. Engine is covered to keep the valley dry.

Next trip a/c test and recharge, oil washout and change, glow plug testing, new shoes for all four corners, B-pillars, seats, cover the big round sunroof, and doors. Maybe also another adventure 😉.

In the mean time wife and I are going to see the total eclipse of the Sun. (“I’m so vain”, with my hat pulled over one eye and the color of my scarf being apricot.)



IMG_4546.jpeg
 

TOBASH

Father, Surgeon, Cantankerous Grouch
Steel Soldiers Supporter
Supporting Vendor
3,596
3,518
113
Location
Brooklyn, NY
Bought some gaseous gold (R134) in Commiefornia.

A/c compressor functions. These rigs use a lot. I will fill more tomorrow.

Rear cool, front hot. I’m guessing this is the heater valve phenomenon???
 

TOBASH

Father, Surgeon, Cantankerous Grouch
Steel Soldiers Supporter
Supporting Vendor
3,596
3,518
113
Location
Brooklyn, NY
Guyfang reached out to me.

Update…

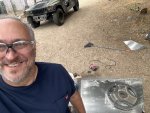
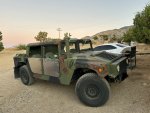
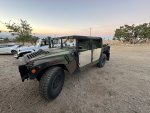
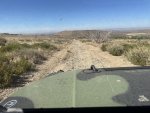
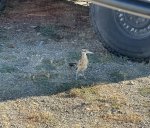
Worked with Eric Hummer H1. Then did a bit of offroad. IMG_6508.jpegIMG_6509.jpegIMG_6520.jpegIMG_6538.jpegIMG_6676.jpegIMG_6694.jpegIMG_6693.jpegIMG_6473.jpegIMG_6484.jpeg

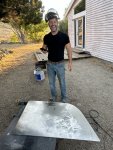
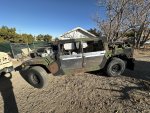
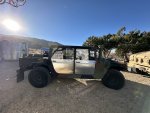
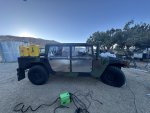
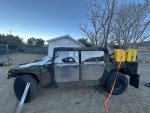
Transmission pan fixed. Wiper arms sourced and wipers placed. Windshield sprayer replaced. Genius Box glowplug button mounted firmly, b-pillars and covers reinstalled, along with reinstalling shoulder harness… and oh yeah, I (we) made half doors for about $60 apiece (sans handles). Hinges cost less than a buck apiece.

Upper hinge spindles are 1/2” longer than lower for ease of reinstalling. Hinges made of 4” and 2” 1/4” steel welded to create offset.

Doors are 1/4” Aluminum wrapped with Amazon gasket. Hand made with nothing but an outline and a 4 1/2” grinder. Later will add 1/4” thick 2” angle Aluminum as armrest. Might pad due to worries about heat in the Summer.

HMMWV soft door handles/strikers are on order.

Top windows will be a surprise.
 

Attachments

Last edited:

TOBASH

Father, Surgeon, Cantankerous Grouch
Steel Soldiers Supporter
Supporting Vendor
3,596
3,518
113
Location
Brooklyn, NY
Back in Cali.

Turret hole covers cost $350-400 shipped. 🤦‍♂️

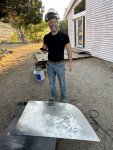
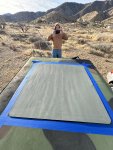
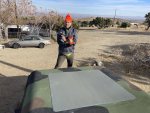
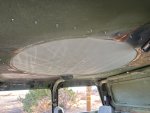
Eric and I just took 4’x4’ 18 ga cold rolled steel, painted it, and locked her down with silicone and self tapping screws.

Positioned on roof and taped off. Rounded corners. Painted with self etching primer, (only came in grey). Marked out every 3” for screws. Coated roof with silicone around outer edge AND inner turret. Placed piece inside the tape lines. Screwed her down. Wiped off excess silicone. Removed painter’s tape. DONE.

Inner screw points btw will be covered with Killmat and rhino liner. Outer top will be painted with army drab green rhino liner.

Looks AWESOME inside and out, even before rhino liner.

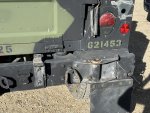
Mounted Rico Rino bumper bits for tire carrier. I’ll mount the carrier tomorrow after I get washers and underside locking screw.

IMG_8916.jpegIMG_8914.jpegIMG_2721.jpegIMG_8920.jpegIMG_8930.jpeg
 

TOBASH

Father, Surgeon, Cantankerous Grouch
Steel Soldiers Supporter
Supporting Vendor
3,596
3,518
113
Location
Brooklyn, NY
I would use rivets….
Thanks Steve… It was definitely an option.

Rivets have central holes… that leak.

I considered rivets but decided this was faster and easier and would easily complete the task during the 1/2 hour silicone workable time. Using rivets means things can shift during drilling, and I don’t have Clecos to hold things steady.

The screw points can easily be removed in less than 5 minutes with an angle grinder if they become a nuisance. They will be covered up so I’m not really worried.
 

Retiredwarhorses

Well-known member
Steel Soldiers Supporter
4,414
4,207
113
Location
Brentwood, Calif
Thanks Steve… It was definitely an option.

Rivets have central holes… that leak.

I considered rivets but decided this was faster and easier and would easily complete the task during the 1/2 hour silicone workable time. Using rivets means things can shift during drilling, and I don’t have Clecos to hold things steady.

The screw points can easily be removed in less than 5 minutes with an angle grinder if they become a nuisance. They will be covered up so I’m not really worried.
If you use crap rivets they will, you want to use cherry rivets, they don’t leak, those screws will loosen because the roof will flex, especially off road, you are better off welding it.
You do realize the entire truck is assembled with rivets right?
 
Last edited:

TOBASH

Father, Surgeon, Cantankerous Grouch
Steel Soldiers Supporter
Supporting Vendor
3,596
3,518
113
Location
Brooklyn, NY
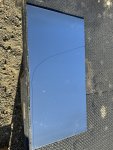
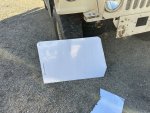
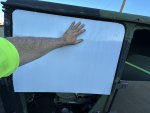
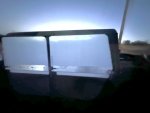
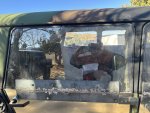
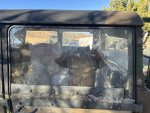
Windows cut and placed. Super clear so only the reflection gives them away. Rain stains, dirt, and pin-striping from the trails will fix that.

Door strikers and handles placed.

Windows are removable. Gaskets later today.

Who was it who said I don’t know how to fabricate??? 🙄🙄🙄 Seems like he stopped posting years ago.


IMG_8960.jpegIMG_8961.jpegIMG_8965.jpegIMG_8972.jpegIMG_8972.jpegIMG_8971.jpeg
 
Last edited:

TOBASH

Father, Surgeon, Cantankerous Grouch
Steel Soldiers Supporter
Supporting Vendor
3,596
3,518
113
Location
Brooklyn, NY
Just a note about the rear door strikers…

There are three screws. The lower two have a loosely applied connected backing plate. The upper screw has a free spinning rear bolt.

When placing a wire striker, DO NOT remove both striker screws at once. You will lose the back hardware plate and you will need to pop in rivnuts. Remove the lower, twist the fiberglass door striker out of the way. Reposition the rear plate and replace and tighten the lower screw. Then remove the upper screw and insert the lower end of the wire striker. The blind screw above that has a nut way back and up in the rear quarter. Reach it OR grind out the screw head and place a rivnut.

The wire striker sits HIGHER than the solid striker. You need to move the wire striker up one screw.
 
Last edited:

Retiredwarhorses

Well-known member
Steel Soldiers Supporter
4,414
4,207
113
Location
Brentwood, Calif
Just a note about the rear door strikers…

There are three screws. The lower two have a loosely applied connected backing plate. The upper screw has a free spinning rear bolt.

When placing a wire striker, DO NOT remove both striker screws at once. You will lose the back hardware plate and you will need to pop in rivnuts. Remove the lower, twist the fiberglass door striker out of the way. Reposition the rear plate and replace and tighten the lower screw. Then remove the upper screw and insert the lower end of the wire striker. The blind screw above that has a nut way back and up in the rear quarter. Reach it OR grind out the screw head and place a rivnut.

The wire striker sits HIGHER than the solid striker. You need to move the wire striker up one screw.
The nut plate is reachable on the passenger side by just unscrewing the fuel filler plastic.
On the driver side just reach up into the wheel well.
The hard striker vs wire striker is that way on all Hmmwv’s.
 

Unimog435115

New member
15
4
3
Location
Frankfurt, Germany
Back in Cali.

Turret hole covers cost $350-400 shipped. 🤦‍♂️

Eric and I just took 4’x4’ 18 ga cold rolled steel, painted it, and locked her down with silicone and self tapping screws.

Positioned on roof and taped off. Rounded corners. Painted with self etching primer, (only came in grey). Marked out every 3” for screws. Coated roof with silicone around outer edge AND inner turret. Placed piece inside the tape lines. Screwed her down. Wiped off excess silicone. Removed painter’s tape. DONE.

Inner screw points btw will be covered with Killmat and rhino liner. Outer top will be painted with army drab green rhino liner.

Looks AWESOME inside and out, even before rhino liner.

Mounted Rico Rino bumper bits for tire carrier. I’ll mount the carrier tomorrow after I get washers and underside locking screw.

View attachment 935885View attachment 935887View attachment 935888View attachment 935890View attachment 935891
Really nice job with the roof and especially the doors! Looking great! I just bought some for $$$ - no, for $$$$! May be you would have made some for me as well? ;-)
 

Attachments

Top
AdBlock Detected

We get it, advertisements are annoying!

Sure, ad-blocking software does a great job at blocking ads, but it also blocks useful features of our website like our supporting vendors. Their ads help keep Steel Soldiers going. Please consider disabling your ad blockers for the site. Thanks!

I've Disabled AdBlock
No Thanks