• Steel Soldiers now has a few new forums, read more about it at: New Munitions Forums!

  • Microsoft MSN, Live, Hotmail, Outlook email users may not be receiving emails. We are working to resolve this issue. Please add support@steelsoldiers.com to your trusted contacts.

M1007 - CUCV Suburban Clone Build Thread

Barrman

Well-known member
5,259
1,767
113
Location
Giddings, Texas
Back on topic from disturbing baby pictures.

I had written the other day how a M1009 front wiring harness plugged right in and at least the marker lights all worked. Yesterday I cleaned up my best set of front marker light lenses and put them on. The passenger side 1157 bulb didn't work when I wanted to see how the lights looked. I pulled the bulb and a little sliver of silver looking metal came out with it. Yep, the ground contact. O'Reilly's only had one replacement socket on the shelf when I stopped by on the way home. I will go ahead and replace them both once they restock. I was surprised they worked when I tried them. If you are messing with a Chevy CUCV. Skip the frustration, spend the $20 and replace both front marker light sockets. It isn't if the ground pin will break. Just when.

I am am keeping the 1157 bulbs front and rear incandescent. The little 194 bulbs I am swapping over to LED. That should still let my blinkers and flashers work, right? Along with keeping me somewhat complying with the "off-road use only" label on every LED light for sale.
 

Barrman

Well-known member
5,259
1,767
113
Location
Giddings, Texas
This week has been total frustration. I came in Monday with heater hose thinking once we put them on and it passed the pressure test I could let it run for more than a minute or so. Tuesday we found the thermostat housing leak. Wednesday another psi test showed the leaks at all 4 coolant passages from the heads. Very small and probably wouldn't leak coolant, but still leaks.

I have learned that 100 pumps on my pressure tester is almost exactly 4 psi in the system. Another 400 pumps this morning and it seemed to be holding. I came back 5 minutes later and it wasn't. It took almost an entire spray bottle of soapy water to find, but a very, very slow bubble formation between the water pump and pump backing plate was found.

Off with the front valence which is now pretty much complete. Out with the just put on again thermostat cross over and the water pump was pulled. There was just a hair width gap in the ambiotic sealant the manual says to apply between the pump and back plate. Maybe it will get all cleaned up and put back on this afternoon. I know I won't get the entire cooling system back together though. Maybe next Monday will start a better week.
 

Another Ahab

Well-known member
17,994
4,545
113
Location
Alexandria, VA
This week has been total frustration. I came in Monday with heater hose thinking once we put them on and it passed the pressure test I could let it run for more than a minute or so. Tuesday we found the thermostat housing leak. Wednesday another psi test showed the leaks at all 4 coolant passages from the heads.

Maybe next Monday will start a better week.
Good thing that there aren't ten days in a week, Barman:

- It might have pushed you over the edge. fat lady sings
You can do this. :beer:
 

Barrman

Well-known member
5,259
1,767
113
Location
Giddings, Texas
Thanks for the encouraging words. I'm frustrated with myself for not checking all these fittings when we put them together the first time. I actually did the thermostat one myself and then had a student who watched me do the other 4.

The water pump backing plate just seems like a fluke. Oh, it is anaerobic sealing compound. I don't know why I wrote what I did a few post up, sorry.

Despite the coolant system setbacks. Progress is still being made. Both battery trays are cleaned, sanded and painted now. So are both headlight buckets. We might get the front drive shaft cleaned up, stripped of the u-joint and painted while I mess with the backing plate this afternoon.
 

Barrman

Well-known member
5,259
1,767
113
Location
Giddings, Texas
It was a fluke. I started cleaning the backing plate with a putty knife. I don't know if the water pump backing plate is painted or coated with something black at the factory. Whatever it is, it was solid when we pulled it off the engine a year ago. It was still solid when we put on the serpentine belt reverse flow water pump last summer. Today it just didn't feel right when I was scrapping gasket stuff off.

It felt clean, it looked clean and it just seemed clean. Yet, it didn't feel solid when pushed on with a tool. From the end it looked like several layers of metal. I looked at some other backing plates and they weren't laminated. Out came an abrasive wheel. I took it down to bare metal. Several large flakes came off. Several spanned where the bubbles were.

Both sides got taken down to bare metal and I just finished putting the pump back on the engine when my afternoon class ended. Psi test on Monday.
 

Barrman

Well-known member
5,259
1,767
113
Location
Giddings, Texas
The hoses all got put back on this morning and the system pressurized. It held pressure for 45 minutes without loosing any. I consider that done.

We added 2 inches to the rod which goes between the transfer case and back of the engine. That makes it fit just right. Waiting for the paint to dry on that one currently.
 

Barrman

Well-known member
5,259
1,767
113
Location
Giddings, Texas
Started pulling the front axle apart. There was good grease in both front bearings. After the way the rear axle looked inside I was not expecting the front bearings to be worth anything. They cleaned up super nice with no wear marks or any visible defects. The rotors are shot and way below minimum thickness. I already got new ones ready to go on.

Once the coolant system passed its test. I went ahead and put the Banks air filter box on and all the plumbing that goes with it. The CDR valve plumbing required some creative thinking and an old front breather to CDR hose to donate about half its length at a certain curve to make everything connect. It looks good and with a CUCV mount for the CDR. Should work properly.

I already mentioned how the transfer case to bellhousing support rod had to grow 2 inches. Yet, the transmission crossmember had to go back 1.5 inches. The transfer case shifter rod had to gain 1.25 inches. I can only guess it is all a result of a longer transmission, aluminum t-case mount and swapping over to a 241 from a 208.

I also figured out that a GMT400 4L80E shifter bracket on the side of the transmission is different than what the TH400 in a square body has. The pivot center of the shift arm anchored in the frame is different. It moves in a different arc that will hit the floor. I need to get one off a 400 at home and swap it in. Once that is done then I can make a new mount for the frame end. We already added 3 inches to the shift rod which attaches to the column up by the master cylinder. Since that is adjustable, I just put extra on so we wouldn't end up 1/8" too short or something screwy like that.

I think all the wiring is done but can't test it. When I had the valence/radiator/cooling stack off last week to fix the water pump leak. I had to remove all my battery cables. I put them back on routed to make sense with the batteries on their mounts instead of hanging down by the front tires so I could do test with the batteries on foot stools.

The fenders, inner fenders and battery mounts are all ready to go on. It is just so nice working on the front axle with out the body in the way though. Once the front end is done, brakes are bled and transmission cooler lines are run. The rest of the body will get put on.

Next week is spring break for us so I should finish making the hood, grill, grill surround trim, head light surrounds, front bumper and grill guard all the proper shade of green at home. Maybe.
 

86m1028

Active member
1,687
17
38
Location
Murphy TEXAS
You are absolutely correct on the shift linkage from 400 to 4L80.
I used factory 4l80 linkage, had to move the linkage pivot back 1 bolt hole & drill new 2nd hole.

Again, really nice build !
 

Barrman

Well-known member
5,259
1,767
113
Location
Giddings, Texas
I have to beg a camera from the art teacher. She had surgery a few weeks ago and will be back in another week. Then I can start begging again.

I thought I was going to be watching the woodshop class this afternoon and have a rule about no tools come out unless it is just my students in the room. It turned out to be just my guys the first two hours. I asked them if they wanted to beat the crap out of something with a sledge hammer. They of course thought that sounded fantastic.

All of the cotter pins for the tire rod ends, drag link ends, stabilizer shock and ball joints were rusted/stuck. We just pushed them out of the way and broke them off pulling the nuts with long breaker bars. Then I showed them how to use a pickle fork and let them go to town. Both knuckles are off. The students thought getting to hit a truck was great.

The ball joints aren't sloppy loose, but they are stuck hard. Difficult to push like new ones but when they move, it just doesn't feel right. No grease zerk so I am assuming they are factory. Same with all the steering ends which were loose. I can't afford to buy all of the ends just yet, but I am glad I am replacing them. It should drive just like a 30 year old truck. Instead of like a 60 year old truck which is how I think it did the last time it ran.

I am now watching the other class and all work has stopped for the day. Maybe we can get the ball joints out of the knuckles tomorrow so we can start cleaning, painting and putting it all back together.
 

Barrman

Well-known member
5,259
1,767
113
Location
Giddings, Texas
Jennifer and I made the 400 mile each way trek to see Warthog Sunday. We came back with a truck bed full of parts and a really ugly M1009 shell. Just a few of the parts will be needed right now for the Cowdog project. The rest just add to my future use stash.

But, I got to use 3 of my trucks getting things unloaded here at home. We had some rain and the ground was softer that I thought so I got the borrowed F350 stuck in my field while getting into position to drop the "crumpled truck."

I thought it was slightly stuck with the street tires so I went for my M1009.
That didnt move move it so I got the M715. That didn't do anything either. That is when the whistler got to join the fun. I was working by myself so I really didn't want to use the winch. It took all 10 tires spinning, but it got the Ford onto solid ground.

I didn't get a picture of it but skid marks of all the m35 tires in grass just look kind of cool.

Now I get to sand and paint more things.
 

Attachments

Another Ahab

Well-known member
17,994
4,545
113
Location
Alexandria, VA
I thought it was slightly stuck with the street tires so I went for my M1009.
That didnt move move it so I got the M715. That didn't do anything either. That is when the whistler got to join the fun.
I was working by myself so I really didn't want to use the winch. It took all 10 tires spinning, but it got the Ford onto solid ground.
When you got ALL the toys out of your toy box, then you just know it was a good day. :driver::naner:


ABC.jpg
 

Barrman

Well-known member
5,259
1,767
113
Location
Giddings, Texas
Yes, it was a fun morning.

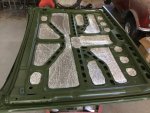
Just came in for lunch from playing "this should fit". I didn't want to throw away all the little pieces of insulation left over from doing the truck and figured sticking them in the recesses of the hood would help noise levels. I still plan to put a factory type blanket hood insulation sheet on with the black plastic push in things.
 

Attachments

Barrman

Well-known member
5,259
1,767
113
Location
Giddings, Texas
That is a '67 Cooper S. I drove it in high school. Well truthfully, I worked on it in high school and got to drive it I think 5 days my senior year. Colton and I have been autocrossing it the last few years. We broke the crankshaft last race. The rebuild is on hold until I get the Cowdog done.

That car is why I think square body trucks are solid, dependable, durable and well made. Compared to a British car, they are.
 

Barrman

Well-known member
5,259
1,767
113
Location
Giddings, Texas
I learned another new thing recently. Like most learning experiences, it was painful. Just my wallet this time, but painful still.

I posted a month or so about how I was hooking up the braided steel transmission cooler hoses. I even put part numbers in. That was all great until I went to hook it up and make the lines. Two didn't fit and I couldn't figure out what they should be. Now I know and will go back to edit that post if I can.

The transmission cooler lines on a square body diesel radiator are 5/16" tubing with "inverted flare, 5/16 inch fittings." I had it in my head 1/4" NPT adapters to -6 AN would fit into the radiator. I don't know why, but I had that wrong idea and bought adapters to plumb it that way.

Obviously, they didn't fit. I searched and searched for the part I needed to go from 5/16 inverted flare to -6 AN. Searches show lots of results but nothing that said 5/16 male to -6 male. All kinds of home made adapters have been made to do this. I almost went that way myself but I kept seeing pictures of GM radiators with a single adapter and braided steel lines bolted up. The part exist, I just didn't know what it was.

Finally on some 3rd gen Camero site I found it. Russel part number 640330. But a search for that brings up 1/2-20 to -6. I had come across that before and kept getting mad at the stupid internet for leading me down a blind alley again. I finally got a tap for 1/2-20 out and tested to see if it would screw into the radiator where the 5/16 inverted flare line screwed in. It did.

I was searching for the wrong name. The part was there right in front of me on every search. I just didn't know about the terminology change. Hopefully I'm not the only fitting adapter idiot out there and this will help someone else.

Once the the sun gets high enough to put my carport in full shade I will shoot the bumper, grill guard, top of the hood and headlight surrounds. I don't get many days off and would rather spend it making progress on the truck than mowing the lawn or something like that.
 
Top