• Steel Soldiers now has a few new forums, read more about it at: New Munitions Forums!

  • Microsoft MSN, Live, Hotmail, Outlook email users may not be receiving emails. We are working to resolve this issue. Please add support@steelsoldiers.com to your trusted contacts.


M1009 Little Red Riding Hood.

cucvrus

Well-known member
11,263
9,552
113
Location
Jonestown Pennsylvania
Where did you get the springs?? I'd assume somewhere local? Also are the dual shocks up front stock or something you added? Mine has a single shock up front. I'd prefer to replace the springs as well and won't be doing any lift kit either... I don't think it needs it really. Only have 48k on it but they are old springs.
I bought them at Stanley Springs on Cameron Street in Harrisburg PA. https://www.daytonparts.com/dpweb/A...info_company_history.asp&hdr=Dayton Parts LLC
I waited 2 weeks to get them but they were readily available. They make a huge difference on these old trucks. Merry Christmas.
 

cucvrus

Well-known member
11,263
9,552
113
Location
Jonestown Pennsylvania
Looks like someone got a nice cab.
CAB? This whole M1009 is nice. I have had this stashed away in my barn the past 25 years. I bought it with 12,K miles on it. It was a 28th Infantry Fort Indiantown Gap vehicle. I waited a long time to get an SF97. The first one arrived with an incomplete VIN . I received another with no VIN. Just when I was about to give up I received a correct VIN SF97 for it. https://www.gsa.gov/forms-library/united-states-government-certificate-obtain-title-vehicle. It only took a few years but good things take time. I had already began parting it out and had harvested both axles for other vehicles I was building at the time. No problem. When I received the proper legal documents I installed new axles front and rear. And then things just took off. I had planned on building a new truck but life happens at times and I just stored it inside my barn for a rainy day. So it's pouring now and I am getting on task. I have all the original body panels except the front fenders. I have others to use and am looking forward to a great production. Stay tuned for further progress. Merry Christmas.
 

Sezzo

Well-known member
122
262
63
Location
Bamberg (Germany)
Can you tell more about the new axles front and rear you installed, Rick? Are they the stock ones or are they different in any aspect and specification? Merry Christmas, busy beaver!
 

cucvrus

Well-known member
11,263
9,552
113
Location
Jonestown Pennsylvania
Of Course they are the stock M1009 axles. Do you think I would alter the perfect design. I was building this for me. I wanted to retain maximum value and authenticity. That is without the antenna brackets and any other add on stuff that wasn't much interest to me. I just sold 2 new in crate M1009 rear differential on Sunday. Take care and you have no worries. Merry Christmas.
 

ehuppert

Active member
279
138
43
Location
Upstate NY
wwrd: Another somewhat local option for springs is ATS which is just north of Philly (Souderton). I've used them for years, good product, very knowledge and orders were always shipped and received within a day or two!
 

WWRD99

Well-known member
Steel Soldiers Supporter
880
1,339
93
Location
York Pa
wwrd: Another somewhat local option for springs is ATS which is just north of Philly (Souderton). I've used them for years, good product, very knowledge and orders were always shipped and received within a day or two!
I live about 2 hours out from there but I'll check them out also...Harrisburg is 20 minutes! I don't like to ship stuff since it costs a lot to ship heavy stuff...I'd prefer an old truck/spring shop...we had one here in town but it closed years ago...they'd re arch and put new springs together in about any combination you'd want. This old town used to have all kinds of companies that made stuff...now not so much anymore except a few putting Harleys together...Auto machine shops is down to 2...both are run by NAPA...both have guys in them that should be retired and no new talent there to replace them when they do...decades of knowledge soon gone.
Cheers!
 

cucvrus

Well-known member
11,263
9,552
113
Location
Jonestown Pennsylvania
Today was a very busy and cold day. I started out early and hauled in 4 loads of firewood. I went to the barn and worked on the M1009 project. I was able to get all 4 new stock leaf springs installed. The electric heat helps but a barn is a hard thing to heat. I need to do some weather proofing sometime. For now I will try and live with it. It is much warmer inside than outside. I did not get the shackle bushings with the new springs. Getting the old/new energy suspension bushings out of the old springs was more trouble than they were worth. I bought a new set. P1000548.JPGP1000549.JPG I had the left front leaf spring in quickly. P1000550.JPG Getting the new U Bolts in place was a task. I improvised and adapted. These deep jawed welding clamps made the task easy. P1000551.JPGP1000552.JPG The outer U bolt was a new challenge. P1000553.JPG Easy as an L clamp. P1000554.JPG Sway bar bolt should have been started before I tightened the U bolts. But all is well it is in place and tight. P1000555.JPG I used a short 2 X 4 to get the front spring eye in place and aligned them with tapered pry bar. P1000556.JPGP1000557.JPG I have the right front all installed. I need to torque everything but things are moving along smoothly. I am alone all day today so I just work and stay busy.
 

cucvrus

Well-known member
11,263
9,552
113
Location
Jonestown Pennsylvania
Right rear I set the spring in place and right away I knew it had more arch. the shock absorber had to be removed at the top eye to allow the axle to drop more. P1000558.JPGP1000559.JPGP1000560.JPGSame deal with the springs in the rear. Easy. I noticed the centering pin was a bit long. I set the clamping plate on the springs and seen it extended beyond the area designed to accommodate the pin. That was as easy as a sawzall. P1000561.JPGP1000562.JPG Same deal the large welding C clamps and the U bolts went right in. I like them spread. P1000563.JPGWhen they are narrow I get into more of a struggle. All is well and I completed this right rear. P1000564.JPG Now onto the left side. I feel energetic and lucky today.
 

cucvrus

Well-known member
11,263
9,552
113
Location
Jonestown Pennsylvania
The left rear went so fast I hardly had time for pictures. Once I get the knack of things I am quicker and work less. This went well. P1000565.JPGP1000566.JPGP1000567.JPGP1000568.JPGP1000569.JPG And yes it was that easy. I had these springs out many years ago and install energy suspension bushings in them. Left front is all I must do today and then my goal has been met.
 

cucvrus

Well-known member
11,263
9,552
113
Location
Jonestown Pennsylvania
Left front was a breeze. Old spring out and new spring in place. start to finish about a 1/2 hour. P1000570.JPGP1000571.JPGP1000572.JPG My Son bought me this Snap-On prybar as a Christmas gift. P1000573.JPG It's shear weight was enough to assist in these springs install. That and my small 4 ton bottle jack. I know I have made someone happy today doing this task. I will try and get more done. Next I am pulling the transmission and getting it overhauled. It has 12 K on the clock but was built in 1983. That is a long time. It is much less expensive to just have all the internal seals and parts checked out thoroughly before it would just up and self destruct taking out possibly the case and other expensive assemblies. I just put a transmission in a plow truck that had a questionable transmission with reverse being slow of no. I used this busted transmission that had just been over hauled. It may look liDSCF6392.JPG
scrap but parts are parts. In the right hands that saved a guy a lot of money. Happy New Year. I know this progress made someone happy today. That makes it all worth the effort.
 

cucvrus

Well-known member
11,263
9,552
113
Location
Jonestown Pennsylvania
As I reviewed my build posts I noticed that the M1009 undercarriage looks very dirty. I had it looking like brand new a few years back. I replaced all the parts I could including front and rear axle assemblies. I carefully cleaned and painted every part as I reassembled it. Well all I can say is dust beats rust. After it is completed I will pressure wash the under carriage well. Since I know it isn't going to live in a museum and will actually be in dirt and rain again I guess that is about as good as it is going to get. gut genug? Happy New Year. I hope to get on the door removal, right inner fender removal and sanding the floor inside. Seems like a step backwards but I only installed the inner fender for a battery support. I have since built a plywood support to keep the batteries in place, Very easy and a temporary piece I have used many times in past builds. Thank you again for the positive and negative support. I am still learning. The spring change was a simple task. No band aids needed. working alone many times I can get more done with less explaining my next move. I just do it.
 
Last edited:

Sezzo

Well-known member
122
262
63
Location
Bamberg (Germany)
Dirt and dust always beats rust for sure. A dusty and dirty undercarriage can easily be cleaned if the surface underneath the dirt is free from rust and well preserved. And that is what really matters. A well preserved undercarriage free from rust. If this M1009 gets wet, dusty and dirty again by pulling a firewood trailer in the woods it must be an easy job to clean the undercarriage afterwards. Preserve it well, Rick. Did you think about an additional cavity sealing? This is not a must have option but worth to discuss about. Great job, Rick.
 

cucvrus

Well-known member
11,263
9,552
113
Location
Jonestown Pennsylvania
Today I started out with the task of getting my shop cleaned up. I have heat now. Not toasty warm heat but enough to work without breaking a sweat. I still wear a sweatshirt. The table at the front area needed to go.P1000574.JPG Before that I had a lot of things to put away. Then like magic a friend called me for my help. We all have one of them friends that we help every time they ask. This time he needed a tree cut up. Everything went well. Until things didn't go well. A big Oak tree had fallen in his pasture and tore thru the fence. I have a big saw. The first cut I made went well. The stump stood back up. That was interesting. I figured it was going to because it was not completely down on the ground and it started opening up during my cut and not binding. Second cut and the saw stopped cutting. ???? I changed the chain and made about 10 more cuts. This was a 20" round tree. I hit something again. Not know what up at about 20 ft. I started looking. On the bottom side was the culprit. This is the first one I barely hit it.P1000576.JPG I never knew it until the second hit hard. P1000575.JPG I used my climbing saw and cut out the area. Someone had screwed climbing steps into the tree many years ago. I never seen the tree and never seen the down side. P1000577.JPG I found a total of 6 Heavy Duty climbing steps in the other pieces I cut and cut them out with my small saw. P1000578.JPG Good thing about this story is it gave me no options but to return home. I went back home and back at my clean up. After a couple hours I had everything cleaned up and was ready to get to work on my project. P1000579.JPG 
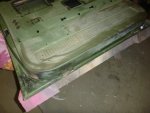
The table and the cushions made some insulation for my drafty east rear door. My project awaits. P1000580.JPGP1000581.JPGP1000582.JPGP1000581.JPG 
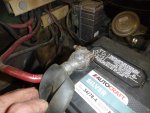
I never had these doors off this truck. They were never off I could tell by looking at hinges and the paint on the bolts. Well we can never say that again. I must get the right inner fender apron off again. I had the battery trays and inner fender aprons powder coated. Glad I did. they look great. More on next post.
 

cucvrus

Well-known member
11,263
9,552
113
Location
Jonestown Pennsylvania
I can see I need to clean the camera lens occasionally. Very dusty cleaning the shop and using a broom. I also remembered that the battery cable ends all need replaced. I picked up, this front battery from a friend that owns a battery shop. It was a bit melted at the post. P1000583.JPGI was able to use it for storage and engine exercise only. All the clamps are bad from being over tightened and crushed. That plus 35 years. P1000584.JPGP1000585.JPGP1000585.JPGP1000586.JPG Very nice battery trays. Powder coated 20 years ago. P1000588.JPGP1000589.JPGP1000590.JPGP1000591.JPG I have the right inner fender out and stored with all the other parts. Everything is going as planned.
 

Attachments

cucvrus

Well-known member
11,263
9,552
113
Location
Jonestown Pennsylvania
Bothe the doors are off the truck now. And I have the left one on the wood horse to be stripped out and gone over. An after thought is that I should have stripped them out attached. Oh well makes little difference. P1000592.JPGP1000593.JPGP1000594.JPG That is still the original paint that left the factory back in 1983. My next project is to get the floors cleaned and sanded. I wish they had the original paint but someone slopped CARC paint on the floor with a brush. The front drivers foot area will be clean because it has the plastic coating on it yet with no holes in it. I am going to remove it. P1000595.JPGP1000596.JPG So much for now. Tomorrow it is back to work at my day job. For a few days and off again for 4 days. Happy New Year. I am sure I will have progress to report. The Heat is on. It in the barn. WOW.
 

cucvrus

Well-known member
11,263
9,552
113
Location
Jonestown Pennsylvania
Today after work I had a friend over at the barn. He does paint-less dent removal as a profession. And I must say he is very good at it. I had a dent on the roof right at the top of the right A pillar. it looked like a softball had hit it. I assume someone had stood on it at some point many years ago. I showed him the dent and he was willing to give it a try. There was difficulty getting the dent adhesive to bind with the flat paint. He glued the pad to the roof several times and used the small slide hammer. It would pull the dent out slightly each time but the glue would release and have a slight discoloration from pulling paint surface the from the roof. Flat paint does not have a great adhesive surface. After a few tries the dent 90% out. It beat the grinding and filling method on this dent. The other small dents in the roof are just proof that this M1009 had a military life. With that task done and being in the low 30* mark I called it a day. More progress later on this week. Take Care and Be Safe. Happy New Year.
 
Last edited:

cucvrus

Well-known member
11,263
9,552
113
Location
Jonestown Pennsylvania
Happy New Year to all my MV friends and acquaintances. Thank you for all your likes and support during all my projects. I always hope to help someone out with good sound and accurate information and needed parts. I don't claim to know everything but I always like the out pouring of PM's and support I get here. Hoping to get under way on my 2 M1009 projects in the New Year. I hope 2021 is better for the whole world. Again I appreciate the business and the questions. Keep them coming. Happy New Year.
 

cucvrus

Well-known member
11,263
9,552
113
Location
Jonestown Pennsylvania
I wanted to start off the new year with a great progress report. Being that I sleep thru the passing of the new year I was well rested for a full day of tasks. The weather turned for the worst and some of my tasks outside did not get completed. All was well. I decided it was time I set some goals on my M1009 project. I looked at it and said I can do anything I wanted today. Hey why not strip out the doors. That is my goal for the day. Also I made a new rule that daily I must clean the shop and put all the tools back in place in the tool boxes. I started by setting the door on my homemade stands. P1000597.JPGP1000598.JPG The drivers side door was first. P1000598.JPG P1000599.JPG I had everything stripped out in an hour. Somewhere I missed this latch clip class. I struggle every time to get the clip off. Of course I could just snap it off but I want to be able to reassemble the door and latch. I use an old steak knife and flip the lock open on the clip. It works. I couldn't show anyone how to do it. I just do it. P1000600.JPG P1000601.JPG P1000602.JPGThe door looks pretty good. You got to like when the steering wheel chain was slammed in the door many times. I eliminated the chain on every CUCV I ever owned. P1000603.JPG I also noticed that the early CUCV's had plastic rivets holding the nomenclature on the door. P1000604.JPG I drilled them out so I could properly paint the door inside and out. P1000605.JPG The drivers door was completed and I still had plenty of time to spend working in my barn. The electric heater was on and it wasn't T shirt warm but warm enough. And it was freezing rain outside so I was warm and dry. I will post more next post. Happy New Year.
 

Attachments

cucvrus

Well-known member
11,263
9,552
113
Location
Jonestown Pennsylvania
This is an over all condition of the drivers door. It is not perfect and it does have a few dents. But overall it looks great and I feel the patina is correct for the age and type of vehicle it is. This is an all original truck with the original body panels with exception of the front fenders. P1000607.JPG P1000608.JPG P1000609.JPG P1000610.JPG I did find both of the upper door reinforcements in the inside of each door still attached. P1000614.JPG The door rubbers and the compact fluorescent light were all scrapped. I think 25+ years with the light was a good run. It stopped working 1 to many times today and I gave it an adjustment with my shoe. P1000615.JPG Happy New Year.
 
Top
AdBlock Detected

We get it, advertisements are annoying!

Sure, ad-blocking software does a great job at blocking ads, but it also blocks useful features of our website like our supporting vendors. Their ads help keep Steel Soldiers going. Please consider disabling your ad blockers for the site. Thanks!

I've Disabled AdBlock
No Thanks