Looks great!! I have a glass bead blaster that you can use anytime and a kid that would do it for you no problem!So, as you all know I have been sanding the floor of my M1009 for over 6 months. I get very tired of it and move on to other projects. Understood? When the military had the M1009 they added some sort of brush it anti-skid to the floor and some time someone brushed in green CARC paint on the side walls and all the way up under the dash and kick panels. They did a very POOR job. It may be what saved the floor and I could have just sprayed Line X over it or added a rubber mat. I was leaning towards LineX and then decided to just get it smooth by sanding it apply a sealer and topcoat it with Sherwin Williams CARC green. I was nearing completion of my sanding efforts and sanded the dash face. I was blowing out the dust and it just kept coming out of everywhere. The edge under the dash looked like it was washed in mud. I suspect 40 years of setting around in dusty environments tends to do that. I peered up under the dash and everything looked like crap with dirt and dust everywhere. That was about all I needed to see. I could only imagine my excellent paint on the floor and looking up under the dash at all the rusty, muddy, dusty, dirty parts. I already had the heater box out, so I thought why not. I have stripped CUCV's down to bare bones in the past and reassembled them. No problem. I was hoping to just paint and move on. I did NOT like the end results and now was the time to correct it. I wanted to have a CUCV that looked great everywhere I looked and what I see selling and the prices these days I was determined to build a masterpiece. 4 hours and I stripped out everything except the ashtray. View attachment 901565I I will take that out when I recover from sweat blindness. I mowed grass and split wood today also. The camera lense is even fogging up as it was in the house in the A/C. The back is completely sanded. View attachment 901566 I removed the brake pedal and the e brake pedal assembly. Why would I have gone thru all this and looked up under the dash to see this horror. View attachment 901570 I will clean and paint everything as it is being installed. The wiring harness will look like new after a good cleaning and all the connections cleaned and greased. The steering column can be rebuilt, and everything cleaned and serviced. View attachment 901568 I left the wiring harness attached to the steering column so if I need to I can plug in the bulkhead connector and start the vehicle. I will say it sure made taping up the interior a lot easier. I don't have to tape up anything. I can even remove the 4WD shifter that I cleaned, sanded and painted. That was easy. I could not even get tape to stick onto the dash edge to cover it. the dust and flat paint made that a mess. View attachment 901567 Thanks for looking. I have lots of work to do. I should have done this from the get/go. Be Safe. See you in Church.
-
Steel Soldiers now has a few new forums, read more about it at: New Munitions Forums!
M1009 Little Red Riding Hood.
- Thread starter cucvrus
- Start date

More options
Who Replied?cucvrus
Well-known member
- 11,478
- 10,505
- 113
- Location
- Jonestown Pennsylvania
The past few evenings after working in the blast furnace we call Earth I came home and sanded more areas in the M1009 floor and cargo area smooth. If I was to be doing this for hourly pay i would be getting a nice payment. I am SAD to report the jack storge decal is gone. I attempted everything to salvage it. I finally took the razor scraper and removed it. It fell into a thousand pieces. I vacuumed them up and sanded the area smooth. Time is not well spent saving things that mean very little in the end. I like details but clean crisp details. I had no way to cover and remove the cover after painting. I am even fearful of the warranty sticker on the dash panel. It appears to be loose. I taped up the shifter and ran a strip of tape and plastic across the back frame rails and across the cowl screen up front. I am going to plan on spraying the grey sealer on Friday after work and let it set and dry a few days. I have lots of property maintenance to complete and am hoping for fair weather. I am happy the mindless sanding has come to an end. I doubt i will ever engage in such another massive hand sanding project. But in the end, I have an M1009 Blazer that has a tub with 98% rust free. I did find some minor corrosion in the kick panels to floors and at the rear riser I had a crack. I did have to weld a few cracks in the floor that were 1/4" or less. Normal M1009 stress punts from large behinds bouncing in the seats on the tin floor. Have a Great Day and Be Safe. No pictures today. Maybe some later when I begin a complete washdown of the cargo and passengers area. I use a spray bottle and PPG DX330 wax and grease remover to clean the entire surface being painted. Thank you for the support.
cucvrus
Well-known member
- 11,478
- 10,505
- 113
- Location
- Jonestown Pennsylvania
Last night I washed out the entire interior of the M1009 tub with PPG DX330. I washed and dried it twice so I was sure it was clean, and the sealer would not fisheye. I was able to apply a nice smooth coat of PPG grey sealer. White sealer was my normal, but I only had the grey in stock, so it matters not the color just that it is sealed. The sealer I use assures a good seal of the metal and gives the topcoat a nice smooth surface to adhere to. I will post pictures later. I plan on applying 2-3 coats of the Green CARC paint later on this AM. I have lots of plans and will see how things go as the day progresses. Thank you for looking and Be Safe. I am very happy this mindless CARC sanding is over inside the cab. I just wanted to preserve a very nice, rare M1009. Like I said this is an early on model as it was built in August 1983. That will make it 40 years old next month. More pictures and progress report later.
cucvrus
Well-known member
- 11,478
- 10,505
- 113
- Location
- Jonestown Pennsylvania
It has been a long successful day for me. I started out at 0500 and worked at my FT job till 1000. Came home and sprayed the CARC green in the tub area of the M1009. It came out well and made all the months of sanding worth the effort. I wouldn't want to do this for pay. I don't think anyone would pay me as much time and materials as I used. The sealer from Friday evening. 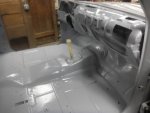
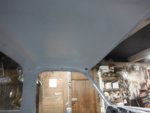
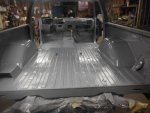
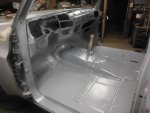
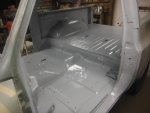 I was happy with the results, and I know it will make a difference in the finished product. This morning the weather was fairly decent. It was not real hot and not cold. So perfect day for painting the CARC green.
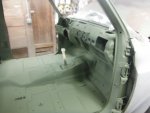
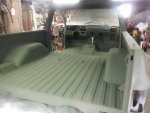
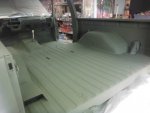
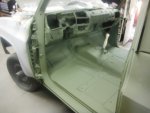
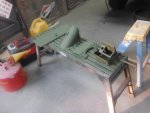 I will probably let it dry for a while before I go and start touching it and reassembling the inside. I may just let it all apart and continue on with the entire paint job. The doors are next to be painted in the jabs and inside. I must get the fiberglass roof ready also. That has some brushed in CARC also. So be it. I was going to use another top but decided to keep all the parts together for this build. Take Care and Thank you for looking. Be Safe.


 I was happy with the results, and I know it will make a difference in the finished product. This morning the weather was fairly decent. It was not real hot and not cold. So perfect day for painting the CARC green.


 I will probably let it dry for a while before I go and start touching it and reassembling the inside. I may just let it all apart and continue on with the entire paint job. The doors are next to be painted in the jabs and inside. I must get the fiberglass roof ready also. That has some brushed in CARC also. So be it. I was going to use another top but decided to keep all the parts together for this build. Take Care and Thank you for looking. Be Safe.
- 1,191
- 454
- 83
- Location
- Lockport N.Y.
Beautiful job Rick , you are a driven person , but the results say it all . Thanks for sharingIt has been a long successful day for me. I started out at 0500 and worked at my FT job till 1000. Came home and sprayed the CARC green in the tub area of the M1009. It came out well and made all the months of sanding worth the effort. I wouldn't want to do this for pay. I don't think anyone would pay me as much time and materials as I used. The sealer from Friday evening. View attachment 901883 View attachment 901884 View attachment 901885 View attachment 901886 View attachment 901887 I was happy with the results, and I know it will make a difference in the finished product. This morning the weather was fairly decent. It was not real hot and not cold. So perfect day for painting the CARC green.
View attachment 901888 View attachment 901889 View attachment 901890 View attachment 901891 View attachment 901892 I will probably let it dry for a while before I go and start touching it and reassembling the inside. I may just let it all apart and continue on with the entire paint job. The doors are next to be painted in the jabs and inside. I must get the fiberglass roof ready also. That has some brushed in CARC also. So be it. I was going to use another top but decided to keep all the parts together for this build. Take Care and Thank you for looking. Be Safe.
cucvrus
Well-known member
- 11,478
- 10,505
- 113
- Location
- Jonestown Pennsylvania
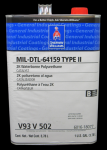
I did want to mention that CARC paint is being sold on Ebay. 2 gallons of paint and 1 gallon of catalyst that makes 3 gallons of useable paint maybe 3.5 when water is added. The cost is $1000. The paint cost me $399. per gallon and the catalyst was $199. It is my opinion that you get what you pay for. I have found that nothing gives the same true look as CARC. Other paints I have tried faded and caulked after a few years in the sun and even in the shade. Some paints I used looked great after the job was completed but faded and turned strange colors after a year or 2. The water based 2-part CARC is much easier to work with and does not scratch when you touch it. Take Care and Be Safe. After looking at the M1009 yesterday I have decided to let it set a week or 2 and work on the doors and roof. I want a through dry time and am in no rush to get back inside. I think I will paint the entire vehicle with the inside gutted out. What could go wrong?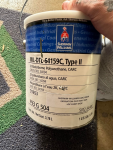


Nice!! You think 2 gallons will do the entire body? Are you doing the fiberglass top with that too? I used a gallon on the blazer when we painted it last summer but only the outside and not the top. He did do several coats though. It is still black fade paint. Can't wait to see it painted.I did want to mention that CARC paint is being sold on Ebay. 2 gallons of paint and 1 gallon of catalyst that makes 3 gallons of useable paint maybe 3.5 when water is added. The cost is $1000. The paint cost me $399. per gallon and the catalyst was $199. It is my opinion that you get what you pay for. I have found that nothing gives the same true look as CARC. Other paints I have tried faded and caulked after a few years in the sun and even in the shade. Some paints I used looked great after the job was completed but faded and turned strange colors after a year or 2. The water based 2-part CARC is much easier to work with and does not scratch when you touch it. Take Care and Be Safe. After looking at the M1009 yesterday I have decided to let it set a week or 2 and work on the doors and roof. I want a through dry time and am in no rush to get back inside. I think I will paint the entire vehicle with the inside gutted out. What could go wrong?View attachment 901972View attachment 901973
cucvrus
Well-known member
- 11,478
- 10,505
- 113
- Location
- Jonestown Pennsylvania
Last night I had the help to bring the roof inside and flip it over. I am a bit puzzled. The rear nuts that screw into the corners of the rear corners are non-existent. I did not remove bolts from the rear corners and that may explain why they were not there. Anyone ever encounter that? These are the 2 - 3/8" bolts that screw up from the bottom. This truck does not and did not have that decal saying that the bolts were there. Anyway, I don't see it as a major issue I am just wondering. this is an August 1983 built M1009. It has chrome wing vent handles and I do believe the 12,674 miles on the odometer because I had it since the mid to late 90's. But I have brushed on CARC to sand from parts of the inside of the roof. OH JOY. I can hardly wait. Be Safe. I will post progress as it happens. I love spraying and working with the waterborne CARC. I washed that old hood with DX330 and painted it and it looks better or as good as most jobs I fussed over. Air movement is very important with water base paint. That was painted in direct sunlight at 1130 in the AM.
cucvrus
Well-known member
- 11,478
- 10,505
- 113
- Location
- Jonestown Pennsylvania
I was down in my barn working on my M1009 rear cargo cover roof. I was able to remove all the seals and weatherstrips without a huge problem. 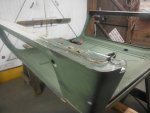
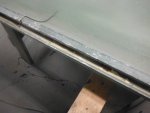
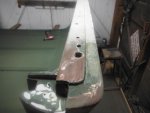 That was easy. Putting them back on is never as easy. I fished the plate out that the threads are in to hold the rear roof down. I don't know if I can get it back inside the corner of the roof again. I may try. Thinking a cable, a bolt and some JB weld. Now I must fish the other one out. I used a magnet and went in thru the hole where an interior light would go.
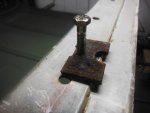
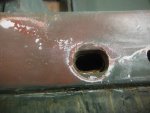
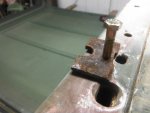
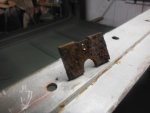 I will look into that later. All the threads must do is get tight. I thought about putting a riv-nut in that hole. I will think it out. Be Safe and Have a Great Day. Lots of money and time will be spent on weatherstrips and seals coming up shortly. First sand and paint the inside of the rear cargo cover.


 That was easy. Putting them back on is never as easy. I fished the plate out that the threads are in to hold the rear roof down. I don't know if I can get it back inside the corner of the roof again. I may try. Thinking a cable, a bolt and some JB weld. Now I must fish the other one out. I used a magnet and went in thru the hole where an interior light would go.


 I will look into that later. All the threads must do is get tight. I thought about putting a riv-nut in that hole. I will think it out. Be Safe and Have a Great Day. Lots of money and time will be spent on weatherstrips and seals coming up shortly. First sand and paint the inside of the rear cargo cover.
Well nuts are able to be installed in blind holes. If the hole is 3/4" diameter the 3/8 well nut is a drop in. No special tools.
Well Nuts, 3/8"-16 Thread Size, for 0.015" to 0.437" Material Thickness

 www.mcmaster.com
Well Nuts, 3/8"-16 Thread Size, for 0.015" to 0.437" Material Thickness
McMaster-Carr
McMaster-Carr is the complete source for your plant with over 595,000 products. 98% of products ordered ship from stock and deliver same or next day.
cucvrus
Well-known member
- 11,478
- 10,505
- 113
- Location
- Jonestown Pennsylvania
I used them in the past to install roof racks on GM vehicles back in the 70's and 80's. I am not sure they would have the grip range and strength to take a tight bolt. May be worth a try provided i must not buy 25 of them to find out. Thank you for the tip. I see they are sold in packs of 1. Thank you.Well nuts are able to be installed in blind holes. If the hole is 3/4" diameter the 3/8 well nut is a drop in. No special tools.
Well Nuts, 3/8"-16 Thread Size, for 0.015" to 0.437" Material Thickness

McMaster-Carr
McMaster-Carr is the complete source for your plant with over 595,000 products. 98% of products ordered ship from stock and deliver same or next day.www.mcmaster.com
cucvrus
Well-known member
- 11,478
- 10,505
- 113
- Location
- Jonestown Pennsylvania
Last night I spent about 4 hours cleaning the old contact cement out of the front roof seal area. That old stuff is tough and requires patience to get it out and the seal area clean. I used a dull razor blade, a flat screwdriver, hook pick and an awl to get the area clean as possible. I followed up and hand sanded the area till all the glue residue was off the surface. I also done a lot of hand sanding with 180 grit and have the roof about 50% done on the inside. I closed the rear holes in the top where they had the antenna wiring pass thru. My thought is why not. I have gone this far and fixed everything else as I am going up to and including the gawd ugly holes in the rear 1/4 panels where the antenna brackets were attached. I will get some pictures the next time I get down to the shop. I have lawn work to do tonight and tomorrow, lots of tree limbs and leaves that blew down in a storm that passed thru the area. Never a dull moment. Take Care and Be Safe. More later.
cucvrus
Well-known member
- 11,478
- 10,505
- 113
- Location
- Jonestown Pennsylvania
Tonight, after working 10 hours, like most Thursday nights I was out to eat supper. I had a brainstorming with my friend about placing/setting the rear roof on and doing the overall paint job and the 3-color woodland camouflage and then removing the roof again to install the weatherstrips. I think this is the route we are going to take. I struggled with the weatherstrips on a few previous builds and must admit they are my weak point. This time around I cleaned the surfaces extra clean. I spent about an hour again last night working on the rear window upper weatherstrip groove in the fiberglass top. I have most of that spotless and must now continue on getting the inside of the rear roof sanded completely. I am only 50% + or - on that part of the roof. I used a DA and it appeared polished, so I resorted to hand sanding. More later. I still have non CUCV related work to do, and it just don't stop or slow down. take Care and Be Safe.
Tonight, after working 10 hours, like most Thursday nights I was out to eat supper. I had a brainstorming with my friend about placing/setting the rear roof on and doing the overall paint job and the 3-color woodland camouflage and then removing the roof again to install the weatherstrips. I think this is the route we are going to take. I struggled with the weatherstrips on a few previous builds and must admit they are my weak point. This time around I cleaned the surfaces extra clean. I spent about an hour again last night working on the rear window upper weatherstrip groove in the fiberglass top. I have most of that spotless and must now continue on getting the inside of the rear roof sanded completely. I am only 50% + or - on that part of the roof. I used a DA and it appeared polished, so I resorted to hand sanding. More later. I still have non CUCV related work to do, and it just don't stop or slow down. take Care and Be Safe.
Ah I have to replace every single strip of weather stripping on my M1009 =[.
cucvrus
Well-known member
- 11,478
- 10,505
- 113
- Location
- Jonestown Pennsylvania
- 8,218
- 20,766
- 113
- Location
- Charlotte NC
.View attachment 903591
And I can't produce one but every 3-4 years.
There is only a small difference between @cucvrus and General Motors...
Maybe one or two more folks on their payroll compared to yours possibly?
Very nice advertising slick!
Thanks for posting it.
Sezzo
Well-known member
- 151
- 307
- 63
- Location
- Bamberg (Germany)
This is the difference between one-off production by CUCVRUS and mass production.View attachment 903591
And I can't produce one but every 3-4 years.
cucvrus
Well-known member
- 11,478
- 10,505
- 113
- Location
- Jonestown Pennsylvania
Latest update. I have the entire inside surface of the fiberglass cargo roof sanded. I hand sanded the entire surface and went over it a second time just to be sure it was smooth. Next is to get it sprayed on the inside then flip it back over and sand the outside. I hope to get that done very soon. Till then rain and grass have me booked. When it rains the grass grows and makes work for me. Stay Safe. Thank you for looking.
- 889
- 707
- 93
- Location
- Cooperstown NY
Rick,Latest update. I have the entire inside surface of the fiberglass cargo roof sanded. I hand sanded the entire surface and went over it a second time just to be sure it was smooth. Next is to get it sprayed on the inside then flip it back over and sand the outside. I hope to get that done very soon. Till then rain and grass have me booked. When it rains the grass grows and makes work for me. Stay Safe. Thank you for looking.
Please assure to all us followers that you pay special attention to and religiously use PPE while sanding the CARC on your projects.
Spence
Member
- 33
- 80
- 18
- Location
- Massachusetts
I have been working through the thread and must say, you are doing the job right. Even using proper CARC paint. Thank you for sharing.
- 114,242members
- 167,165threads
- 2,353,398posts
- 4,414online users


