• Steel Soldiers now has a few new forums, read more about it at: New Munitions Forums!

  • Microsoft MSN, Live, Hotmail, Outlook email users may not be receiving emails. We are working to resolve this issue. Please add support@steelsoldiers.com to your trusted contacts.

M1010 ambulance box build reference

Skinny

Well-known member
2,130
488
83
Location
Portsmouth, NH
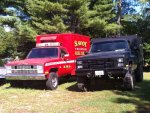
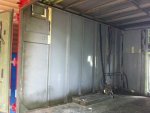
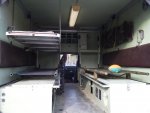
I picked up a meat wagon a few months ago since the MV disease can only be cured with new purchases. I have a pretty mint M1031 and didn't want to take it only in the harsh winter so this truck will be an all year beater. Since it is an ambulance and I am not an EMT, the most obvious thing to do is build it into an expedition/bug out/creeper/RV rig.

I'm still mostly in the research phase of how I want to lay out my floorplan and what components I want to outfit it with. I will post that build in another detailed thread. My purpose with this thread is to outline how the ambulance box is constructed to assist other SS members in either outfitting or just doing repairs to what they have. I found absolutely zero data on internal construction so what is behind the walls was a mystery. I also gathered through many RV conversion threads that doing a complete gut is the best way to perform the conversion. The more effort I spend on sealing and insulating now, the less I will spend on climate control equipment and fuel to accomplish that.

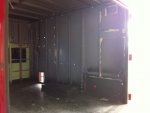
Without further delay, lets get into the most fun part of any build...demo :)

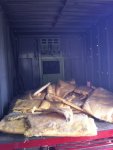
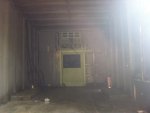
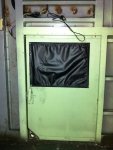
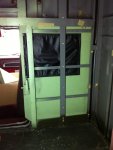
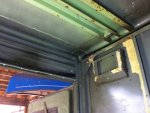
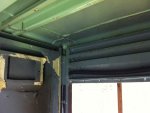
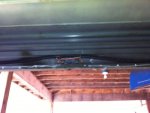
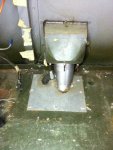
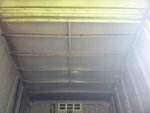
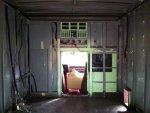
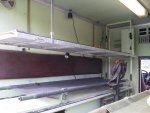
IMG_0989.jpgIMG_0996.jpgIMG_1060.jpgIMG_1062.jpg
 

Skinny

Well-known member
2,130
488
83
Location
Portsmouth, NH
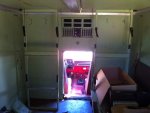
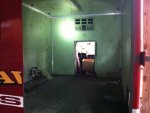
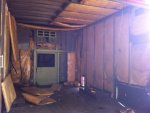
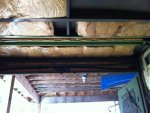
I removed the remaining ambulance remnants, the rig had no diesel heater which was a bummer. I apologize but the insulation wanted to make a run for it as soon as I pulled the inner aluminum skins.

The skins are overlapped in the corners and have the additional brushed corner trim pieces. It is very rugged and was not easy to remove after drilling the rivets. You can pretty much drill everything out, remove the corner trim, then start pulling the big pieces out. You will have to spend some time pulling the lights, vents, and other assorted pieces before doing any of this.

You can see that the stretcher bench that goes above the heater compartment is fully insulated.
IMG_1097.jpgIMG_1106.jpgIMG_1107.jpgIMG_1109.jpgIMG_1108.jpg
 
Last edited:

Skinny

Well-known member
2,130
488
83
Location
Portsmouth, NH
The insulation is a 1.5" thick fiberglass mat in a semi sealed poly bag. It fits nicely in a 55 gallon drum. Note...this drum is now fully insulated and will make a nice home for something this winter.

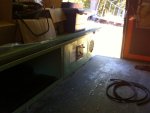
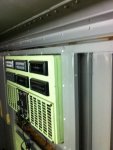
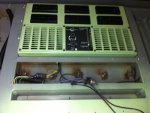
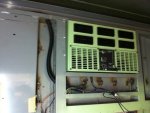
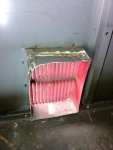
You can see that the 38" x 24" pass thru door slides into a pocket inside the box construction. The door seems like it is insulated. The 22" x 13" A/C unit sits in a fully framed housing. I will more than likely be pulling this out and replacing it with an off the shelf household unit. The cavity size will limit you to an A/C only (no heat pump or heat strip option) unit of 5-8k BTU's.

IMG_1110.jpgIMG_1111.jpgIMG_1112.jpgIMG_1113.jpgIMG_1114.jpgIMG_1116.jpgIMG_1115.jpg
 
Last edited:

Skinny

Well-known member
2,130
488
83
Location
Portsmouth, NH
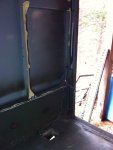
To the left of the A/C unit, there is a bracket that had insulation behind it. I'm not sure what mounts here. Mine had a couple of nutserts here. If you wanted to rivet something heavy in here, this would be the spot to do it since it has some additional bracing.

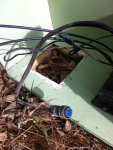
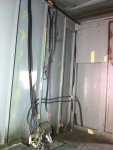
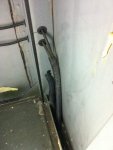
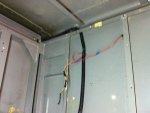
The A/C and box wiring runs inside the wall cavity and through the upper framing. The 24v bus cable goes down and outside.

The inlet for the compartment heater is flanged directly to the outer skin where the grate is. The rear upper vents have a cavity that keeps water from entering and then has the swivel grate directly on top of it.

IMG_1118.jpgIMG_1119.jpgIMG_1126.jpgIMG_1117.jpgIMG_1123.jpgIMG_1124.jpgIMG_1120.jpgIMG_1122.jpgIMG_1121.jpgIMG_1125.jpg
 
Last edited:

Skinny

Well-known member
2,130
488
83
Location
Portsmouth, NH
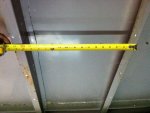
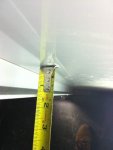
Moving on to the more technical box construction, the walls and ceiling are built 16" on center using 1.5" thick studs. The studs are a Z shape so the skin rivets are offset. The roof starts about 3" thick in the center and tapers off to about 2" towards the outside.

I hope this thread serves as a reference to anyone wondering how these things are constructed, insulated, and wired. I will finish this out with a full write-up on the floor when I decide to tackle it later.

I think anyone building their rig into a living space, you want to maximize the insulation factor and also create a thermal break. These boxes have a pretty good starting point for a basic RV but the aluminum on aluminum construction creates no thermal break. I've seen plenty of photos of rigs in the snow where the roof has a cross hatch on top where it melts off from heat loss.

I plan on putting a foil back poly board into the existing cavity, strap it horizontally, add 0.75" poly board, sheath it with something that won't out gas and kill me, then put the finish of choice on top.

I calculated that it won't take more than 400 BTU's to keep at 70 degrees in below freezing temps. We will see but that is where the math puts me which is awesome compared to off the shelf garbage RV's.

IMG_1129.jpgIMG_1127.jpgIMG_1132.jpgIMG_1131.jpgIMG_1130.jpgIMG_1134.jpgIMG_1133.jpgIMG_1135.jpgIMG_1136.jpg
 
Last edited:

Crockett028

New member
11
0
0
Location
Springfield Mo
I looked at that one a bunch of times before buying mine. The red kept me away. Had super low miles if I remember correctly. And the ad said bring a trailer even tho it ran and drove. That kind of pushed me away too. Looking good. The first time I have seen the inside of one of these!
 

Recovry4x4

LLM/Member 785
Super Moderator
Steel Soldiers Supporter
34,012
1,808
113
Location
GA Mountains
Hey Skinny, can you take a few additional pics of the roof member towards the rear that supports the litters in the up position? I may need to replace mine. Is this the only steel part of the box? Thanks for this useful thread.
 
Last edited:

Skinny

Well-known member
2,130
488
83
Location
Portsmouth, NH
This truck certainly is a basket case. I got a smokin' deal on it because I told him it is basically a parts truck at this point so I scored it for what the axles are worth. I upgraded the starter relay, installed a new GP solenoid, and put new AC Delco AC60's glow plugs in. I cranked it a few seconds and it didn't fire. Opened the fuel filter bleeder and got a shot of air. Cranked again and it fired right up...very happy.

I'm not sure what the litters are. Can you describe what you are looking for and I will get a photo of it. My box is missing all of the frame work on the sides and top for the ambo crosses and such.
 

Recovry4x4

LLM/Member 785
Super Moderator
Steel Soldiers Supporter
34,012
1,808
113
Location
GA Mountains
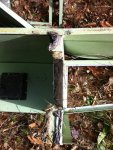
The green roof crossmember near the back door. I know it's steel as mine is rusting from a roof leak it had (for years likely). This supported the rears of the upper litters when suspended. It this all one stamped piece of steel and does it look like it can be removed without dismantling the entire truck? Are the other cross members steel or aluminum? I plan to archive all these pics.

In the attached pics you can see the arm that swings down from this crossmember to support that back of the upper litter berths.
 

Attachments

fitz

Member
268
13
18
Location
Mass
Skinny,
Your back in NH?
I've been watching that truck on Craigslist for the last year or so. As the price kept dropping, I thought someone would buy it for the axles and part it out.
I'm glad you are going to save this one.
This will be an interesting build.
 

Skinny

Well-known member
2,130
488
83
Location
Portsmouth, NH
It seems like that is the only steel part as mine had some surface rust and the rivets were steel. I will take some photos this weekend.

I'm back in New England, boat is in Portsmouth, living in Pelham, working in Mass.

I think the truck started around $4500 which was way too much. I did the same thing, watched it come down slowly until I finally ventured out to take a look. I bought it knowing that I had something worth my offer in parts. I want to save it and think it is in better shape than I thought. I was going to gut it and use the parts for a Suburban build but the ambo is just sweet :)
 

ODFever

Madness Takes Its Toll...
Steel Soldiers Supporter
2,011
73
48
Location
Orlando, FL
I don't know if I'll ever buy a CUCV ambulance, but I'm curious about their construction as well as your plans for the box. :-D
 

Skinny

Well-known member
2,130
488
83
Location
Portsmouth, NH
My plan is to have a pretty weather friendly shelter that is multipurpose whether it is doing some adventurous trail running, pulling a sled trailer, or just heading to the beach. Plus zombies may eventually take over and I will need a remote place to stay while they eat the population :)

I want to do a U-shaped layout and maximize as much space as possible in the rather tight quarters. I will build a platform going sideways all the way in the back. I will use a Twin sized inflatable. Under will most likely be my house battery box and water in the 20-40 gallon capacity. On the left side, I will mount 24" x 36" long shower pan and drain it right on the ground. This will also be a good place to store a camp cassette toilet and serve double duty (get it) as a wet hanging locker. There will probably be 2' between the shower and bed so I will build a cabinet in between. On the right side I want to do a sink, fridge, microwave, etc build. I would like to mount my electronics down low so I can reach back while driving to hit switches/radio/etc. and get the fridge as far away from the sleeping area as possible. One thing I hate on my boat (I know, first world problems) is hearing the fridge compressor while trying to fall asleep.

The goal is to have as much insulation and minimize heat loss so I can heat the thing with a match or cool it with a modest sized A/C. This means no windows, huge doors, etc. and sacrificing some interior room for insulation value. I don't want to commit right off the bat to a diesel hydronic unit since I'm not sure how often I will use it and unsure of the ROI. I will plan to install 120v heat (like a toe kick or panel mount) so it's out of the way and can be thermostat controlled. This will give me a source while on shore power or running a generator. I will also have venting built in just in case I need to use a buddy heater. Yes, I will install the appropriate smoke/CO/LP detectors. I want to run a small inverter generator and plumb it to a 10-20 gallon tank under the truck. I already have a nice EU2000i but am thinking of getting a cheaper Champion and cutting it up. The point is that everything in this rig should have multiple uses. I can use a buddy heater or generator for other purposes if necessary but a diesel hydronic heater is pretty much dedicated to the truck.

I own a Whynter dual zone portable fridge/freezer which is a 120v/12v/24v setup and it works awesome. I also have a Norcold unit on my boat which is good but the power supply just died and its $280 for just the part not to mention these things run about $800 to start. Yet you can buy a Danby or Emerson energy star dorm fridge which run on super low wattage for under $200 depending on size. After running some numbers, I can run one on an inverter for comparable power to any of my other units with a lot of money left over for solar/batteries. So my intention is to have about 400-500 watts of solar with 4 group 31 deep cycles and have my equipment all 120v. A departure for most people and expedition builds but dedicated 12v equipment is expensive and these days for me does not justify the high cost for power savings. Even the new energy star A/C units utilize soft start compressors so I think people will either shift towards traditional off the shelf fridges, A/C's, etc. or the price of these RV or Marine grade units will become more competitive.

On a side note of something I learned, you do not need to purchase expensive marine or RV detectors. Standard home detectors typically use a 9v backup battery and require 120v to run. What I didn't know is that inside the unit there is a transformer that goes from 120v AC to 9v DC. Some even have the power unit as a seperate plastic box which clips into the detector housing and runs a very tiny diameter two conductor wire with a connector to the housing. I looked up 12v to 9v DC power supplies on Amazon and they run under $10. In theory, you could buy a power supply and power all of your house detectors in your boat or RV and the detector wouldn't be the wiser. If the supply died, the detectors still have the 9v battery backup. Pretty neat huh? If you didn't pick up on it, I hate buying specialty equipment at higher prices that deliver zero value over a traditional model :)

I think the truck is going to be a pretty standard build with a 4" lift (shackle flip out back), 37" tires, and some crossover. Nothing crazy but very capable.
 

Skinny

Well-known member
2,130
488
83
Location
Portsmouth, NH
That is a great thread and will be referenced quite a lot over the next few months. It is exactly what I want to build, just to a smaller scale. I have about half the room so hot water, roomy interior, etc. will not be in the cards. Thank you for the link.
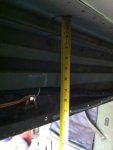
Sorry for not having any photos of the metal supports yet. I have yet to get a good days work on it. I'm in the middle of stripping the DUVAC out and adding a pair of Leece 12v alternators in series. I did notice that the single metal support bar for the stretchers does not directly support the roof in the back end. If it is compromised, I don't think you will lose a lot of structural rigidity from the box. It looks like it sits on top of the horizontal metal bars running front to back and offers the roof skin little to no support.
 

Recovry4x4

LLM/Member 785
Super Moderator
Steel Soldiers Supporter
34,012
1,808
113
Location
GA Mountains
At your leisure sir. My fear is that the steel support will no longer support the upper berths. My kids sometimes sleep up there. At some point I just need to open mine up and have a looksee at it!
 

Skinny

Well-known member
2,130
488
83
Location
Portsmouth, NH
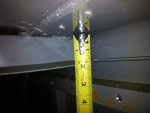
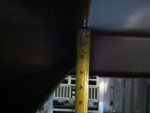
I should be up at the shop this weekend trying to get my DUVAC installed into the trash can and a shiny new pair of new Leece Neville's in. I will take some more detailed photos and measurements so your surgery doesn't have to be a guessing game :)
 

tourus

Member
197
2
18
Location
madison me.
when I converted my 1010 to 12 volt I put 2 new leece Neville's on works great no issues at all .. I took out that blue duvac box tape up wires that is all .. then on the alts . I run a 4 gage wire from each alt to each battery and grounded each alt and battery.have not had any issues in 10 years like that and it was very easy.
 

Skinny

Well-known member
2,130
488
83
Location
Portsmouth, NH
Nice! My plan is the same thing but put them in series mimicking the other CUCV trucks just with a bigger setup. I want to keep the starting system 24v, I have a 24v multimount winch, and it creates a lot of redundancy having a 12/24v setup. If the entire truck including the RV portion runs on 12v, I carry a spare alternator around on the engine all the time. You only need that second alternator and battery when cranking or running 24v accessories so you can always limp home and swap batteries to get you out of the woods. That was my reasoning after thinking for awhile.
 
Top