• Steel Soldiers now has a few new forums, read more about it at: New Munitions Forums!

  • Microsoft MSN, Live, Hotmail, Outlook email users may not be receiving emails. We are working to resolve this issue. Please add support@steelsoldiers.com to your trusted contacts.

M1010 fire rig to camper conversion

cruzer747

Active member
218
145
43
Location
California
I'll put in a aftermarket diesel or propane heating system. Definitely looking at some overdrive solution as well (built 700R4 or Gear Vendors OD).
The diesel heater offers two benefits, one is no combustion gas in the cab (in theory) the second is unless you need a propane tank or anything else, you can stick to the main fuel tank for space saving (wanted to avoid strapping a tank to the back). As far as the OD goes, I have read into it a lot and there is a company here that is highly regarded (forget off the top of my head but when it is time I will get the built 700r4 and be done with it. For as many features it seems to offer, the GV has its own set of drawbacks.


Weller, have fun with it! I took some time to lay out as much of a ergonomic layout as possible and tried to think of everything I will need so I was able to run wires in advance. I have one spare switch on there in case something comes up (which it will) but yeah, I am happy with how it turned out, will be interesting in learning how to use the amp hour meter once I start using the rig more with the fridge running full time etc...
 

cruzer747

Active member
218
145
43
Location
California
I'm curious if anyone here knows if there is a fitted seat cover that would fit the high back bucket seats that are stock in this vehicle, I did a little bit of searching and I'm not sure if anything is actually a good fit. I bought a set of cheapos to protect what I have as a really good condition but would like something that's it better than I had to modify them to fit and they are already failing.
 

chevymike

Well-known member
603
468
63
Location
San Diego, CA
The diesel heater offers two benefits, one is no combustion gas in the cab (in theory) the second is unless you need a propane tank or anything else, you can stick to the main fuel tank for space saving (wanted to avoid strapping a tank to the back).
Problem is, to use it you have to have the vehicle running and there is no thermostat. Not really a good option when you are trying to sleep. I'l have other propane items so adding a heater is no big deal.
 

cruzer747

Active member
218
145
43
Location
California
Problem is, to use it you have to have the vehicle running and there is no thermostat.
The cheap chinese knockoffs are very power efficient (as I would imagine the german and russian models to be as well). Running on full draws about 1 amp (fan and fuel pump). Startup and shutdown sequence will draw about 6-8 amps on mine for about a minute(glowplug) . Not too bad and no need to be running. Also these have full control panels, adjustable thermostat, you can have them go on before you wake up on a timer etc. The good models even compensate for elevation. Mine is a 5kW. It consumes roughly .5L / hour on high and .2L /h on low. So if on high you are burning 1 gallon in 8 hours, low would be 1 gallon per 20 hours, I have not brought it to the cold weather yet but it gets so hot I could not see running it on anything higher than low for sleeping. High just to get it warmed up for 10-15 minutes.

I would say that a good pair of starting batteries would handle this without flinching but a dedicated house battery is recommended just on principle.
 

chevymike

Well-known member
603
468
63
Location
San Diego, CA
The cheap chinese knockoffs are very power efficient (as I would imagine the german and russian models to be as well). Running on full draws about 1 amp (fan and fuel pump). Startup and shutdown sequence will draw about 6-8 amps on mine for about a minute(glowplug) . Not too bad and no need to be running. Also these have full control panels, adjustable thermostat, you can have them go on before you wake up on a timer etc. The good models even compensate for elevation. Mine is a 5kW. It consumes roughly .5L / hour on high and .2L /h on low. So if on high you are burning 1 gallon in 8 hours, low would be 1 gallon per 20 hours, I have not brought it to the cold weather yet but it gets so hot I could not see running it on anything higher than low for sleeping. High just to get it warmed up for 10-15 minutes.
I would say that a good pair of starting batteries would handle this without flinching but a dedicated house battery is recommended just on principle.
Are we talking about the same thing? I was referring to the original M1010 heater, not an aftermarket diesel heater. The original one doesn't have an adjustable t-stat. Basically on/off, high/low and fresh air blend door. This is why I was going to remove it and put an aftermarket diesel or propane unit in, as I know how those work for a camper (having had one before).
 

cruzer747

Active member
218
145
43
Location
California
Are we talking about the same thing?
no, I am talking about aftermarket diesel heaters. You could easily replace the stock one and get a lot of features over a propane unit with the additional safety of not having propane combustion taking place inside the cab. Maybe I am just biased but I have done a lot of reading and decided to go with a cheapanese unit.

There is a group on FB over 22k members that all pool knowledge on troubleshooting and install (Chinese Diesel vehicle air heaters - Troubleshooting & Parts sales.) Cost would likely be less and features far exceed what I have seen propane to offer but by all means do your research.

Ah I see you mention that you may go with an aftermarket diesel unit, read up on it and good luck!
 

cruzer747

Active member
218
145
43
Location
California
foldout door shelves

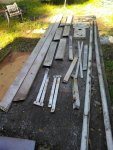
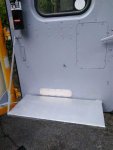
So I knew having some tables that make for easy setup would be a good thing I finally found the time and came across the right material to make them. After paying through the nose for the aluminum H channel I wanted some cheaper solution for this next project and I realized that the old aluminum ladder I was about to recycle was full of usable parts so I drilled out the rivets and for this project used the main rails and some of the bracing.
IMG_20190423_164135.jpg
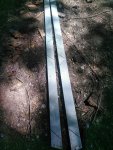
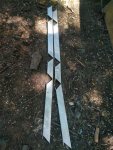
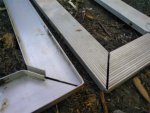
Decided on 12x"28" for the tables which gave me about 2" extra from what the ladder provided. I do not have a way to weld aluminum so I cut just the tops of the channel and left tabs to be able to use pop rivets at the insides of the miters and just bent the outside corners.
IMG_20190424_132410.jpgIMG_20190424_134917.jpgIMG_20190424_140511.jpg
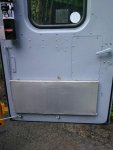
I had a lot of the aluminum interior siding left and I cut out pieces and skinned and riveted it to the frame. Lots of hammer work but using a single skin makes these things very stout. Mounting it to the doors was pretty easy and only needed one side as the tables were so strong, using some of the aluminum bracing I measured out the appropriate length so the support folds away nicely. Also I want to point out that I made sure to mount the brackets I made into the door framing and not just on the door skin.

IMG_20190507_195457.jpgIMG_20190507_195504.jpgIMG_20190507_195531.jpg
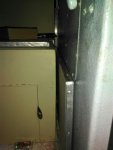
Just enough room to close the doors. Fridge will be coming this weekend so I will be able to put the flooring down... Have a 500 mile trip coming up in a few weeks so I am pretty interested in feeling out how it all feels and what new changes and Ideas I have for it. I have read a bit about water heaters and have decided to do a pressurized ABS vessel for now as it is certainly the most affordable for now.
 
Last edited:

Weller

Member
220
8
18
Location
Kern County, CA
Looking like some really fine work. It's even better when you can re-purpose materials like an old ladder into something useful, putting your skills and creativity to use.
 

cruzer747

Active member
218
145
43
Location
California
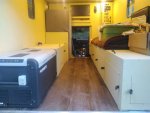
So the floor is in and the fridge is fit. All I need to do with the fridge is about 5 minutes of wire splicing and I will be in business. The reviews were hit and miss on this so I purchased it locally to be sure I have a brick and mortar store to return it to when and if things go wrong with it. Still have some details on the floor (2 pieces short to run it under the cubby areas) And the uneven aluminum floor underneath made snapping it together a PITA but I got it. If I run into problems down the road I may disassemble it and lay down some sort of leveling compound/bondo for the dips (it had plenty of undulations ranging all the way up to 3/8"). I got extremely lucky with the fit at the face as I did not know it needs room at the back for the lids to open, still was able to keep it inline with the rest of the cabinet.
.
IMG_20190511_191208.jpg

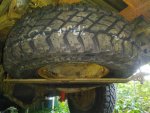
Also I am sure most have seen the other thread but I extended my spare tire carrier to fit my full size spare. No more worrying driving without one now.
IMG_20190511_190440.jpg
 

cruzer747

Active member
218
145
43
Location
California
been a while...

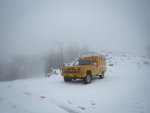
went on some nice trips so far and everything feels like it is coming together, maybe even past the halfway point on things to do. I took it out and got into the snow a touch, the heater worked great! Now I am thinking about the showering system and while I have a good plan on a simple ABS water tank on the top, in winter I would also like to be able to shower with hot water so I picked up something that may be right but wanted to run it by you guys here before I go ahead and install it.

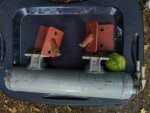
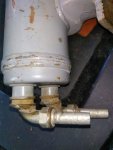
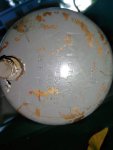
It looks like it was a heat exchanger but even looking on the companies website I could not pull up any specs on it. It weighs about #25 or so and I am not overly excited about the flange/gasket style coolant connections but I figure if I had some valves to allow flow through this and then a pump and switch leading the freshwater to and from back to the abs container along with an overpressure relief valve.... it may fit the bill. I have plenty of space under the hood for it. I have no experience in this territory which is why I am asking about it. Totally open to the idea of selling it and finding something more suitable. The ABS on top will be roughly 9.5'x4" which will be about 6 gallons.

Here are a few pics of the exchanger, tennis ball for scale.
IMG_20190804_200656.jpgIMG_20190804_200720.jpgIMG_20190804_200751.jpgIMG_20190804_200827.jpg

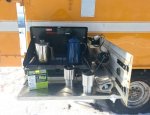
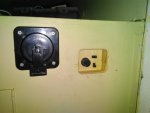
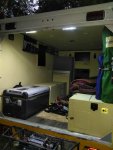
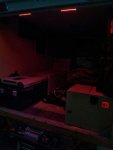
Here are a couple of pics from the trip, cooking pullout is working great! last thing I think I need to do is add a lockout for the cutting table (easy peasy). A tiny detail I am almost done with is adding a pair of led courtesy lights above the rear doors which can either light red or white and dim accessible from a small flush panel next to the water filler on the right bench.
untitled-1-12.jpgIMG_1027.jpg
 

richingalveston

Well-known member
1,715
120
63
Location
galveston/Texas
it looks good but you have no idea what has been put through it and it is pretty large for the heat you need. I would buy something like this if I was planning on using the engine coolant for heating the water.

[FONT=Verdana,Arial,Tahoma,Calibri,Geneva,sans-serif]https://www.amazon.com/Brazed-Exchanger-Stainless-Plates-Threaded/dp/B07R4NKDZY/ref=sr_1_11_sspa?hvadid=77859219120689&hvbmt=bb&hvdev=c&hvqmt=b&keywords=20+plate+heat+exchanger&qid=1565125302&s=gateway&sr=8-11-spons&psc=1

install it on the heater hose for the hot circuit and get a small 12v rv water pump. These brick style exchangers are very small and do not weigh much. In order to not have a hot water tank, you can insulate your fresh water tank (tank you plan to shower with) and then just circulate the water through the exchanger until the tank is to the temp you want for a shower. Then you just have one hose and no mixing valve. very simple. once the tank is up to temp, you can then turn off the truck.

another option with the heater that you installed is to install a copper coil inside the duct work. buy some coper tubing and bend it into a coil that fits in your duct work. you need a ft. to 18 inches of straight duct work but with an air to water heat exchanger, you do not have to run your engine to heat your shower water.


[/FONT]
 

cruzer747

Active member
218
145
43
Location
California
https://www.amazon.com/Brazed-Exchanger-Stainless-Plates-Threaded/dp/B07R4NKDZY/ref=sr_1_11_sspa?hvadid=77859219120689&hvbmt=bb&hvdev=c&hvqmt=b&keywords=20+plate+heat+exchanger&qid=1565125302&s=gateway&sr=8-11-spons&psc=1

I saw these after I picked up the one I have. Mine also came with a pump and am pretty sure it had been run for water heating as far as the heated liquid goes and could run water through it for a bit in a closed loop and have it tested for anything scary if there was any reason that there might be an upside to this unit vs the one on amazon. From what I can tell mine has the very robust housing as it is a heavy steel shell around it vs the amazon unit but I am sure I could mount that one plenty safely.
To be clear on the water tanks, I have a 20 gal mounted over the wheel well that is only for clean water(drinking, cooking, etc) The shower tank will be an ABS pipe mounted on the top of the box that runs the length of it and holds about 6 gallons and will be available for showers, cleaning, etc. pretty much took notes from this video but added a quick connect fitting that I had to add a spring to close the check valve due to it not being normally pressurized.https://www.youtube.com/watch?v=dG2HK9JsAjw

Using this as the heated tank I would then run two 1/2" lines down the box along the frame and into the engine bay to the exchanger/circ pump.
another option with the heater that you installed is to install a copper coil inside the duct work
I considered this as well but I would not want to have to heat the room in order to have a hot shower and it is too late in the game to plumb in an air diverter valve to dump the hot air outside so this is no longer an option for me.
If there is no upside to using the unit I have I will likely buy that unit from amazon, I especially like the idea of using something with a smaller size and weight. Thanks!
 

cruzer747

Active member
218
145
43
Location
California
started a winch bumper

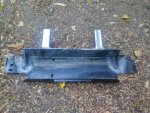
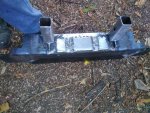
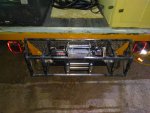
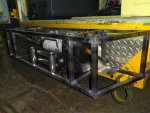
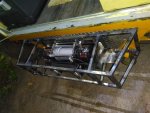
getting some progress made for the winch bumper, it came with dual receivers front and back so I had a big head start. Planned for it to be able to go front or back. Need some more bracing and I decided to go all aluminum diamond plate clad as it matches existing. Will have more pics as it comes along. Thinking of hinged lower step rather than using lower receiver.
IMG_20190825_185121.jpgIMG_20190825_185142.jpgIMG_20190830_195149.jpgIMG_20190830_195210.jpgIMG_20190830_195158.jpg
richingalveston- I got a similar heat exchanger to your link (more plates) and it is much lighter than that unit I had.... back burner until bumper is done.

Led lights at back red/white/ pwm dimmable with lit control panel.
IMG_20190814_201554.jpgIMG_20190830_195224.jpgIMG_20190830_195258.jpg
 

cruzer747

Active member
218
145
43
Location
California
Which Dometic fridge do you have? Been looking at them, the CFX65DZ actually. Wondering how you like yours?
We got the CFX95DZ and of the three outings it has seen use it is great! Really quiet and efficient. I did not remember how much it actually draws... I think around 3 amps but it does not cycle too much and if it is hot then the solar makes plenty to keep it covered while still keeping the batteries topped off during the day. Payed an extra $100 or so to get it from a local outlet so we could return it if issues arise. So far the only thing I have seen is that the temp seems off by about 8-10 degrees. Cycling at around 30 does not freeze anything and using a thermal camera it sees about 10 degrees warmer. I just set it colder and it has no problem pulling it down to freezing. That is the only quirk so far. Will be getting a couple of trips in this winter.

There are schematics online if you search which will give you exact sizes. I was going to go for the smaller size but triple checked and this one fit perfectly. For two people I would not recommend a smaller one if you liked keeping perishables on longer trips.
 

cruzer747

Active member
218
145
43
Location
California
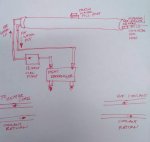
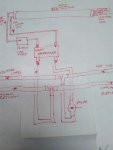
So it is getting closer to falling temps and some winter camping trips so the water heater is getting closer to top of the list (winch bumper is getting closer to completion)... and I have a plumbing question/crossroad. I have kind of scribbled out a diagram and I know there will be many ways to do it so here is what I have; since the heat exchanger will need flow from the heater hose and that flow is regulated by the heater core control valve, I would like to be able to flow through the hx even when the heat is off in the cab (or for faster water heating?) So that means I need to tee off of both lines and then have a shutoff valve on the hot side. Ideally I could have this be a 12 volt setup that would keep the valve open with the flick of the switch along with the fresh water circ pump but this is not mandatory.

How does this look to everyone else? Thanks in advance
coolant flow.jpg!coolant flow easy.jpg
 

richingalveston

Well-known member
1,715
120
63
Location
galveston/Texas
maybe your truck is different from 1009 but I was not aware of a heater control valve. There is always flow through the heater core, the air flow is the only thing controlled. I replaced my heater core and the hoses connect directly to the heater core with no valve.

you would want a valve in place so that your heat in the truck will work with full heat. And your diagram looks fine.
 

cruzer747

Active member
218
145
43
Location
California
There is always flow through the heater core, the air flow is the only thing controlled.
I just double checked and you are correct. Too many things on the brain I assumed there was a valve. So it looks like it may be a little simpler to put a 4 port bypass valve on the coolant feed instead of tees. Cable operated and I could then stick a roller switch on the lever and have it trigger a relay for the pump. Ill take some pics when I source all the parts and have it ready to go.

heater valve.jpg
thanks
 
Top
AdBlock Detected

We get it, advertisements are annoying!

Sure, ad-blocking software does a great job at blocking ads, but it also blocks useful features of our website like our supporting vendors. Their ads help keep Steel Soldiers going. Please consider disabling your ad blockers for the site. Thanks!

I've Disabled AdBlock
No Thanks