• Steel Soldiers now has a few new forums, read more about it at: New Munitions Forums!

  • Microsoft MSN, Live, Hotmail, Outlook email users may not be receiving emails. We are working to resolve this issue. Please add support@steelsoldiers.com to your trusted contacts.

M1010 fire rig to camper conversion

cruzer747

Active member
218
145
43
Location
California
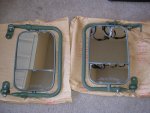
You definitely get better visability and not completely out of place since many times dually trucks would have those.
I agree, I went for it, once it all goes the same color (eventually) it might even look stock, got one on already. Had to do some more twisting than I thought on the upper back brace but it came out ok and... it's a truck.
They look like the ones on mine.
I vaguely remembered that and went and peeked at some of your pics, thanks! I like the matte paint on yours. Mine will eventually get there and dont think they look out of place. Yours fit right in being a dually and all.
 

cruzer747

Active member
218
145
43
Location
California
I have not had much time to devote to anything on my m1010 lately (trying to rebuild a motor for my work truck at the moment) but I have had some ideas floating around like.... how am I going to organize all the indicator lights for things such as "winch power on" "trans cooling fan, trans temp high, etc... " and how can I do that in a way that looks like a professional outfitter did it?

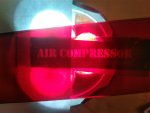
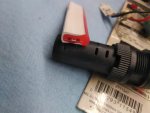
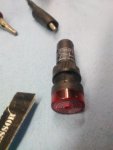
I was looking at the indicator lights Chevymike recently installed and it got me thinking about making some myself. I am really excited as I think it is not only going to work well and not cost much money but it will be easy to customize, update and have a very slim profile for possibly putting it above the windshield or below. Not sure if I want to do a long strip or maybe a boxy console but here are some pics.

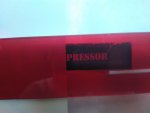
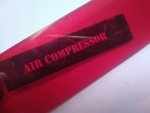
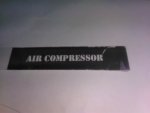
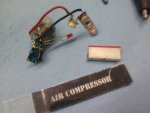
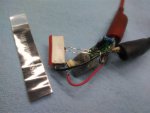
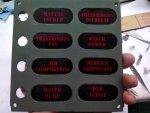
I found my laser printer is capable of printing to acetate so I used an empty (prelaminated) lamination sheet and made a mirror image so the toner was on the back and then with a translucent strip of red plastic and an intermediary sheet of paper (for now, probably add a smokey sheet of plastic instead) to obscure the print when not illuminated I cam up with something thta was really nice.

I ordered a 12v led strip that is cuttable every inch and it is enclosed in a soft red jacket that evenly disperses the light. It is a few weeks out but I will post some pics when I get time to make more progress on it. This would be able to fit in 1/2" Channel.
 

Attachments

cruzer747

Active member
218
145
43
Location
California
So I got the led strip in the mail, it is a really smart design. dense packed led strip @ 12v and wrapped with a tight silicone tube. The light sines @ 90' to the output, it is backed by a white silicone layer which reflects and allows an extremely effecting amount of diffusing to happen (no hot spots from the leds. It really does look like flexible neon. The output side is roughly 1/4" and the depth is about 5/8.

I got one of my led blinky/beepy alarms and tore it down, cut a hole in the back of the silicone tube and married the two. There is a pot on the led strip to dim it down to allow the led from the alarm to be the brighter of the two (the strip can be very bright) and there is some towel taped to the buzzer to quiet it down a bit (it is too loud) . The led strip is cuttable every inch but it is hard to pull the strip from the jacket anything over an inch. For the video I changed from 1 inch to a two inch section.

The video shows a few different setups, first with the red plastic, then none, and finally the red plastic with the backing tape not removed which completely obscures the lettering when off. I drove the rig for a few minutes today and I am pretty sure I do not want something slim. Not overhead.... will consider a pillar mount but most likely it will be a cluster in the center behind the tcase shifter. Input welcome and happy to answer any questions. Oh, also the beepy/blinky will only be for the manual torque converter lockup and maybe winch power, other things just on/off dummy lights .

vid:
 

Attachments

cruzer747

Active member
218
145
43
Location
California
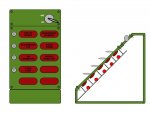
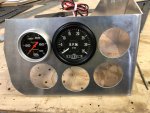
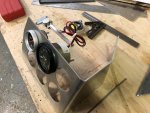
Trying to remain productive in my spare time... I laid out how I think the console will fit into the rig. The diagnostic plug will get tucked up under the dash, the main ground disconnect will be built in and it should fit nice and snug fully underneath the dash next to the PA box. figure the face will unscrew and allow easy access to inside. The face will be aluminum and the lenses will be sandwiched red plastic/printed film/clear sanded plastic glued to the back. LEDs will be glued down to a sub panel and then wired accordingly with a big harness plug so the thing can be removed easily if needed. The buzzers should have plenty of room in there as well. Probably will install a dual usb outlet next to the main disconnect switch so the ashtray door does not have to be open for charging.
Trying to think of any other dummy lights I should add to the list.
 

Attachments

Sharecropper

Well-known member
Steel Soldiers Supporter
1,840
995
113
Location
Paris KY
That is going to be nice. Good design.

I am doing something similar but different - if that makes sense. I have designed and fabricated a dash-mounted gauge cluster pod which will mount under the dash pad between the radio delete plate and dash door. This will completely cover the ashtray which will be completely removed to provide an ample chase for all the mechanical gauge leads to run through. I am mounting a new HMMWV tach in the middle which will be driven by a HMMWV oil pump drive in the P400. The tach will be flanked by oil pressure and water temperature gauges, with oil temperature, fuel pressure, and transmission temperature gauges on the bottom row. After I mocked-up the panel, I realized that the transfer case lever was going to be difficult to access and operate, so I am abandoning the OEM lever and linkage and am replacing it with a new JB cable shifter. The top of the new gauge pod will have a flat space where I plan to mount either my iPhone or the screen for my backup camera.

F74C769F-4232-42BA-9A41-E0528C2D1701.jpeg23FD5CE7-60B9-40DD-96B4-CAE022E2FBE9.jpeg
 

cruzer747

Active member
218
145
43
Location
California
Nice, never can have too many gauges! I am pretty sure that the vacuum pump delete from one of my 6.5t motors for my work truck will fit in place of my current setup as I no longer have the need for vacuum. (Building a replacement now which will hopefully run for a few years, bought a truck and tore it down for the motor so I have a bunch of spare parts but to my dismay the 01' 506 block has 2 cracks started at the webs at the outer bolts. Other than that it was in great shape at 116k.) Anyways, never knew they had the drive with a tach output. pretty neat! My ashtray area will eventually become the support for some custom dual phone holder that has one tilted towards my seat and the other to passenger. I have been using the offline maps quite a bit while out camping and itll be nice to have it visible with a side-ward glance.

How do people feel about swedish camo? When I do get to it in a few years I thought something a little more angular would go good on the big flat box of the m1010. M90 camo is I think gunna be the one. Layout will let the darker shapes fall across the windows and break up the hard lines a bit better than I mocked up in photoshop.

Amazing all the stuff I can get done when I have shelter in place orders :p
 

Attachments

Last edited:

chevymike

Well-known member
604
471
63
Location
San Diego, CA
So... unless you have the diagnostic tool, why keep that plug in the truck at all? I recall removing it from my first M1010 which has a connector up under the dash, which will unplug that under dash plug. Then remove it and the mount and nothing more to worry about. Just a thought and one less thing to deal with.

I like that camo pattern. :D
 

emeralcove

Member
Steel Soldiers Supporter
134
15
18
Location
Battle Ground/WA
Just a suggestion to throw in the mix for your camo project. There is vinyl perforated film with many camo patterns that could be applied on the windows of the box and the sheet metal paint could be blended to really break up the windows. One of many sites offering this product; https://camowraps.com/perforated-window-film/
I do appreciate your thread, I am slowly collecting parts to add a 700R4 to my M1009 myself.
 

cruzer747

Active member
218
145
43
Location
California
Just a suggestion to throw in the mix for your camo project. There is vinyl perforated film with many camo patterns that could be applied on the windows of the box and the sheet metal paint could be blended to really break up the windows.

That is a great idea! While the windows are a nice source of light I am sure it wouldnt cut it by too much (I usually don't hang out in there in the day anyhow). The camo patterns probably wouldn't match up perfect but I am sure I could adjust layout (which I was planning) for a dark color to span the windows and then I could try and find a close solid color perf vinyl match. I will keep that in mind. Not too mucth time to put into this until I get my work truck motor back together and in so I can get back to work assuming the work world will be where I left it. If not I have a good bugout vehicle to spend a bit of time in :)
 

emeralcove

Member
Steel Soldiers Supporter
134
15
18
Location
Battle Ground/WA
No doubt there is uncertainty right now and depending on the work you do, to a greater or lesser degree. But things will return to normal eventually.
I also have multiple projects going and when your daily driver is on the "needs attention" list, priorities shift pretty quick.
I figured I would mention the perforated film and at least it could be referenced later in your build thread as "paint" for your truck looks okay even if it isn't the paint you want right now.
I know you are having some engine heat issues even in the winter. Have you been able to check the condition of your radiator, in the photos it looks like a fair amount of paint overspray is on the coils, this could affect heat transfer and even though it is a really low mileage vehicle it is till over 30 years old and the radiator is most likely original. My '86 M1009 only had 42,000 miles on it when I bought it at auction but I had some engine heat issues but didn't have the extra 2000 pounds of ambulance body to haul around. It was pricey but having the radiator re-cored made a huge difference. Pulling long grades in the summer in Southern California would make the engine temp light flicker and the fan clutch would lock up so the engine fan would roar, I would back off the throttle to help it and the light would stay off for awhile. After the radiator re-core with the thickest core that would fit the tanks, I have never seen the engine temp light again except for a moment when starting so I know it still works. Since moving to Washington, it takes a bit to warm up and I need to get a cover for the radiator so it warms up faster. Mind you, where I am just north of Portland, winters are not really severe and looking at the pictures you have posted of your winter trips indicate it is most likely not as cold normally for me. Anyway, just another thought to consider, could be a very straight forward solution. I had originally thought I only needed to have the radiator rodded out but the shop called me and said the core was shot and would need to be re-cored which kind of surprised me since it didn't leak that I was aware of.
 

cruzer747

Active member
218
145
43
Location
California
I know you are having some engine heat issues even in the winter.
Thankfully my motor runs cool as a cucumber! So cool I wonder if someone may have installed a lower temp stat or removed it entirely but I have not gone digging as it runs great. Coolant stays where it is supposed to and it does get warm enough. Never gets past 190 on grades and cruises at 165 normally.

My overheating problem is the 700r4. The next step fr me will be to install a lockup switch for long grades. I hope that fixes it as the thing works wonderfully in every other condition. It is an easy enough fix if it does but at the moment it is waiting on building that control console. I completed a full size mockup and now have sheetmetal stencils printed out and ready for transfer and cutting. When I get further into that project I will post some more pictures. I am going to be really stoked once that is done.
 

Sharecropper

Well-known member
Steel Soldiers Supporter
1,840
995
113
Location
Paris KY
Thankfully my motor runs cool as a cucumber! So cool I wonder if someone may have installed a lower temp stat or removed it entirely but I have not gone digging as it runs great. Coolant stays where it is supposed to and it does get warm enough. Never gets past 190 on grades and cruises at 165 normally.

My overheating problem is the 700r4. The next step fr me will be to install a lockup switch for long grades. I hope that fixes it as the thing works wonderfully in every other condition. It is an easy enough fix if it does but at the moment it is waiting on building that control console. I completed a full size mockup and now have sheetmetal stencils printed out and ready for transfer and cutting. When I get further into that project I will post some more pictures. I am going to be really stoked once that is done.
Hey Cruz - did you speak with Chris Gardner at Bowtie regarding the manual lock-up switch? I believe those long inclines pulling your heavy load in 3rd gear (unlocked) is probably your overheating issue. Just my 2 cents.
 

cruzer747

Active member
218
145
43
Location
California
Hey Cruz - did you speak with Chris Gardner at Bowtie regarding the manual lock-up switch? I believe those long inclines pulling your heavy load in 3rd gear (unlocked) is probably your overheating issue. Just my 2 cents.
Yes, he gave me the go-ahead to install the switch. How much that will stop/slow down the climbing temp will be interesting. I will post results when I find out. Will be in about a month or two.
 

emeralcove

Member
Steel Soldiers Supporter
134
15
18
Location
Battle Ground/WA
I understand the cool running engine, my M1009 really takes time to heat up to put out any heat from the heater when it is around freezing, in the 20's I am glad there are hill or I would be at work before the heater did much and that is a 20 mile drive. I will be following closely to see what resolution you come up with to keep the transmission temp in range, since heat is oil's greatest enemy .
 

cruzer747

Active member
218
145
43
Location
California
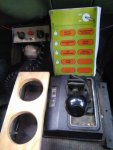
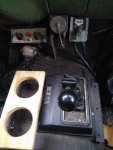
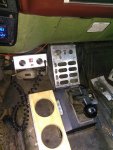
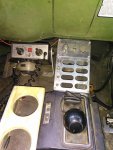
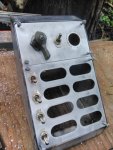
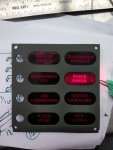
So I made some good progress on the console. Had a heck of a time getting the slots "just right" by hand (drill press, router, dremel, file etc... but they definately got to where I am happy with them. I wish it could have been 1/2" wider but I did not want to move the PA over nor have it hang over to the passenger area so while it is all going to work it is really tight! Decided to put the ground disconnect on my side to keep the lady and dog away from it and put the usb on her side. Will put when I get further along, need to do some aluminum solder next and attach a grid to separate the red plexi.

So who votes for green to patch the dash and who votes for semigloss black body with the aluminum face to patch the PA and black of the tcase shifter?

-also if you notice the voltage, that is not accurate, just whatever is leaking through the system with the ground disconnected.-
 

Attachments

emeralcove

Member
Steel Soldiers Supporter
134
15
18
Location
Battle Ground/WA
So I made some good progress on the console. Had a heck of a time getting the slots "just right" by hand (drill press, router, dremel, file etc... but they definately got to where I am happy with them. I wish it could have been 1/2" wider but I did not want to move the PA over nor have it hang over to the passenger area so while it is all going to work it is really tight! Decided to put the ground disconnect on my side to keep the lady and dog away from it and put the usb on her side. Will put when I get further along, need to do some aluminum solder next and attach a grid to separate the red plexi.

So who votes for green to patch the dash and who votes for semigloss black body with the aluminum face to patch the PA and black of the tcase shifter?

-also if you notice the voltage, that is not accurate, just whatever is leaking through the system with the ground disconnected.-
The results surely speak for themselves. That truly turned out perfect. We used to joke in the Army "Measure with a mic, mark it with chalk, cut with an ax then paint to cover up your mistakes" Then later "If it don't run chrome it" You are definitely not supporting that joke! Beautiful job!!
I always appreciate the green to match the dash/truck so it keeps most thinking it was factory and the mystic of the CUCV continues to be bigger than life.
 

cruzer747

Active member
218
145
43
Location
California
The results surely speak for themselves. That truly turned out perfect. We used to joke in the Army "Measure with a mic, mark it with chalk, cut with an ax then paint to cover up your mistakes" Then later "If it don't run chrome it" You are definitely not supporting that joke! Beautiful job!!
I always appreciate the green to match the dash/truck so it keeps most thinking it was factory and the mystic of the CUCV continues to be bigger than life.
Well thanks! I am sure I have over 30 hours in with an easy 20 to go but seeing it lit up makes it all worth while at this point. I have the last few parts ordered (some atx computer harness extensions to hack up to make the thing easy to dissasemble without undoing dozens of connections).

I am really excited to see how it is slowly creeping along, I decided for green (so I think I may paint the PA to match) and here are some updated pics of the dummy light face. The "forest green camo" paint I picked up does not quite match (darker than the dash) so before I finish I will try and find a better match in a can. I assume carc 383 is what I am after, I found some on the auction site and will give it a go... Also looking at the pics again I may try and remake the PA brackets so I can nudge the console over another 3/4" to line up with the ashtray door. Having things line up nicely might be pushing it abit trying to make this to looki like it was a military addon but I could live with that :D
 

Attachments

Last edited:
Top
AdBlock Detected

We get it, advertisements are annoying!

Sure, ad-blocking software does a great job at blocking ads, but it also blocks useful features of our website like our supporting vendors. Their ads help keep Steel Soldiers going. Please consider disabling your ad blockers for the site. Thanks!

I've Disabled AdBlock
No Thanks