• Steel Soldiers now has a few new forums, read more about it at: New Munitions Forums!

  • Microsoft MSN, Live, Hotmail, Outlook email users may not be receiving emails. We are working to resolve this issue. Please add support@steelsoldiers.com to your trusted contacts.

M1010 fire rig to camper conversion

cruzer747

Active member
218
145
43
Location
California
So, you received a cast aluminum flywheel cover from Bowtie? When I purchased my 700R4 from them, a cover was not included.
I requested it as an add on. He was actually saying many people opt to run without one (for cooling and a few other reasons I have already forgot) and was here or there with whether I needed it. I could have sourced one on ebay but this one was beautifully clean and saved me one more transaction.
 

Sharecropper

Well-known member
Steel Soldiers Supporter
1,836
989
113
Location
Paris KY
You may need to modify it slightly for the CUCV starter hub to clear. I simply cut mine with a jigsaw and then filed/sanded the edge smooth. Almost looks professional. 😃
 

chevymike

Well-known member
603
468
63
Location
San Diego, CA
Nice! I am still on the fence between doing the 700r4 swap or Gear Vendors. Pros and cons to both. Excited to see how this works for you.
 

Sharecropper

Well-known member
Steel Soldiers Supporter
1,836
989
113
Location
Paris KY
Nice! I am still on the fence between doing the 700r4 swap or Gear Vendors. Pros and cons to both. Excited to see how this works for you.
Must be a heck of a fence. Why would you consider a Gear Vendors unit over a built 700R4? In my 50-year history of building and modifying 4WD trucks, when comparing the two, I can see many more cons to the Gear Vendors, and many more pros to the 700R4. Just my 2 cents.

Respectfully,
 

chevymike

Well-known member
603
468
63
Location
San Diego, CA
Must be a heck of a fence. Why would you consider a Gear Vendors unit over a built 700R4? In my 50-year history of building and modifying 4WD trucks, when comparing the two, I can see many more cons to the Gear Vendors, and many more pros to the 700R4. Just my 2 cents.

Respectfully,
GV pros are very easy to install. Gives me gear splitting and living in SoCal, I have a lot of mountains to cross over to get to anywhere. Having a "2.5" gear could be very useful when 2nd is to high and 3rd is to low. I can get it with a fixed yoke and use a slip joint driveshaft, so if any rear end failure, I can remove driveshaft, pull axles shafts (then seal them off) and be able to drive out.

Biggest con of the 700r4 is they were never designed for vehicles this heavy, so there could be some questions to longevity of it. Definitely more work to install.
 

Sharecropper

Well-known member
Steel Soldiers Supporter
1,836
989
113
Location
Paris KY
[QUOTE

Biggest con of the 700r4 is they were never designed for vehicles this heavy, so there could be some questions to longevity of it. Definitely more work to install.
[/QUOTE]

I wish I could un-read this non-sense.
 

cruzer747

Active member
218
145
43
Location
California
[QUOTE
Biggest con of the 700r4 is they were never designed for vehicles this heavy, so there could be some questions to longevity of it. Definitely more work to install.
[/QUOTE]

This is from what I have read, fairly accurate (700r4 was not used in 1 tons, they stuck with the th400 until the 4l80e came out from what I have read) Not saying they can not be improved but the th400 is no doubt a heavier duty (along with the increased parasitic loss) tranny.

OD is nice, more work to install? Maybe... but not in the big picture potentially but all of this is certainly open for debate not that I really want to take this thread there...

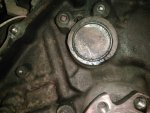
Anywho, the th400 is now out, nothing too difficult. The dipstick tube did NOT want to wiggle up past the motor so I took it out downwards. When I removed the flywheel I was greeted to what look like 2 leaks. One being the rear of the oil pan..
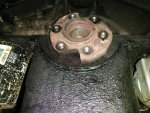
IMG_20191214_172644.jpg
and the next being the rear cam seal
IMG_20191214_172654.jpg
(EDIT- This looks worse than it is, I measured it and it was only .01" out top to bottom at its worst... so it is just a leaker)
So I noticed that the cam seal is a little out of perpendicular to the block at the base, it is tempting to try and tap it in but I should and will do it right and replace it. As far as the pan leak goes... anyone have experience with permatex spray leak sealant?
 

Attachments

Last edited:

Sharecropper

Well-known member
Steel Soldiers Supporter
1,836
989
113
Location
Paris KY
Looks to me that you need to drop that pan and clean/reseal it. Regarding the cam seal, I have never replaced one but I believe it comes out/goes in just like a freeze plug.
 

cruzer747

Active member
218
145
43
Location
California
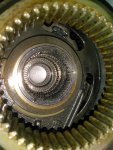
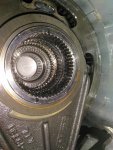
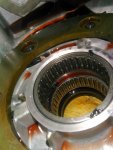
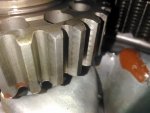
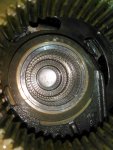
Today I had enough time to tackle the lions share of the work on the transfer case. A pretty straight forward deal as long as you pay attention. The seal kit came with some extra bits and and was also lacking seals for the speedo housing and speedo output (I hope they are not leaking) The majority of the leakage was coming from the two main case seals as the factory black sealant was either not allowed to set up enough or put on too cold or who knows but it was very compromised.

Also solved the mystery of all the gunk in the adapter, it was excess sealant. Not only that but it was all gunked up in the input area along with causing a restriction of the input drain.
IMG_20191215_165103.jpg IMG_20191215_165142.jpg IMG_20191215_165344.jpg IMG_20191215_165648.jpg IMG_20191215_171114.jpg
Thank goodness that in spite of this there was very minimal wear to all parts and just a tad of sludge at the magnet.
IMG_20191215_164347.jpg IMG_20191215_164353.jpgIMG_20191215_164415.jpg

It is now all cleaned up with all new seals and waiting for me to get some blue threadlocker tomorrow to bolt it back together. I like using 'right stuff' and think it will do fine here, certainly better than whatever came from the factory. I have heard about loctite 515... but I have plenty of right stuff on hand so if there are no objections....

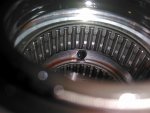
look at all these needles!

IMG_20191215_210421.jpg

Also I will unfortunately not have the time to drop the oil pan , I am trying to hit the road for the holidays and I jhave a feeling I am already going to be behind. I will do my best with a bandaid. I think I will be fine. If it gets worse I will address it then.... when I am fixing it the right way by putting a 6.5 in :D
 

Attachments

cruzer747

Active member
218
145
43
Location
California
So no pics but while it is still fresh in my mind I will put some details here before I forget. Today kinda kicked my butt.... being that the cam plug was done and I got a second touch up on the rear of the pan with a little Great Stuff (I really think i nailed it and at least it will be a thousand times better than it was if not) Anyhow it was time to start the install.

As per the guidelines from Bowtie, an external filter is required for between 100-500 miles on the 700r4. I got that ordered and got to work. The guidlines provided are very well written. A lot of tips but not the basics. It advised to install the dipstick tube first which I decided against as I am installing parked at a slight angle in the dirt/mud without a tranny jack and figured I would have enough to deal with. Using a stack of 2x6 and 4x4 on either side as cribbage it made its way up there. When it was high enough I employed ratchet straps as a safety measure and also adjusters when needed. It got in. Wishing I had a shop :/ Things I ran into....

Not needing the vacuum line anymore I was going to leave it there if it was not in the way but when I went to put the dipstick in sure enough it had to go. I guess since the modulator was all that the vacuum pump is there for it may be time for a delete but one thing at a time. I was going to also leave the wire for the electronic kickdown... but without the vacuum I will be taking that out as well. If this thing does not work right I will have to go 4l80e I guess as OD is a necessity and I do not want a GV uinit. Being passed by big rigs on backroads is no fun.

I did see one thing with the transmission that was surprising, I got the derale air cooling pan which was bolted on, it has a drain plug at the bottom which sticks out about 3/8 of an inch. it was sitting on this during shipping and slightly bowed the pan in. No biggy as I will be taking the pan off to set the shifter and will tune it up with a soft mallet but still... would have been easy to cut a square osb shim with a hole in it that would have avoided this.

I noticed that the distance from the torque converter to the mounting pads on the flywheel were beyond spec so I will need to get some washers to push it back into the tranny (bolted it up for the night to keep weight off the seal). (spec is 3/16 to 1/4, mine was a fat 5/16)

I started to work on the tailshaft adapter. It looks like it will work out just fine. I compared shaft lengths and all looked good. I am curious about torque specs as I did not see it in the instructions. Also there is a splined plastic washer that I have no idea where it goes. its spline count does not match anything ata glance. Will ask BO tomorrow.

Hoping to have drivetrain bolted up and be in the adjustment phase by thursday.
 

Sharecropper

Well-known member
Steel Soldiers Supporter
1,836
989
113
Location
Paris KY
I’d like see how you plumbed the temporary filter upstream from the 700R4. If I remember correctly, the return line from the radiator is the top fitting.
thanks.
 

cruzer747

Active member
218
145
43
Location
California
I’d like see how you plumbed the temporary filter upstream from the 700R4. If I remember correctly, the return line from the radiator is the top fitting.
thanks.
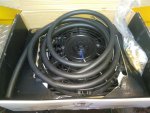
I included an external tranny cooler w/ fan in my order which came with a bunch of fittings to adapt to a hose (makes fitting the temp ext filter really easy). My plan is to mount the tranny cooler (I guess under the truck is a popular install spot for these) but I am pretty sure in this case the proper route is Trans bottom is feed out--->bottom port radiator in out top port---->tranny cooler hardware ---> hose---->3/8 filter--->hose---> tranny cooler---->hose--->cooler hardware----hard line---->stock line back to trans top return fitting. I will leave enough extra hose to delete the filter and still be able to reach after its gone.

I will maybe get by with bending the stock line but I may have to cut it back and reflare it depending on how routing goes.
 
Last edited:

cruzer747

Active member
218
145
43
Location
California
after the rain let up I managed to take another stab at kicking this thing down the road. Pics tomorrow when there is better light. The adapter went on very nicely, but I did make a mistake in assuming the cast numbers would indicate up/down. The bolt holes on the advaned adapters tailhousing piece /tcase adapter are asymmetrical and the 700r4 output is a perfect square 4 bolt holes. 3 ways to get it wrong and I only did 1, not bad eh? There was a little struggle with the mounts being off by about 1/16th but I highly doubt it was the adapter and was tamed with a little coercing.

I picked up some hardened steel washers (3) after spending a few minutes micing the bin at teh hardware store. The 3 matches that I got were .098. I had a call in to BO and I originally thought the free loose space between t converter and flywheel was ~.33... based on this info i heard back and was told I need .15 of shim which would give a free play distance of .18 or a tight 3/16. I took the time to measure with feeler gauges and found my gap was only .28 so my .098 shims had me right in the sweet spot. Starter gear to ring gear looks good....

Looked around under the truck for a spot to mount the aux cooler. I do want the ability to mount another fuel tank on the passenger side and if it were identical to the driver side there would be about the right amount of room in front which would put it in just the right spot nice and near the tranny lines. I would have to make some sort of shroud to protect it from debris being flung back from the front tire. Will look harder at that tomorrow.
 

cruzer747

Active member
218
145
43
Location
California
Quick question, hopefully I did not overstep a seal but the flange at the transmission tail to the transfer case adapter comes with an o-ring and a gasket. When I took out the transmission there was only the o-ring which is what are replaced and put back. No sealant other than a little gasket tac. Should I also use the paper gasket?it seems that the o-ring should be able to seal anything before it gets to the paper gasket which could just be a backup?
 

cruzer747

Active member
218
145
43
Location
California
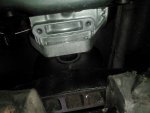
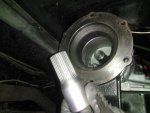
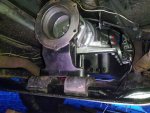
Pics from yesterday, should have it all done today or tomorrow. I left the square cut seal only as I figured it is an either or and worst case it seeps and I have to dig back to it. Got the brace in, transfer case is in, linkages are all connected, outstanding is the tv cable, cooler (I am thinking in front of the radiator is the easiest place now) the tcc wiring and the temp probe. I checked in with BO and their preferred trans cooler mounting is radiator first then cooler. My prior post will be edited to reflect that.
IMG_20191219_165052.jpgIMG_20191219_165013.jpgIMG_20191219_164924.jpg

shim at TC
IMG_20191219_165037.jpg

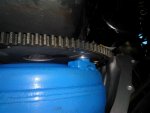
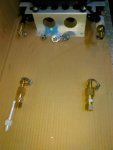
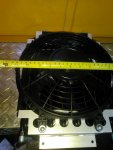
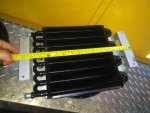
The radiator cooler came with fittings that will require cutting into the lines and then using compression to mpt to barbed fittings. AN6 to barb at the cooler.
IMG_20191219_185902.jpg IMG_20191219_191752.jpg IMG_20191219_190105.jpg IMG_20191219_190031.jpgIMG_20191219_190019.jpg
 

Attachments

cruzer747

Active member
218
145
43
Location
California
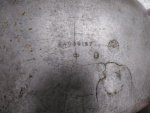
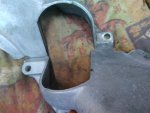
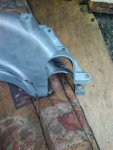
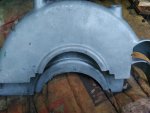
Something I just learned right now is that yes I would need to modify the inspection cover to clear the starter and out of curiosity I tried my old one and it fits like a glove. Looks like I will have a nice shiny inspection cover for sale soon.

Th400 cover part# 14036187
New 700r4 cover (does not fit) #1552212
 

Attachments

Last edited:

cruzer747

Active member
218
145
43
Location
California
Ok, quick question.... got the tv bracket on (required pulling temp sending unit) and everything hooked up nicely (have not adjusted it yet. I had to pull the rod all the way to the end to clear the stud on the injection pump bracket. At that point does the slotted connector just float there? Any washer and E clip required? It looks like it has a little bit of slop that makes the rod able to slightly twist and really made me wonder if I should add something to prevent that.

I am now trying to stuff the cooler in front of the grill in the dark and the sirens that were installed by PO have made easy access impossible! There will be many words tonight that I will spare you but tomorrow I will have some pictures. Just that and a few wires to run and I am in action!

Oh, as for the long term cooler setup, I will be swapping out to 5/16 SS lines and -6an fittings at the cooler to 5/16 x 5/16 compression to the original line. In my experience tranny fluid always finds its way out of rubber sooner than later. I will save that for a sunny warm day.
 

Sharecropper

Well-known member
Steel Soldiers Supporter
1,836
989
113
Location
Paris KY
Ok, quick question.... got the tv bracket on (required pulling temp sending unit) and everything hooked up nicely (have not adjusted it yet. I had to pull the rod all the way to the end to clear the stud on the injection pump bracket. At that point does the slotted connector just float there? Any washer and E clip required? It looks like it has a little bit of slop that makes the rod able to slightly twist and really made me wonder if I should add something to prevent that.

I am now trying to stuff the cooler in front of the grill in the dark and the sirens that were installed by PO have made easy access impossible! There will be many words tonight that I will spare you but tomorrow I will have some pictures. Just that and a few wires to run and I am in action!

Oh, as for the long term cooler setup, I will be swapping out to 5/16 SS lines and -6an fittings at the cooler to 5/16 x 5/16 compression to the original line. In my experience tranny fluid always finds its way out of rubber sooner than later. I will save that for a sunny warm day.
It sounds like your TV cable is not adjusted correctly. There are many references online about how to correctly adjust it and I recommend that you read as many as you can. Basically you need to temporarily remove the spring on the IP and wedge the throttle in the WOT position with a piece of wood or other strong material. Then press and hold the horseshoe button on the TV cable and pull the cable as far rearward as it will go, and then release the button to lock the cable in that spot. Remove the wedge and replace the throttle spring. That will get you close enough to get rolling, however in order for Bowtie’s warranty to be in force you need to use a pressure gauge on the side of the transmission as is detailed in Bowtie’s instructions.
Do you have the correct 6.2 TV bracket installed in the correct location?
 
Top
AdBlock Detected

We get it, advertisements are annoying!

Sure, ad-blocking software does a great job at blocking ads, but it also blocks useful features of our website like our supporting vendors. Their ads help keep Steel Soldiers going. Please consider disabling your ad blockers for the site. Thanks!

I've Disabled AdBlock
No Thanks