• Steel Soldiers now has a few new forums, read more about it at: New Munitions Forums!

  • Microsoft MSN, Live, Hotmail, Outlook email users may not be receiving emails. We are working to resolve this issue. Please add support@steelsoldiers.com to your trusted contacts.

M1010 for my daughter the field biologist

Tow4

Well-known member
Steel Soldiers Supporter
2,097
647
113
Location
Orlando, FL
Remove the nylon screw from the alternator with the Transpo regulator. I'm pretty sure that regulator is adjustable.
 

jpg

Member
611
15
18
Location
Boston, MA
I might be missing something here, but it looks like the alternator is grounded to ITSELF, and that doesn't make sense.

It's that smaller wire between the two terminal posts right?
The fat wire in the bottom corner is the positive output of the alternator, which goes to the negative post on the back battery, which connects to the positive post of the front battery. (They were out of red 2G wire.) The upper fat wire goes to ground, though it's not fat enough yet.
 

jpg

Member
611
15
18
Location
Boston, MA
Doghead relay installed without incident.

Replaced hazard flasher with new HD Delco flasher. Formerly anemic flashers seem adequate now. I guess the old flasher was just tired.
 

jpg

Member
611
15
18
Location
Boston, MA
Attendant's Seat Bearing restoration/replacement

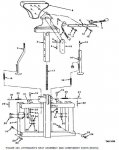
The M1010 has an "Attendant's Seat" in the back. It looks a little like a Harley saddle with a seat belt. It sits on a steel frame that rolls the length of the ambulance, and it's spring loaded to allow the attendant to pop up to deal with the upper litters, or pop down to deal with the lower. Foot pedals control the rolling and the height.

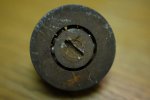
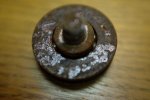
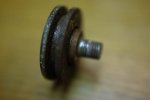
Mine was a little rusty, so I took it out and began disassembly in preparation for cleaning and painting. I'm not sure what to do with/about the roller bearings. The balls look OK, but the outside of the race that contains them is rusty.

The part is "09-0056 ROLLER,SEAT", #19 in image 223 in TM9-2320-239-34P, copied below.

I put out some feelers for a replacement part, including SS classified, but I'm not optimistic. I could use some advice as to how to clean up this part. I'm thinking perhaps a soak in naval jelly followed by rust reformer after carefully masking the bearing, then chassis lube in the bearing. My goal is to stop the rust and to put the part back into service. Is there a better way?

Thanks,
-jpg

attendSeat.jpgDSCF2825.jpgDSCF2823.jpgDSCF2824.jpg
 

Recovry4x4

LLM/Member 785
Super Moderator
Steel Soldiers Supporter
34,012
1,810
113
Location
GA Mountains
Well, for what it's worth, after my first camping trip with 2 kids, I promptly removed said seat and stored it away. Always seemed to be in the way. I now keep a couple of pieces of 1x12 to span the area between the seats. Nice seat and step.
 

Another Ahab

Well-known member
18,007
4,579
113
Location
Alexandria, VA
The M1010 has an "Attendant's Seat" in the back. It looks a little like a Harley saddle with a seat belt. It sits on a steel frame that rolls the length of the ambulance, and it's spring loaded to allow the attendant to pop up to deal with the upper litters, or pop down to deal with the lower. Foot pedals control the rolling and the height.
-jpg
Well, for what it's worth, after my first camping trip with 2 kids, I promptly removed said seat and stored it away. Always seemed to be in the way. I now keep a couple of pieces of 1x12 to span the area between the seats. Nice seat and step.
I can sure understand how you might want to "deep-six" the seat (considering that you're not operating as an active combat ambulance).

But I admire it as a GREAT concept, whoever came up with the idea.
 

jpg

Member
611
15
18
Location
Boston, MA
I can sure understand how you might want to "deep-six" the seat (considering that you're not operating as an active combat ambulance).

But I admire it as a GREAT concept, whoever came up with the idea.
With young kids, it surely would be a menace. Lots of sharp corners and pinch hazards. I would remove it too, if I had little ones in the mix.

Depending on how we rig this up as a lab, I'm not sure if it will be convenient or not. We may end up using it, or putting it in storage. I'm not sure yet. In any case, my current mission is to stop the rust.
 

Another Ahab

Well-known member
18,007
4,579
113
Location
Alexandria, VA
Depending on how we rig this up as a lab, I'm not sure if it will be convenient or not. We may end up using it, or putting it in storage. I'm not sure yet. In any case, my current mission is to stop the rust.
That sounds like a good plan you got there; because, like it or not:

- Rust Never Rests


rust.jpg
 

jpg

Member
611
15
18
Location
Boston, MA
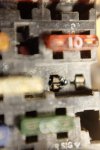
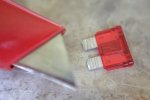
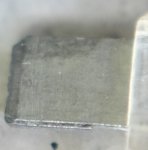
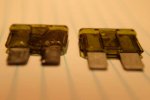
When my 30A headlight fuse melted, it damaged the fuse holder. The fuse holder wouldn't hold properly, and I had to re-seat the fuse regularly. Picture below.
DSCF2833.jpg

The charred remains in the photo above is a lump of melted fuse block. I chiseled that away.

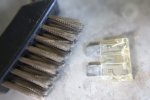
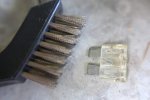
I needed a way to clean corrosion from the fuse holders, so I took a fuse and cut teeth into it with a mat knife to make it into a crude file.
DSCF2834.jpg

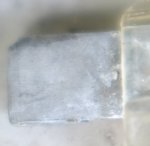
I stuck this "file" into each fuse holder a couple dozen times, to file off any corrosion. I took a stainless wire brush to each fuse, to clean off the corrosion there. Before and after pictures below:


DSCF2836.jpgbefore.jpgDSCF2835.jpgafter.jpg

Then I coated the fuse contacts with no-ox-ide, and inserted it about a dozen times to distribute the lube. Hopefully, this is the last time I'll mess with the fuse box unless I actually blow a fuse.

I'm not sure if removing the horn diode fixed my problem of too much current through the headlight fuse. I've not melted any fuses since, so I have hope. I ordered a gently used Fluke 375 off flea-bay so I can measure this current. I also ordered the LMC headlight relay kit.

I know the headlight relay kit will solve my problem with the headlight fuse melting, but before I install the kit, I want to be sure I fix any problems like the horn diode that are contributing to my headlight fuse current overload problem. I don't want the LMC kit to mask problems.

I'm digging through threads and wikis looking for other troublesome items I should remove from my truck. All suggestions welcome.
 
Last edited:

Another Ahab

Well-known member
18,007
4,579
113
Location
Alexandria, VA
I'm digging through threads and wikis looking for other troublesome items I should remove from my truck. All suggestions welcome.
Please remove all remnants of Negativity in and around the vehicle, and be mindful to accentuate the Positive whenever in the truck's vicinity.

The OD Buddha would want it that way.


buddha.jpg
 

tim292stro

Well-known member
2,118
41
48
Location
S.F. Bay Area/California
Remember that all of the lights go through that fuse as well as the horn power, so that the service/blackout switch can control them at a single point and modifications or additions to the original lighting design has an impact on this one fuse's draw. IMHO this is the one weak point in the entire GM wiring that needs addressing.

The LMC headlight harness, effectively replaced the load of two high wattage headlight fixtures with the miniscule load of a relay coil. I would offer that a similar harness for putting the high current horn load outside the firewall is a good idea.

Modern vehicles have two "fuse panels and relay boxes". The lower power logic loads are handled by the smaller lower power fuse panel and control switches inside the cab, the higher power loads are handled by a larger higher power fuse panel under the hood. This reduces the likelihood that an electrical fire can start inside the cabin since there isn't much energy available inside the cab.

To put a relay on the horn, do this:
horn_relay.jpg
 

jpg

Member
611
15
18
Location
Boston, MA
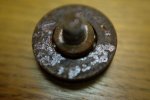
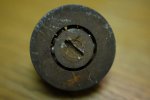
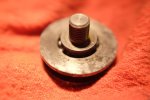
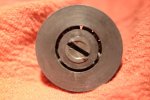
I struck out finding replacement bearings for my attendant's seat. I tried the SS classified and various parts sources. So I soaked them for a day in Naval Jelly. 3 of the 4 came out clean and spinning freely. The fourth wouldn't turn until I used tools on it. Then it broke loose. I had sprayed it with WD40, and I could see rusty lubricant running out as I worked the bearings back and forth. So I cleaned that one as best I could, and put it back in the Naval Jelly. Before and after shots below.

DSCF2823.jpgDSCF2825.jpg
DSCF2838.jpgDSCF2837.jpg

I wouldn't recommend this approach for a critical engine or wheel bearing, but for something that allows a seat to slide, I think these will be fine. I'll paint the outside, grease the bearings, and declare victory.
 

USAFSS-ColdWarrior

Chaplain
Super Moderator
Steel Soldiers Supporter
18,550
5,917
113
Location
San Angelo, Tom Green County, Texas USA
I struck out finding replacement bearings for my attendant's seat. I tried the SS classified and various parts sources. So I soaked them for a day in Naval Jelly. 3 of the 4 came out clean and spinning freely. The fourth wouldn't turn until I used tools on it. Then it broke loose. I had sprayed it with WD40, and I could see rusty lubricant running out as I worked the bearings back and forth. So I cleaned that one as best I could, and put it back in the Naval Jelly. Before and after shots below.

View attachment 582890View attachment 582891
View attachment 582888View attachment 582889

I wouldn't recommend this approach for a critical engine or wheel bearing, but for something that allows a seat to slide, I think these will be fine. I'll paint the outside, grease the bearings, and declare victory.

There is a business here in San Angelo called WEST TEXAS BEARING that has supplied me with odd and infrequently specified bearings for aircraft and in my days in a antiquated foundry operation. A GOOD bearing supplier SHOULD be able to find a match or close replacement. I'd suggest your find such a quality local shop - or ask a mechanized manufacturing operation's purchasing agent - or an oilfield company who they get their odd bearings from.
 

Another Ahab

Well-known member
18,007
4,579
113
Location
Alexandria, VA
I struck out finding replacement bearings for my attendant's seat. I tried the SS classified and various parts sources. So I soaked them for a day in Naval Jelly. 3 of the 4 came out clean and spinning freely. The fourth wouldn't turn until I used tools on it. Then it broke loose. I had sprayed it with WD40, and I could see rusty lubricant running out as I worked the bearings back and forth. So I cleaned that one as best I could, and put it back in the Naval Jelly. Before and after shots below.


View attachment 582888.
Those bearings cleaned up nicely. You did a good job there. [thumbzup]

I was shopping for some Naval Jelly the other day, and the guy at the store (West Marine) told me it's unavailable now. He said something about the EPA, and how it was not approved for further sale, He had some alternate environmentally-friendly product. And THAT product is probably good enough, but still I asked if he had any old back-stock of the Naval Jelly I could buy, but no dice.

Where did you get your stash!?
 

rsh4364

Active member
1,372
15
38
Location
greensprings ,ohio
Remember that all of the lights go through that fuse as well as the horn power, so that the service/blackout switch can control them at a single point and modifications or additions to the original lighting design has an impact on this one fuse's draw. IMHO this is the one weak point in the entire GM wiring that needs addressing.

The LMC headlight harness, effectively replaced the load of two high wattage headlight fixtures with the miniscule load of a relay coil. I would offer that a similar harness for putting the high current horn load outside the firewall is a good idea.

Modern vehicles have two "fuse panels and relay boxes". The lower power logic loads are handled by the smaller lower power fuse panel and control switches inside the cab, the higher power loads are handled by a larger higher power fuse panel under the hood. This reduces the likelihood that an electrical fire can start inside the cabin since there isn't much energy available inside the cab.

To put a relay on the horn, do this:
View attachment 582422
Has someone done a step by step horn relay install for electrical dummies? As Im an electric dummy.
 

jpg

Member
611
15
18
Location
Boston, MA
Naval Jelly

I got it at Lowe's
http://www.loctiteproducts.com/p/s_trmt_naval/overview/Loctite-Naval-Jelly-Rust-Dissolver.htm

Google shows multiple sources. Lowe's was most convenient for me.

Those bearings cleaned up nicely. You did a good job there. [thumbzup]

I was shopping for some Naval Jelly the other day, and the guy at the store (West Marine) told me it's unavailable now. He said something about the EPA, and how it was not approved for further sale, He had some alternate environmentally-friendly product. And THAT product is probably good enough, but still I asked if he had any old back-stock of the Naval Jelly I could buy, but no dice.

Where did you get your stash!?
 

jpg

Member
611
15
18
Location
Boston, MA
Should M1010 fuse #17 be 20 or 30 amps?

My M1010 came with a 30-amp fuse in #17, Engine Control. The TM and the SS thread below both say that should be a 20-amp fuse for non-M1010 CUCVs. They don't say what the M1010 should have. Is 30 amps correct for this fuse in an M1010, or do I have the wrong fuse installed?

This thread lays out the non-M1010 fuse box.
http://www.steelsoldiers.com/showthread.php?132309-CUCV-Fuse-Box-Layout

Page 4-31 of TM9-2320-289-20 also lays out the non-M1010 fuse box, with errors corrected in the SS thread referenced above.

I find several items in my M1010 that I don't find in the TMs or elsewhere on SS:
  • My M1010 has a 25-amp fuse in #3, which I'm told is for Ambulance Accessories,
  • and a 30-amp fuse in #10, for GPFU and A/C.
  • In the TM, #16 is a 5-amp fuse labeled "Courtesy Light". In the SS thread above, it's a 20-amp fuse. In my M1010, it's a 20-amp fuse that also powers the cigarette lighter. As far as I can tell, my M1010 has no courtesy lights, and the TMs don't document the cigarette lighter.

My M1010 came with the following fuses installed:
View attachment M1010Fuses.pdf
 
Last edited:
Top