- 483
- 33
- 28
- Location
- Ahwatukee, AZ
wiring and cooling update
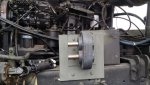
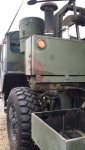
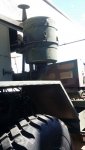
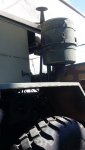
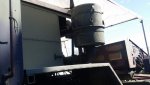
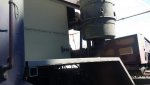
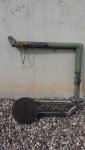
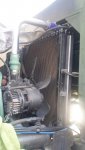
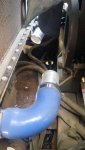
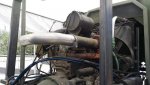
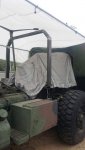
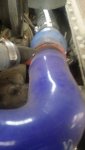
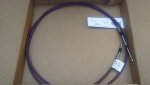
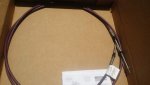
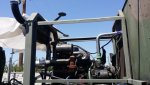
Well the wires are all spliced/soldered and shrink tubed together. Just have a few in the cab to extend (indicator lamps, shifter). Ordered some radiator hoses and 90 degree extension tube which will get painted. Sent 2 hoses back to Amazon because the quality is not as good as High Performance Silicone (HPS) that already was on the truck. The other HPS which I ordered from Amazon I kept and is the blue one on the photo.
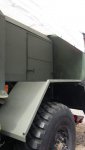
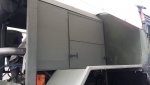
Drove up to see Soni on Saturday (16 hour round trip) to purchase front cab guard, cab steps, and heater for the MK-48 cab. Wish I had more time to spend their as I am sure I could have found many things to buy. Thanks Soni, as this is going to make the build that much easier.
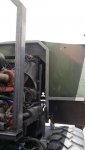
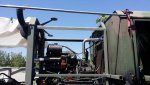
Lower Hose
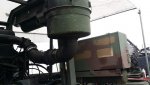
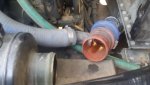
Lower hoses will be fairly straight forward. One 90 degree then go into bypass, and then into a 45 degree so there are no hard bends. Then it will have the straight cross over into the final 90 degree that goes into the radiator. (HPS 2.5" 90 degree & 2.25" 45 degree used, and original 90 degree).
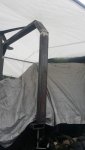
Upper Hose
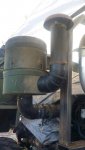
Brand (UPGR) 13" aluminiumradiator extension tube used. Purchased this on Amazon as well.
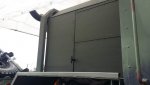
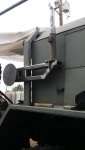
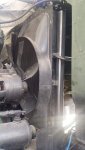
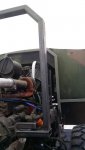
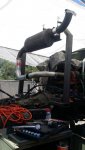
Radiator shroud will be refitted to radiator with addition of aluminum flat pieces to provide addition material to bolt shroud too.
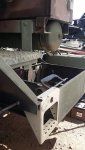
Also started to work on the shifter adapter plate. The plate will go under the current black plate and extend out to be able to bolt to the existing holes in the cab. Should have photos of this once completed.
Well the wires are all spliced/soldered and shrink tubed together. Just have a few in the cab to extend (indicator lamps, shifter). Ordered some radiator hoses and 90 degree extension tube which will get painted. Sent 2 hoses back to Amazon because the quality is not as good as High Performance Silicone (HPS) that already was on the truck. The other HPS which I ordered from Amazon I kept and is the blue one on the photo.
Drove up to see Soni on Saturday (16 hour round trip) to purchase front cab guard, cab steps, and heater for the MK-48 cab. Wish I had more time to spend their as I am sure I could have found many things to buy. Thanks Soni, as this is going to make the build that much easier.
Lower Hose
Lower hoses will be fairly straight forward. One 90 degree then go into bypass, and then into a 45 degree so there are no hard bends. Then it will have the straight cross over into the final 90 degree that goes into the radiator. (HPS 2.5" 90 degree & 2.25" 45 degree used, and original 90 degree).
Upper Hose
Brand (UPGR) 13" aluminiumradiator extension tube used. Purchased this on Amazon as well.
Radiator shroud will be refitted to radiator with addition of aluminum flat pieces to provide addition material to bolt shroud too.
Also started to work on the shifter adapter plate. The plate will go under the current black plate and extend out to be able to bolt to the existing holes in the cab. Should have photos of this once completed.
Attachments
-
 41 KB Views: 206
 -
 38.1 KB Views: 159
 -
 43.3 KB Views: 151
 -
 37.1 KB Views: 159
 -
 32.4 KB Views: 150
Last edited:


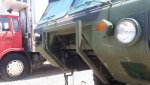
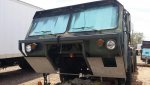
") I'm curious.. How does the air make it to the radiator in that position? Is there a scoop somewhere that I missed, or does it just travel under the truck through that bottom cutout in the front?
I'm curious.. How does the air make it to the radiator in that position? Is there a scoop somewhere that I missed, or does it just travel under the truck through that bottom cutout in the front?