• Steel Soldiers now has a few new forums, read more about it at: New Munitions Forums!

  • Microsoft MSN, Live, Hotmail, Outlook email users may not be receiving emails. We are working to resolve this issue. Please add support@steelsoldiers.com to your trusted contacts.

M934a2 bhtrv

Mos68x

Active member
827
36
28
Location
Seligman,AZ
Feels like it’s been forever since I’ve updated this thread so I thought I’d catch up. The engine rebuild is still moving forward, but it is consuming all of my spare money so I haven’t done anything really new on the ISO or it’s frame. Even though I have all the parts for the frame I don’t have a heavy enough welder to “glue” it together. I had a friend that was going to help, but his truck failed on him after some shoddy mechanic work. My neighbor has a borrowed welder that I was going to use, but he still needs to do something to it he says before I can borrow it to weld at least the main frame pieces together. I hope to have the engine finished in about a month or so and then I can finally get back to this part of the truck build. I would’ve loved to have cut the front wall out of the ISO but I want to have it sitting on the back of the truck before I start framing the front section so that I know I have good clearance between the extension and the cab. I would like to cut holes in the walls for the windows but I want to wait until I have the material to frame them up and the windows on hand before I do that since we are in the monsoon season now.
 

Mos68x

Active member
827
36
28
Location
Seligman,AZ
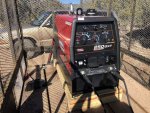
With the engine rebuild finally nearing its finish, I’ve been able to do some work on the camper part of the truck. I bought a new welder (Lincoln Ranger 250GXT) with zero hours on the meter. Display model, brand new, just not brand price. Sumbeach still cost me $5000 to walk out the door with it though, OUCH!

2B5830AF-B0D1-4D18-B2C9-0FFDF20DBE58.jpg

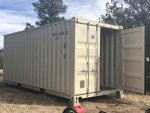
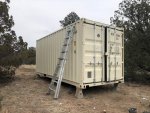
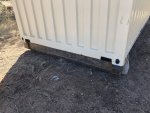
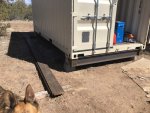
Also bought a “new” one-trip shipping container to build the “house” in. It’s definitely nice to be working with something that’s not all dinged up and bowed out everywhere.

999287CB-7FF4-4894-B6A1-C5AFBD4A3C00.jpgF6E95C36-6931-4737-8095-1D0818B0E345.jpg

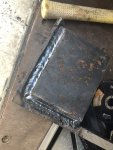
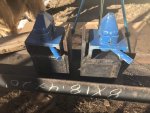
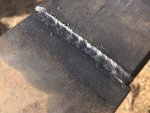
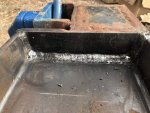
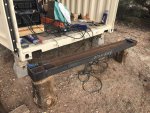
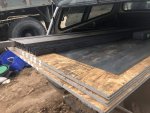
Went straight to work welding up the corner locks first first and then the end assemblies. Right now they are hanging from the bottom of the ISO corner blocks until I weld together the jacks to lift this bad boy onto the truck. Once I can lift it I’ll feel much safer getting underneath it to weld in the long beams and the ribs.

301B7A65-D558-4362-92D3-5F1144EDC047.jpg160C3C51-D2D8-49FA-ADF0-06E3DC7217CC.jpgEEB1FE92-8A6A-40D9-91F1-3FC8A688147A.jpgA8413990-6A74-4873-BD1A-C425FF48CA19.jpg6B57D322-E5C2-444B-BA33-9EBBB1AC45B3.jpg1708F635-F451-4DB9-85C2-7068B56A3916.jpg7C36D897-81BB-49D8-9139-43874465C10A.jpg
 
Last edited:

Mos68x

Active member
827
36
28
Location
Seligman,AZ
I put a new o-ring on the fuel pump couple days ago and got the pump back on and the engine started by that night. Engine sounds and runs great! I tried starting it again last night, but she just wouldn’t fire. I’m betting the fuel pump lost its prime again. There is a seal on the fuel pump bleed screw that failed, so I went to the neighbor again to get an o-ring that I hope will work. If the o-ring doesn’t work as is then I’ll either find a machine shop to modify the part, or I’ll order a new seal.
CF854AC1-6F36-4576-9B63-725F214AC76A.jpg
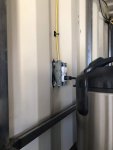
Today I got 3 of the 5 dedicated electrical circuits completed in the container. I only welded in one of the electrical boxes, and that was for the external outlet. The microwave outlet box I think I will leave floating until I have a better idea exactly where it needs to be. Tomorrow I will probably weld in the outlet box for the refrigerator and do the other two circuits.
803AC852-0EA1-440C-866C-374418292AA7.jpg1ECE48EF-F3BC-4ADD-8D87-BE499090DF9E.jpg
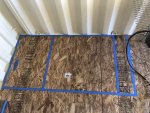
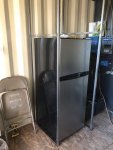
Today the warranty work for the refrigerator was finally completed, they brought a new fridge and took the old one. Just 30 mins after it was plugged in and the freezer was cold already. Took a look at my solar charger history tonight, 19kwh since the 1st, 37kwh total since I installed the two 320w panels of the 23rd of last month. I still have two more panels to install now that I have more material to mount them. I also bought 3 sheets of 3/4” tongue and groove sub-flooring while I was in Prescott yesterday getting more steel. I know that I don’t have enough steel for the entire frame build inside the container, but it’ll get me started and keep me busy until the 1st hopefully. I have enough to start the shower and it’s utility closet, as well as the power distribution wall, which also happens to be inside the pantry closet, and the wall next to the washer/dryer.

24652B70-0A6F-4CED-8C38-126ED9958A73.jpg8E720146-F220-40B2-8965-9B43FF91D696.jpg1D8F3A3F-0A04-4EE9-8DD4-EBEF3C8DBBFE.jpg0308111C-C84F-4D4B-86D9-E8D45AF8D139.jpg
 

Mos68x

Active member
827
36
28
Location
Seligman,AZ
Looking good. Coming along nicely. Do you have plans to put in winders?
There will be windows, I just haven’t ordered them yet so I haven’t bothered with cutting the holes for them. Windows are an absolutely necessary thing, otherwise this would be one large faraday cage lol

More work is completed, I just haven’t updated here. I will try to remember to update here after today’s work.
 

Mos68x

Active member
827
36
28
Location
Seligman,AZ
Yesterday I “rebuilt” the fuel lift pump on the side of the block. Unfortunately it doesn’t work any better than it did before, but I did finally figure out where I’m getting in the system. The fuel filter immediately below it seems to have a case that is separating at the crimp point.

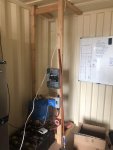
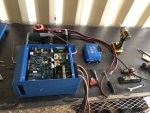
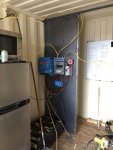
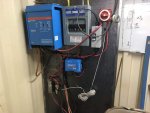
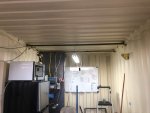
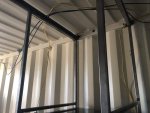
The last few days have gotten more work done on the inside. I cleaned up the wires for the power wall.
0266738D-1730-4439-9674-D94169E9BEBB.jpg341264B5-32CE-4DF9-AAA2-B4CBFE54E2F8.jpg264499EA-D173-4B45-B879-4E6BF6A55B4F.jpg

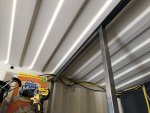
I added another overhead wall support for the next wall. I also added the main frame for the second wall.
840F1A44-E086-4406-A328-82855DBD39B8.jpg4597E0DB-275C-4902-A33D-F3EDEAD8E750.jpg3C9E4042-5FCA-47A6-A9B9-C45A44E2F1BC.jpg

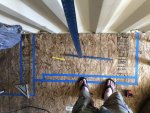
I laid out the sink area across from the refrigerator, while still leaving room for the door and the Harley. I also made sure there was room for the well pump and accumulator, and I also laid out the toes kick as well.
641B8B61-C13F-4F8A-B670-955CD5B74CB0.jpg

I laid out the shower, toilet, and utility closet area, but I realized that I will have very little room to maneuver the washer/dryer into place if welded that assembly together. So I’m opting to wait to put that in place, as well better think out it’s design until later.
9C36CF86-C821-4AD9-A11D-EF33FEE46E8A.jpg
 
Last edited:

Mos68x

Active member
827
36
28
Location
Seligman,AZ
Nomadic, if you don’t mind me askin...where in NV are you? I will be taking the truck up to Lovelock to see my brother and help him with his rebuild, thought I might stop by.
 

Nomadic

Active member
337
79
28
Location
Nevada
Nomadic, if you don’t mind me askin...where in NV are you? I will be taking the truck up to Lovelock to see my brother and help him with his rebuild, thought I might stop by.
I'm living/camping in a tent outside of Pioche, NV right now and move every 14 days. I'm pretty far from Lovelock. Your build is looking clean. The weather is starting to warm up. What are you going to do for insulation?
 

Mos68x

Active member
827
36
28
Location
Seligman,AZ
I'm living/camping in a tent outside of Pioche, NV right now and move every 14 days. I'm pretty far from Lovelock. Your build is looking clean. The weather is starting to warm up. What are you going to do for insulation?
Pioche wouldn’t be that much extra of a drive considering I’m starting in AZ and driving to the northern end of NV.

Thanks, I never did a proper build design beforehand in SketchUp but I have everything that I want in my head. Insulation will be the closed cell spray in insulation. I had tried to work with the rigid board insulation from the big box stores but it was such a PITA to cut them to fit the corrugations in the container, and besides that it has a lower R value per inch than the spray in insulation does. Only real bad thing about the insulation is the dang cost, holy moly is it expensive! I think it’ll cost me close to $1200 do the insulation that way.
 

Mos68x

Active member
827
36
28
Location
Seligman,AZ
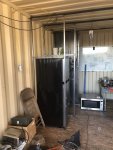
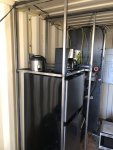
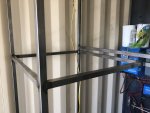
Got some more accomplished, even though this is definitely not moving fast enough to make me happy. I got the second wall surrounding the refrigerator finished and added the frame for the overhead cabinet above it. The significant other is shorter than I am so after asking her where she wanted the microwave she decided on above the refrigerator which surprised me since it wasn’t the shortest option I gave her lol

F580F22E-959C-437D-8FA3-59A1876F9FC2.jpgF31F39DB-604A-4F67-9461-04F5F7BD121F.jpg04723B2A-FFA3-4EA6-B352-478832F893C0.jpg5DA56275-BEEF-41C3-A208-E5BDA3BA0B79.jpg140FC40C-CAA8-4E9F-A8C8-D4A65E195AA6.jpg
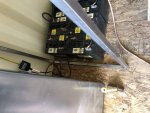
I also finished anchoring the electrical outlet boxes for those two dedicated circuits

26C89E18-D7F1-4CC9-A29C-C3DAB8BF98D5.jpg8DC2631F-26BA-4CA1-BF2D-4699E1DCD26F.jpg
 

TechnoWeenie

Well-known member
Steel Soldiers Supporter
1,653
1,669
113
Location
Nova Laboratories, WA
Try to keep as much stuff 12v as possible. Every conversion from 12 to 120 to xVDC is a loss in efficiency, even your laptop power supply.. use a DC DC power supply instead.

Also, look into converting a chest freezer into a fridge, often called an aussie fridge.... very efficient...
 

Mos68x

Active member
827
36
28
Location
Seligman,AZ
I already know about the chest freezer conversions, there just isn’t enough room for it. None of the house is going to be 12V. The only exception to the 120v is the 5v charger outlets.
 

TechnoWeenie

Well-known member
Steel Soldiers Supporter
1,653
1,669
113
Location
Nova Laboratories, WA
I already know about the chest freezer conversions, there just isn’t enough room for it. None of the house is going to be 12V. The only exception to the 120v is the 5v charger outlets.
Why would you do that? You're losing 20% right off the bat in terms of conversion efficiency... That means a 1kw battery bank is effectively an .8kw battery bank
 

LonT

Member
36
1
8
Location
Alexandria, VA
What sort of progress have you made in the last year? Just found this video and it looks like the guy went without a subframe, saving about six inches. Would love to see how he attached. Anyway, looking forward to an update on your progress.
Here's the video:
 

Mos68x

Active member
827
36
28
Location
Seligman,AZ
What sort of progress have you made in the last year? Just found this video and it looks like the guy went without a subframe, saving about six inches. Would love to see how he attached. Anyway, looking forward to an update on your progress.
Here's the video:
I saw that post on the other thread. To me the inside looks like sh!t, but to each his own. I am curious about the connection myself.

I have made progress, I’ve just been too busy to post anything here or on YouTube. I’ve been focusing on the inside of the house since I got the the new shipping container. I did take the truck out for drive lately, other than a few minor things to fix it’s nice to have it running again.
 
  • Like
Reactions: 98G
Top