• Steel Soldiers now has a few new forums, read more about it at: New Munitions Forums!

  • Microsoft MSN, Live, Hotmail, Outlook email users may not be receiving emails. We are working to resolve this issue. Please add support@steelsoldiers.com to your trusted contacts.


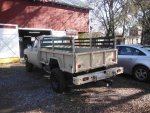
Meet Mr Rusty

cucvrus

Well-known member
11,263
9,552
113
Location
Jonestown Pennsylvania
I just broke for lunch. I have been out in the barn working on Mr. Rusty. The horror is unreal. I can do it is all I keep saying. So far so good. A bite to eat and back at it. I will post pictures after 5 when I finish for the day. I don't think finish the job but finish for the day. I made some awful discoveries. Nothing I can't fix. But awful none the less. Have a great day. LED work lamps are the best. I am inside now. No working in the dirt. Not sure I will know how to act. Full face shield all day for rust protection. I love the smell of Kroil in my face.
 

cucvrus

Well-known member
11,263
9,552
113
Location
Jonestown Pennsylvania
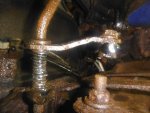
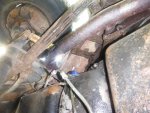
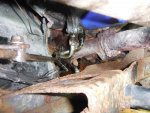
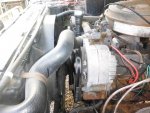
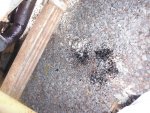
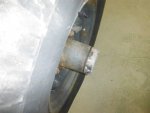
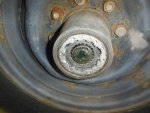
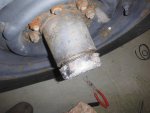
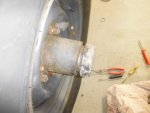
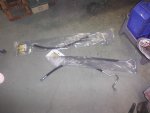
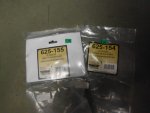
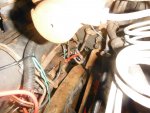
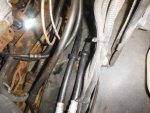
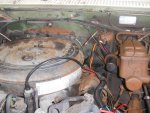
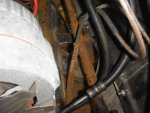
oneDSCF4075.jpgDSCF4068.jpgDSCF4069.jpgDSCF4070.jpgDSCF4071.jpgDSCF4072.jpgDSCF4073.jpg What is the general consensus on oil cooler lines? Which ones do you purchase made up and put on? I mean with the engine still in the truck and not have to reform the piping to fit. I picked up a set of NAPA today. They do not even start on the fitting in the block. I removed a fitting from another engine and could not get the threads to start. I thought the bends looked about perfect. I then walked up front on the left side and noticed the hub sticking out. That's NOT good. Picture 4 of 7 was what I first seen. I had to slide hammer the L/O off. NOT good. The hub looked like it was pieced together. It had a 1/4 turn inside with the bronze base. I had it apart 2 years ago and don't remember that. I would remember that. He said he had trouble last year with the L/O's. I think a complete set of new Warn 1/4 turns are in line. Or maybe I just make a good set out of the parts I have. I like the new 1/4 turn idea best. I could not get the engine to leak oil yesterday. Today I took it for a ride and I smelled the oil on the exhaust pipe. I drove to NAPA and changed the belts in the parking lot. They are the same belt numbers but left me with a lot of adjustment. I also put solid pulleys on these alternators. The underside is very scary. The trans cooler lines have compression fittings and the dipstick tube has a compression fitting on it. The oil pan was rusted thru on this truck a few years back. I think it is ready to rust thru again. Well Monday I will see if I can get a set of Mainland China A C Delco oil cooler lines. They fit horrible on Easter find. I feared this. But it is a simple task. Very dirty and rusty but it can be done. Anyone know if you can purchase the transmission cooler lines? A direct fit. I could form a set. But That would out weigh the cost of some made up. No SS. That would be overkill. Where would I stop? Nothing else in SS. Have a great day. I raked and blew my quota of leaves today and also built 3 wood racks. So the day was not a total waste.
 

cucvrus

Well-known member
11,263
9,552
113
Location
Jonestown Pennsylvania
I have been slacking. Digging sludge/mud out of the dry dams at the plant. Not light hearted work. I purchased a set of Dorman oil cooler lines at Autozone. They were available in 1 day and I wanted to give them a try again. I have a friend that talked me into giving them a try. What do I have to loose? I will know in a few minutes if the fit or not. I am not sure how the NAPA line stripped out. I must have a better grip then most guys. If I stripped it by hand. Not worth fighting about. I will report back when I get to installing the line. Have a Great DAY.
 

cucvrus

Well-known member
11,263
9,552
113
Location
Jonestown Pennsylvania
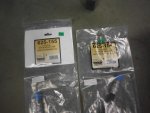
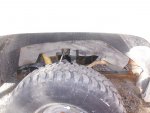
DSCF4076.jpgDSCF4077.jpgDSCF4083.jpgThese are the pair of Dorman oil cooler lines I purchased at Autozone. Less the $70. out the door. I give this set of oil cooler lines an A+ for fit and ease of installation. I installed a lot of these lines. And the last set I tried to install were NAPA branded. No fit and the outlet side was stripped or I stripped it with my bare hands. I had these completely installed and the truck running in a hour or less. I even have the clip in place on the rear of the exhaust manifold. I threaded a bolt from the back side of the bracket and then nutted the clamp to the bracket. Worked well and is secure and clear of all the shift and steering linkage. Unlike the A C Delco Mainland China oil cooler lines. DSCF4081.jpgDSCF4078.jpgDSCF4082.jpgDSCF4080.jpgDSCF4079.jpgI added 2 metal P clips to the inner fender. They are a better fit because of the plow controls. Thank you for looking. I ran it a while no leaks. I may have done something right. But in all seriousness. The Dorman's get my vote over all other brands that I recently tried. Have a Great Day.
 

cucvrus

Well-known member
11,263
9,552
113
Location
Jonestown Pennsylvania
After I had supper I went down to the shop and try and get some bonus points. I looked around and found a set of OEM lockouts that I had stored in a crate of lock out parts. I removed them from the box. They were all clean and ready to go into service. So I installed the OEM lock out and that job is complete. So I am now done for the day. I am going to make new glow plug wiring harnesses as mentioned last week. I have some 8 gauge and 14 gauge wire. That is what I need to complete this project. I will report back. I think a few more wires are burnt in the OEM glow plug harness. Tired of playing with it. It still starts a bit hard with new glow plugs.
 

cucvrus

Well-known member
11,263
9,552
113
Location
Jonestown Pennsylvania
Mr. Rusty is out of the garage. Now it wants to wash the windshield every time the wipers are on. Don't know. It was out of fluid and I filled it so it may have been doing it all along. I will have to look at that issue tomorrow. Sounds simple enough.
 

cucvrus

Well-known member
11,263
9,552
113
Location
Jonestown Pennsylvania
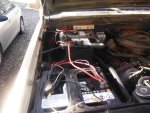
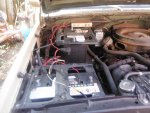
DSCF4099.jpgDSCF4100.jpgDSCF4101.jpgDSCF4102.jpgDSCF4103.jpgDSCF4104.jpgDSCF4105.jpgMr. Rusty has passed the check up. I added the fender rubbers to the inner fenders. I bolted them in place. I replaced the batteries with a pair of 950 CCA Exide group 31 batteries. I replaced the washer switch on the wiper motor and solved the endless wash cycle. When I test drove it for the day it ran and shifted fine but would shutter and stall every now and then like it was idling to slow. I looked over the fuel system and changed the fuel filter. It ran about the same and still did the occasional shutter and stall. I pulled the air cleaner and looked at the right side of the injection pump. It was dry and the lever was sticky. I blew that all out and sprayed kroil oil on everything and blew it all off again. I lubed everything with some lubriplate oil and an oil can. I took it for a ride and it worked perfect. I think the cam and the lever were sticking and making the pump operate incorrectly. It fixed the issue. I am not a technical man. I am a simple man and knew it was a simple issue. Mr. Rusty will be returning to active plowing duty at the end of the week or when ever the first snow storm hits.
 

cucvrus

Well-known member
11,263
9,552
113
Location
Jonestown Pennsylvania
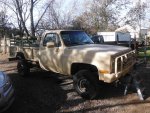
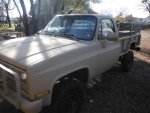
Guess who just got back today.
That Rusty truck that had been away.
Hadn't changed that much.
But I still think that chassis is Rusty.
Owners was asking if I was available for work
What I thought and if any leaks could be found.
I told him I up for the challenge and driving this old man crazy.
Mr Rusty's back in town.
You know that truck that used to rust a lot.
Every night I would be at the barn grinding and sanding what was left.
When I say rusty I mean he was corroded.
I mean she was thin at places.
And that time over at the barn.
When them transmission lines broke.
The fluid flew and shot about the place.
If you don't want to fix them right. Forget it.

Mr Rusty is back in town. Oil leaks and other small repairable issues to take care of. More later. Just a bit or humor. If you don't like it. Forget it. Have a Great Day.
 

cucvrus

Well-known member
11,263
9,552
113
Location
Jonestown Pennsylvania
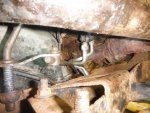
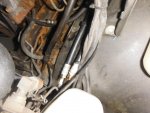
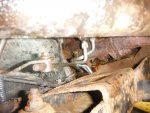
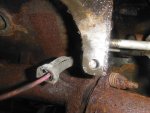
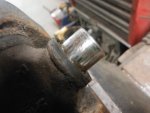
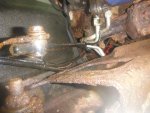
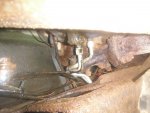
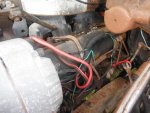
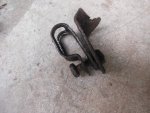
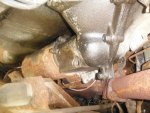
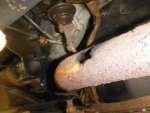
Dirty deeds done dirt cheap.DSCF6126.jpgEven an oil soaked frame and chassis can not conceal the rust and corrosion on Mr Rusty. DSCF6127.jpgIt appears the oil cooler mount bracket has rusted off the left exhaust manifold and the oil cooler line has rubbed thru on the brake reinforcement on the firewall. DSCF6128.jpgEasy fix. DSCF6129.jpgOr should a say a temporary easy fix. I had a set of OEM take off lines I had stored in the barn for the past 20 years. I came across a stash during some other part searching this past week. DSCF6130.jpgAfter the used replacement line has been set in place. DSCF6131.jpgCooler bracket that rusted off. Getting the nuts off the manifold studs will be a challenge for me. But I am up for the challenge. No Fear. DSCF6133.jpgStarter bolt broken off in the block. It is also here for a flex-plate change. DSCF6134.jpgDSCF6135.jpgBoth header pipes are rusted thru and the truck is very loud. I will be removing them and cutting them back at the muffler. that makes everything a bit easier for me. I will take it to the exhaust shop after everything has been repaired. All in all Mr., Rusty has held up well to the snow plowing. A few more minor dents but I will be sanding and doing touch up rust work again. No rust thru at this point. Just surface and bleed thru rust at the edges and corners. Thanks for looking. I have lots of work scheduled for this season. Not all CUCV but nonetheless work. I always look forward to the challenge. Have a Great Day and enjoy the weekend.
 

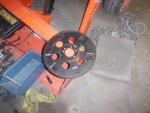
cucvrus

Well-known member
11,263
9,552
113
Location
Jonestown Pennsylvania
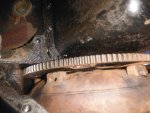
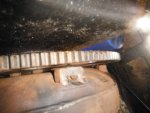
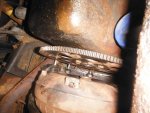
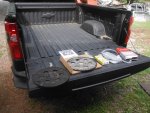
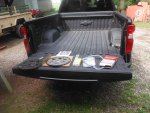
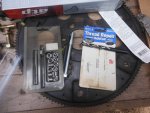
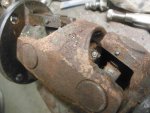
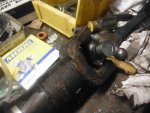
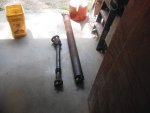
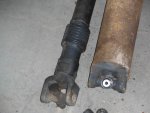
DSCF6282.jpgToday after work I started the flywheel/flex-plate removal on Mr. Rusty. First make sure batteries are disconnected. DSCF6283.jpgDSCF6284.jpgDSCF6285.jpgFirst I removed both drive shafts. The caps came off and they are very rusty inside and have some knurling on the trunnion's so I will be replacing both of them. DSCF6286.jpgDSCF6287.jpg This is the handy dandy fly wheel turning tool from Snap-On. It is a must have for working on CUCV's as much as I do. DSCF6288.jpg DSCF6289.jpgI have everything disconnected and the 4" 3/8" bolts in place on the transmission to engine block. I slid the transmission and transfer case rearward on the bolts and reached up in there and removed the flywheel/flex plate. DSCF6290.jpgAnd yes it was that easy. I used a rolling floor jack on a 3/4" sheet of plywood and rolled the assembly with the cross member still attached back 4" and removed the flywheel flex-plate. DSCF6291.jpgAt 8PM the flex-plate was out and on the floor. I will send the starter out for rebuilding. Just as a precaution. I never wore a starter out in my life. I rebuild them anytime I have to remove them. I found sweating brake lines. That explains the spongy brakes. the exhaust is rusted thru everywhere and the rust that fell down while I was impacting the cross member bolts off could fill a dust pan. I am doing this out in the stone driveway. Why? Because I can. Going back together will be quicker. I have a huge parts list to get. I need to change the rear main seal also. I think the oil pan has static oil leaks in the rust spots. keeping in mind this is just a snow plow truck. it has held up thru a few winters since I rebuilt the frame and springs. that part still looks decent. Have a Great and Happy 4th of July and Be Safe. More later. Parts stores are closed tomorrow. Break time.
 

cucvrus

Well-known member
11,263
9,552
113
Location
Jonestown Pennsylvania
I just breifly looked at mr. Rusty today. I have to get a parts order in tomorrow and fight with getting out a broken starter bolt. That I hope is a fair fight. More progress later. Happy 4th of July.
 

cucvrus

Well-known member
11,263
9,552
113
Location
Jonestown Pennsylvania
DSCF6296.jpgDSCF6297.jpgToday is the day. I finished mowing all the grass on the tractor. Like all things mechanical I had a few break downs. They come in hoards at me. Most times things go for a year or 2 and this year was the year of broken worn parts. The drag link on my Honda 4518 tractor broke out of the ball and socket joint. The new one was $82. and back ordered. Means others are having the same worn part. I opted to use a long bolt and made my own joint. It will last and not damage any part of the tractor. The wear will go to the part that is already worn out. I made a run to the parts store. they had everything I needed within a day. All picked up and now my goal will be to have the transmission all bolted back in and the transmission serviced. My first obstacle is the broken starter bolt and I am keeping hi hopes that it is a very cooperative bolt. I need a few new bolts for the cross member but other than that I should be good to go. I shall report back later with my success or failure. Keep in mind as long as I am 5% smarter than the object I am working on it is toasted. Have a Great Day. It is Hazy Hot and Humid here. Be Safe.
 

cucvrus

Well-known member
11,263
9,552
113
Location
Jonestown Pennsylvania
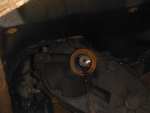
LWell here I am after 3 hours of attempting to get the starter bolt out. I am failing. It was broken off deep in the hole. i used my stud extracter and snapped. it off. I did get the broken piece out of the hole. I worked on it long enough. I am going to go buy a 13/32" drill bit and just go ahead and put a heli-coil in place. I have used them before and I have the tool to install the M10 x 1.50 heli-coil inserts. Not what I wanted to do. But laying under there looking up and trying every trick in the book just is not working. It is the outer bolt on the outer ear of the block. I have called and advised the owner. I am committed to the Heli coil at this point. I have the hole a little more messed up than I am proud to say. I was frustrated and sweat blind. But determined to get it out. I should have fixed this starter milling problem a year ago and all would have been well. The owner choose to wait till spring. All will work out. I just keep seeing more issues. Nothing as major/minor as the broken starter bolt. Win some. Lose some. Today the bolt wins. Not really it will be dust by the end of the day. Back at it in Pennsylvania. Reporting later.
 

cucvrus

Well-known member
11,263
9,552
113
Location
Jonestown Pennsylvania
The bolt hole was messed with before. It had a piece of another bolt up further in the hole. I drilled all the pieces out and installed a Heli coil. I have the transmission back in bolted fast and attached by the 6 bell bolts, torque converter bolts and new 7/16" cross member bolts. I found the flywheel/flex plate was changed before also. The one I removed was made in India. Matters not where it was made. It held up well for the past 10 years that I worked on this truck. I do remember having issues with this starter bolt before now when I was under there looking. It was middle of winter and I was laying on the ground changing the starter and had a hard time getting the bolt started. I got a new bolt and it went in very tight. I removed it and looked up the hole and put it back in again with some grease. It was very tight. The owner reminded me today when I talked with him. It is moving along slowly and I was rained out again. Have a Great Day. More progress reports later. Hope they are better results. I have serious ring around the collar after soaking 4 shirts today in the heat and humidity.
 

o1951

Active member
899
155
43
Location
Bergen County, NJ
I admire your perseverance. What with on & off the rain, it is so humid here just going outside soaks my T shirt with sweat.

You said helicoil is on the outer ear of the block. When I have not been 100% confident in a repair, I use a longer bolt and a nutwasher with a bit of blue locktite (Never red). I also do this a lot on aluminum castings, where threads look good, but there is a possibility they are fatigued and may pull out in the future.
 

cucvrus

Well-known member
11,263
9,552
113
Location
Jonestown Pennsylvania
I put a starter up in there and tightened it in place. I think all is well. I think the initial milling started with a starter bolt that fell out. I can't remember. I do know I put a starter on it before. The owner told me and I semi remeber the difficulty. All is well. I hope to get some U joints in later today. I will report back.
 

cucvrus

Well-known member
11,263
9,552
113
Location
Jonestown Pennsylvania
DSCF6298.jpgMy nemesis DSCF6299.jpgThe cure. Done. DSCF6300.jpgDSCF6301.jpgNice bolt Made in USA and the right length. But the wrong size. It is 3/8" x 16. Oh well. I took advantage of the down time while waiting for paint to dry. I installed the U joints. I am on my 3rd set of clothing today. It is Hot and Humid. DSCF6305.jpgA small mark of knurling. Now is the time to change the U joint. DSCF6306.jpgDSCF6307.jpgEveryone is always busting off about Moog. Well I bought them. They are made in Mexico. I really don't care if they are made in Timbuktu. They fit they do the job and that is all that matters. DSCF6308.jpg I did grease the CV joint. I mention that a lot. Make sure you get in there and grease that joint annually. DSCF6309.jpg New U joint on the front. So Pretty. And now both drive shafts are ready to be reinstalled. I have the starter out getting rebuilt. DSCF6310.jpg I have lots of other things to do but another day. Have a Great Week. Stay Safe.
 

cucvrus

Well-known member
11,263
9,552
113
Location
Jonestown Pennsylvania
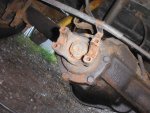
After reattaching the transmission to the engine I began reattaching linkage and plugs. I noticed the 4WD shifter was very difficult to move and discovered the linkage was seized in the shifter linkage. I was able to unbolt the lever from the transfer case and place it in the vise. I cut the pin and pried the lever free from the linkage rod. I cleaned both ends of the linkage rod and drilled the pin holes out with an 1/8" drill bit. It required 4 bits o get thru the rust and corruption that had formed on the rod and in the holes. I wire wheeled the rod and ends used some copper never seize and using some new cotter pins and grease I reattached the linkage. I also lubed the floor shifter pivot point. It is smooth in and out of 4WD now. I am talking serious rust. The P clamp that holds the speedometer to the floor is dissolved. Easy fix. New Stainless steel P clamp. I pick up the cooper/nickel 1/4" brake line in 5 ft length. I have some plumbing to do. It seems like a lot of work. But have you priced a new 1 ton plow truck lately? This is used on a private road about 1 1/2 miles off the main road. It is in the woods and steep. the truck was made for this. A new one would do just as good but not cost effective. I am contemplating the Stainless Steel exhaust system. May not be worth it. But for sure the brake lines are taking a beating from rust. I picture this thing plowing 15 inches of snow and then sitting there packed with snow and never getting washed except in the rain. Sitting on a dirt/stone area for weeks waiting for snow and every horrible job to come along. More later. I am inquiring about hydraulic lines for the transmission cooler lines. I will follow up.
 
Top
AdBlock Detected

We get it, advertisements are annoying!

Sure, ad-blocking software does a great job at blocking ads, but it also blocks useful features of our website like our supporting vendors. Their ads help keep Steel Soldiers going. Please consider disabling your ad blockers for the site. Thanks!

I've Disabled AdBlock
No Thanks