• Steel Soldiers now has a few new forums, read more about it at: New Munitions Forums!

  • Microsoft MSN, Live, Hotmail, Outlook email users may not be receiving emails. We are working to resolve this issue. Please add support@steelsoldiers.com to your trusted contacts.

MEP-831a Inverter Overhaul

kloppk

Well-known member
Steel Soldiers Supporter
2,149
3,536
113
Location
Pepperell, Massachusetts
Part 2...


Remove this bolt and spacer. (mine is missing it)
Step 11.jpg


Remove the screws attaching the fan and bottom panel. There are spacers where the bolt passes thru the fan housing.
Step 12.jpg


Pull the fan and base panel away.
The bracket shown in the pic attached to the base panel would be loose by the heat sink. Just slide it out and set aside.
Step 13.jpg

Almost there...
Step 14.jpg

Remove these 2 bolts and spacers
Step 15.jpg

Remove the screws attaching the top of the capacitor board to the top board vis the "L" brackets.
Remove the 2 screws attaching the bottom of the board.
Step 17.jpg


Tilt the board away and remove these two nuts. You may need to use and allen wrench on the inside to prevent the bolts from turning.
(Pic taken before removing the cap boards mounting screws.)
Step 18.jpg


Remove the various "L" brackets that used to be bolted to the top of the frame. Keep track of were they go. Some are slightly different.
Step 19.jpg

After that it's just a matter of removing the spacers and screws that make up the stack of boards.
There are many washers used in the spacer stack up. Be sure to remove them from the PCB's as they sometimes are stuck to them.
!!Very Important!! Be sure to re-install them properly to maintain the correct spacings.

Easy peezy
 

Attachments

kloppk

Well-known member
Steel Soldiers Supporter
2,149
3,536
113
Location
Pepperell, Massachusetts
831 haters :ROFLMAO:
When they work they are great. Perfect 60 Hz output frequency & AC power plus stable VAC output. No droop like 802's and 803's.

When the inverter fails it sometimes burns out one or more of the fuses.
Check each of these 8 fuses by the PMA power input connectors to be sure they are all still good.
There are 4 for each PMA power input.
It's a bear to get thru the C.C. to meter them.
Fuses.jpg
 
Last edited:

marcjs14

Member
35
34
18
Location
NC
kloppk, that was very helpful - thanks!

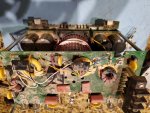
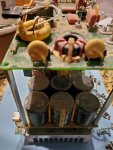
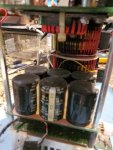
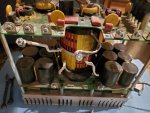
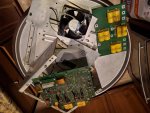
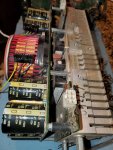
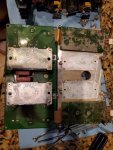
I've managed to break it down to individual boards, with the exception of the board holding all the electrolytic caps.
20220820_090732.jpg20220820_090755.jpg20220820_090803.jpg20220820_090822.jpg20220820_090904.jpg
The board holding the electrolytic caps also holds the output transistors, which are attached to the heatsink by socket-head cap screws. I take it those are accessible via the access holes in said board? I haven't yet separated the heatsink, since it was time for a fresh cup of coffee.20220820_091609.jpg
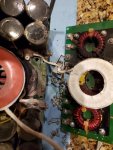
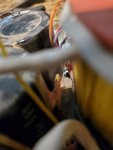
The scorching of a pair of coils (one large/one small) is evident in this pic...
20220820_091010.jpg
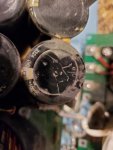
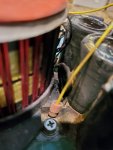
Lastly, as far as evidence of capacitor bulge, this is the only mark vaguely indicating damage to the can's top...all others appear fine - at least on the surface. Hopefully they've just dried out. Once pulled, I'll test each individually in order to determine whether cap failure was a likely root-cause of the inverter failure.
20220820_091015.jpg
 

marcjs14

Member
35
34
18
Location
NC
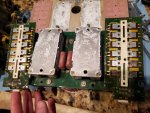
Separated power board from heatsink...
20220820_111603.jpg
Clear evidence of source of smoke (roasted disc capacitor - other side shown for reference)...
20220820_112726.jpg
20220820_112742.jpg
Pretty clear which transistors have been damaged also (look bottom-right)...

20220820_111742.jpg
 

kloppk

Well-known member
Steel Soldiers Supporter
2,149
3,536
113
Location
Pepperell, Massachusetts
Interesting. I've torn apart dead inverters and never saw one with a toasted disc capacitor.

The 12 semiconductors on the left and right are diodes. They comprise the AC to DC rectification of the 3 phase AC power from the PMA.
 

peapvp

Well-known member
Steel Soldiers Supporter
1,118
1,244
113
Location
Basehor, KS
Separated power board from heatsink...
View attachment 876612
Clear evidence of source of smoke (roasted disc capacitor - other side shown for reference)...
View attachment 876613
View attachment 876614
Pretty clear which transistors have been damaged also (look bottom-right)...

View attachment 876615
this is probably a variastor and is used as inrush current limiter.
This burning up of the Varistor indicates that the high voltage side has a severe short(s) to ground.
At this point, any semi conductor, any capacitor in the HV part of this circuit is suspect.

That’s pretty much a major repair and the other question which has to be checked are PCB’s for burnt traces, looking at the amps involved in this failure.

One missed defective component or open track May cause this whole thing to go up in smoke again.

So, be careful and very thorough. Question every measurement you take. As they say, measure thrice, cut once.

Peter

1FC0819D-A740-439A-A56C-EE215550E4E3.jpeg
 

peapvp

Well-known member
Steel Soldiers Supporter
1,118
1,244
113
Location
Basehor, KS
A metal oxide varistor has usually a bulge on both sides when compared to a ceramic disc capacitor .

your picture is not that clear, so we will find out if it is a ceramic capacitor or a varistor once you remove the part in question


963A18A3-B2A3-49E2-B479-3441B213F3FF.jpeg
 

marcjs14

Member
35
34
18
Location
NC
Ugh...not going to give up just yet, but the thought of tossing it into Lake Norman as point-of-interest for young carp seems quite appealing right now ;).
 

marcjs14

Member
35
34
18
Location
NC
this is probably a variastor and is used as inrush current limiter.
This burning up of the Varistor indicates that the high voltage side has a severe short(s) to ground.
At this point, any semi conductor, any capacitor in the HV part of this circuit is suspect...


View attachment 876621
Peter,
should I be checking the alternator first before going any further with the inverter? Could the problem have originated there? Certainly just prior to the smoke pouring out I heard something which could best be described as some sort of mechanical rubbing sound.

Thx,
Marcel
 

peapvp

Well-known member
Steel Soldiers Supporter
1,118
1,244
113
Location
Basehor, KS
Ugh...not going to give up just yet, but the thought of tossing it into Lake Norman as point-of-interest for young carp seems quite appealing right now ;).
Marcel,
Could you please desolder this part now and post a pictures of it from both sides? This way I can get better understanding of what actually happened.
Since this part is directly next to the large caps it is most likely a inrush current limiter
But I need to verify this
 

peapvp

Well-known member
Steel Soldiers Supporter
1,118
1,244
113
Location
Basehor, KS
Kurt, the one you got is Cermaic Cap, no question. Is there anywhere in your circuit a inrush limiter that your aware off?
It is hard to believe that they have no inrush current limiting with those 12 large caps. The inrush current is pretty high when they are empty and the system first fires up
 

peapvp

Well-known member
Steel Soldiers Supporter
1,118
1,244
113
Location
Basehor, KS
Peter,
should I be checking the alternator first before going any further with the inverter? Could the problem have originated there? Certainly just prior to the smoke pouring out I heard something which could best be described as some sort of mechanical rubbing sound.

Thx,
Marcel
Marcel,

i still would like to see a picture of both sides of your failed part to see how it failed besides the obvious that it got hot

Peter
 

peapvp

Well-known member
Steel Soldiers Supporter
1,118
1,244
113
Location
Basehor, KS
Marcel,

once you remove the part could you please check for continuity between both pins?

Ceramic Capacitors can fail. They start decreasing their DC Resistance from near infinite Ohm down to full short.
But this usually takes quite a while for this happen.
A system with a failing ceramic cap usually becomes unstable first. It will keep operating but with noticeable differences. In your case it would have been drifting voltages or voltage fluctuations which increase overtime before the ceramic cap completed fails
 
Top
AdBlock Detected

We get it, advertisements are annoying!

Sure, ad-blocking software does a great job at blocking ads, but it also blocks useful features of our website like our supporting vendors. Their ads help keep Steel Soldiers going. Please consider disabling your ad blockers for the site. Thanks!

I've Disabled AdBlock
No Thanks