• Steel Soldiers now has a few new forums, read more about it at: New Munitions Forums!

  • Microsoft MSN, Live, Hotmail, Outlook email users may not be receiving emails. We are working to resolve this issue. Please add support@steelsoldiers.com to your trusted contacts.

Metal Magnets's M211 teardown and future rebuild.

186
1
16
Location
Dalhousie N.B. Canada
Inkerman trip

Thanks for the suggestions and offer. I will see what he has and decide if I need it bad enough to impose on you. Small stuff can be mailed, so that will be the first choice. Doors, bumpers and stuff like winches and pto's would be freight. Once a pallet is going , then the sky is the limit to make it worth doing... I'll keep you posted once I know what I find out.
Just got back home and unloaded almost all the stuff. I couldn't take pictures of the M37 stuff because time wasn't on my side today. 20160521_192511.jpg

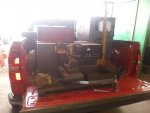
I have another load to get in a few weeks, he has an engine core, and cargo body for a M-135, with all the brackets for the troop seats. The wood is shot, but that's ok. His intention is to sell (CLEAR OUT) everything. So now is your time to ask for whatever it is you need. I told him to put ANYTHING for those old trucks aside for me. I picked up some old, but usable brake shoe cores, and will have them all relined and keep a set handy. I now have a slave cord, and picked up an Arctic Winter booster kit (funny looking thing on tailgate) I couldn't resist.........8) I'll post more shots later. By the way, IF anyone is looking for rifle holders, and things like that, he still has some. (NO GUNS).
 
186
1
16
Location
Dalhousie N.B. Canada
"new parts arrived"

Just went to the mail tonight, and a package arrived with a convoy light plate!! This will be going on my M-207, once it starts going back together. I plan to make a few copy's for the other trucks. Too bad I can't fit the truck into on of those new fangled 3-d printers, and let it rip!!!

!20160524_193619.jpg
 

Section8

Member
503
6
18
Location
Little Fort, B.C., Canada
Glad it made it to you safe and sound waaaay out there on the other side of the big rock.
I was gonna clean it up and make it pretty but figured you might prefer the era correct petina and rust.
Surprisingly even though the nuts and bolts were considerably rusted, they turned nice and easy and it was removed quite easily.
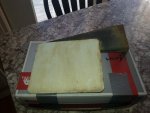
I don't know if you can polish the white material to make it shiny again or not. I didnt want to try in case I ruined it.
I am very happy it went to a good home and will used on a restored truck. Since mine will not even be close to a restore vehicle I had no need of it.
I expect to see pictures of it in all its glory hanging over the rear diff!!
Bwahahahahaha!!!!
Cheers, keep the great work going!!
 
186
1
16
Location
Dalhousie N.B. Canada
Convoy Plate

I know this is some time later, but summer tends to shift your priorities somewhat. I had been busy with other things, but now, I seem to have quite a bit of time to do the things I would have done sooner. In my travels this summer, I picked up a M135 cargo deck, complete with a strange "net" or screen cover. Never saw one before, and will post that picture here. I found another truck, I think it's a M-135, but not sure, because to see better, I'd have to cross on private property, and where I was, could be "life threatening"if you catch my meaning. There was a pulp loader on it and all I could identify it from that it was a military vehicle, was the distinctive roof. The weeds were waist high, so more was impossible. I'll keep it in mind for the future, and I just pray that the gas axe keeps away until next year. I hope to start posting progress on the M 207 tomorrow night, weather permitting. I want to say thanks to SECTION 8 for donating the convoy plate, it is really greatly appreciated.
 
186
1
16
Location
Dalhousie N.B. Canada
.M 135 deuce engine

That sounds really good!
Thanks! But today after installing the valve cover, I ran the engine and gave it a couple of short revs, and the throttle stuck almost wide open! After unhooking the transmission linkage and trying again, the same thing happens.So now I unhook the pedal linkage and again it sticks. So at this point I remove the carb. This has happened several times before, and I didn't run the truck much because of this, and just no time to dig deeper.I assume something is sticking in the throttle plates or somewhere else. I blame old gas for sticking things up, is it possible? Sometimes, it works perfect, the pedal is fine, others, the pedal is really stiff, and then sticks, with nothing seemingly touching anywhere. The throttle plates are not sticking at all and the governor seems ok also. Now I'm ready to clean the parts and re-assemble it all. My ONLY possible trouble area, is the accelerator pump rod that hooks to the throttle plate, where it passes through the carb body.It seemed sort of tight or stickyi. The carb on the engine from the M-207 in the basement is REALLY HARD to try to move, and spraying with lube does nothing at all. It was working well when I last ran it. Never had any issues with sticking from day one. But now is almost unworkable.

Has anyone had this happen to them? Do you have any idea's that I could try to fix, without taking the carb apart? I'm going to make new gaskets, re-install, and post the progress, hopefully that issue is gone.

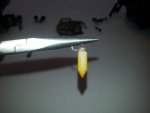
One thing worth mentioning, the needle valve is made of plastic. Never saw that before.!!!!
 

USMC 00-08

Well-known member
1,183
180
63
Location
Skiatook, OK
The only time I have seen a carburetor stick like that was because the accelerator pump was way too tight. I did not have the carb on the truck, but noticed it when working it by hand. I put a new accelerator pump in that is listed in the parts list and it fixed my problem.

Never have seen a plastic needle valve.

I have used this kit before because it was cheap and got me going. Might save you some time by not having to cut gaskets. The air horn gasket and accelerator pump are not right for our carburetors. I was able to use everything else. I had an air horn gasket from a partial NOS kit so all worked well for me. The correct rebuild kit for us is also listed in the parts list, but it is a bit pricey. They also have the governor diaphragms available. Also listed on our list.

https://www.amazon.com/Walker-Produ...rue&ref_=ox_sc_act_title_2&smid=ATVPDKIKX0DER
 

hendersond

Well-known member
Steel Soldiers Supporter
1,171
29
48
Location
Galesville, WI
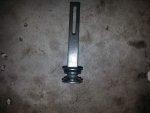
Can you post a picture of the dogleg shape linkage that connects the lever on the throttle shaft to the accelerator pump? if installed incorrectly it binds.
 
186
1
16
Location
Dalhousie N.B. Canada
Carb questions

Can you post a picture of the dogleg shape linkage that connects the lever on the throttle shaft to the accelerator pump? if installed incorrectly it binds.

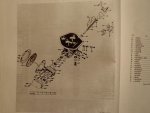
In answer to both of you at the same time, the needle valve is indeed plastic,( ugly yellow ) and tomorrow night I'll be posting pictures to show both the needle, and the "dogleg linkage", which I had not touched until removing the carb and stripping it down. There was LOTS of dirt in the bowl, and the acc pump leather was nearly completely gone, and what remained, was "solid".....I McGivered "o"rings to make something usable to do some testing once I have everything back together. I should have taken a pic of the pump before to show it's condition, but....aua.......One question, the loose brass vent tubes that are about 1 1/2 inches long in the middle of the bowl area, one has bigger holes than the other, (not much bigger) which one goes where? The reason I ask, is the other owner had it apart and mentioned he wasn't sure if he got it right. As you can see by the video, it has no problem, other than a sticking issue. While I'm there, I want to make sure. Thanks in advance, and I'll be here tomorrow night.
 

USMC 00-08

Well-known member
1,183
180
63
Location
Skiatook, OK
I believe those tubes are supposed to have the same size holes. They are called "Main Well Tubes" according to the rebuild manual.

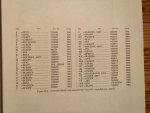
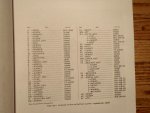
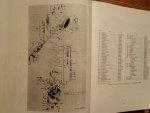
The rebuild manual is TM 9-8647. Tomorrow night I will look to see if it calls out the sizes of the tubes and will also see what it takes to scan\post the Holley 885-FFG rebuild part.
 
186
1
16
Location
Dalhousie N.B. Canada
Carb sticking issues.

I believe those tubes are supposed to have the same size holes. They are called "Main Well Tubes" according to the rebuild manual.

The rebuild manual is TM 9-8647. Tomorrow night I will look to see if it calls out the sizes of the tubes and will also see what it takes to scan\post the Holley 885-FFG rebuild part.
Here is the photo of the plastic needle valve, the other pictures didn't show any detail you could see of the small tubes. Tomorrow night, I should be able to finish it of and maybe even attempt an engine test.20160725_191849.jpg I have a lot assembled, just two gaskets to make.
 

m1010plowboy

Well-known member
Steel Soldiers Supporter
3,912
2,721
83
Location
Edmonton, Canada
I sure wish we were closer so I could eat some lobster that hasn't been frozen for a week. How ya doin' neighbour? I need a few more years of mechanical beatings before I give carb advice and I know who's setting my valves next time. That's a sewing machine brother! .....not that us boys know what a sewing machine sounds like but if we did we're guessing that's the sound it would make.

Help me out with the location of that pointy plastic piece. I have a dis-assembled carb on the bench right now and I'm not seeing that.

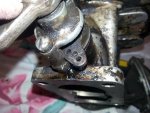
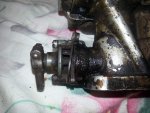
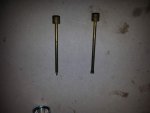
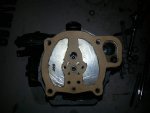
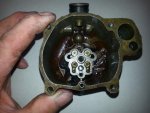
P7250457.jpgP7250456.jpgP7250455.jpgP7250454.jpg
 

USMC 00-08

Well-known member
1,183
180
63
Location
Skiatook, OK
Help me out with the location of that pointy plastic piece. I have a dis-assembled carb on the bench right now and I'm not seeing that.
From the picture you posted, it appears to be MN #2. I've never seen one made from plastic, just metal ones.

I'm still trying to figure this new scanner out for the rebuild manual. Sorry for the delay. Something I did not know before I got the manual is the governor spring post is supposed to be in the #1 position. Mine was somewhere else. It made a difference being put back in the correct spot.
 
Last edited:
186
1
16
Location
Dalhousie N.B. Canada
Carb breakdown

I sure wish we were closer so I could eat some lobster that hasn't been frozen for a week. How ya doin' neighbour? I need a few more years of mechanical beatings before I give carb advice and I know who's setting my valves next time. That's a sewing machine brother! .....not that us boys know what a sewing machine sounds like but if we did we're guessing that's the sound it would make.

Help me out with the location of that pointy plastic piece. I have a dis-assembled carb on the bench right now and I'm not seeing that.

View attachment 635590View attachment 635591View attachment 635592View attachment 635593

Hello, and thank you very much for the pictures. I would buy you a BUCKET of lobster if it were possible. It would be great to sit and shoot brown stuff about these trucks...... Now I can see things clearly.The two vent pipes are both the same every way, so no confusion there. The needle valve is part NN, as an assembly, that your looking for. You remove the big easy to see dime sized cap with a standard screwdriver, and then CAREFULLY remove the valve seat, and then the needle valve. The engine I have in the basement on the test stand had a steel, or aluminium one, I have never seen a plastic needle valve before in my life, until now. Tonight I made my gaskets, and have to engineer a suitable replacement for the acc pump. That's all that I need right now.I know you have a usable part number, but the lady at the local parts store I usually deal with is ready to kill me because I'm always after something "obsolete, discontinued, back ordered, oddball, I don't have that in my catalogue's etc"......Why don't you buy something that's not prehistoric????.:burn:.......(Just wanted to add, she DIDN'T SAY THAT!!! ) (not yet anyway....).You see what I mean??? So I have to do some head scratching on certain things (I'm nearly bald by the way!) So If I'm lucky, tomorrow night I MIGHT have some news on that subject. Let me know what your project is and the progress on it. I might learn something, or be able to help somehow.The carb is very easy to understand, but you MIGHT need to make a tool or two., to not wreck things. Go easy, and slow.
 
Last edited:
186
1
16
Location
Dalhousie N.B. Canada
My carb when I last ran it, worked fine right up to the assumed governor setting, and held there. Just a little more throttle than I used in the video. I think my problem lies in the acc pump or linkage to it area. The rest seems ok. I can't wait to run it again to see how it works after cleaning it out.
 

USMC 00-08

Well-known member
1,183
180
63
Location
Skiatook, OK
"obsolete, discontinued, back ordered, oddball, I don't have that in my catalogue's etc"......Why don't you buy something that's not prehistoric????.:burn:........You see what I mean???
Yep. That is why we started the parts list. No one has 1952 GMC M135 or M211 in their database. A lot of the parts are out there. Just have to find the modern equivalent.
 
186
1
16
Location
Dalhousie N.B. Canada
Some progress to add.

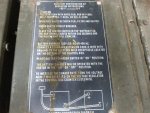
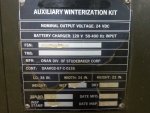
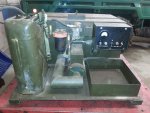
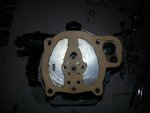
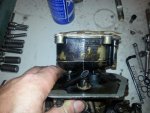
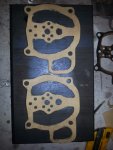
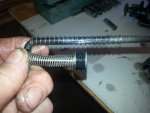
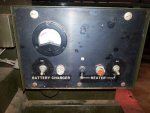
Here is some of the progress on the carb, the other pictures shown, are of the "Arctic Battery Booster Unit" I bought this summer, just so I could get the slave cable that comes with it. I will post that picture later.20160726_215312.jpg20160726_215211.jpg20160726_215151.jpg20160726_215142.jpg20160726_215126.jpg20160726_214941.jpg20160726_214928.jpg20160726_214823.jpg20160726_204604.jpg20160726_194449.jpg


The Arctic Heater, is a brand new unit, never been fired up, or had any batteries installed. Too good a chance to pass up. As for the carb, I still need to finish the pump assembly, was just too busy at work to scrounge the "right" parts to finish. Possibly today I hope. More pictures to add. I couldn't put all here this time.
 
Top