• Steel Soldiers now has a few new forums, read more about it at: New Munitions Forums!

  • Microsoft MSN, Live, Hotmail, Outlook email users may not be receiving emails. We are working to resolve this issue. Please add support@steelsoldiers.com to your trusted contacts.


My 1971 Am General m109a3 RV build

muthkw25

Well-known member
Steel Soldiers Supporter
415
446
63
Location
Sayre, PA
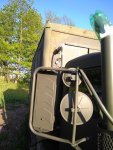
If you ever plan to use your truck at a campground, you may want to read my lesson learned here on dealing with GFCI electrical outlets
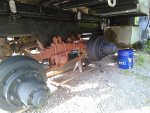
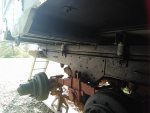
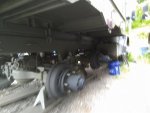
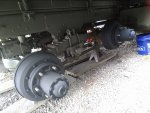
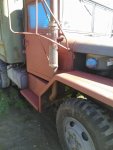
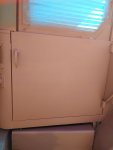
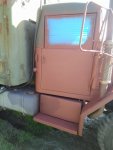
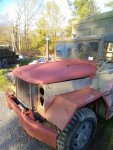
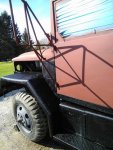
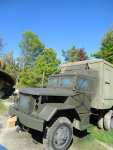
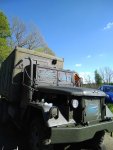
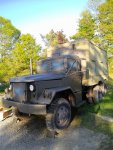
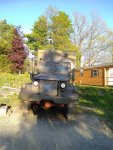
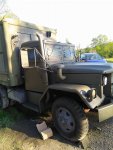
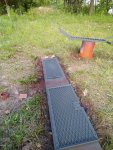
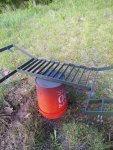
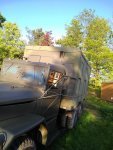
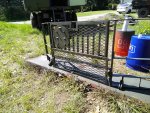
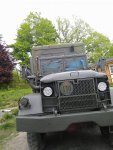
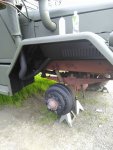
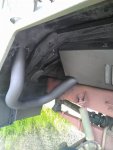
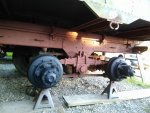
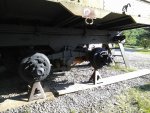
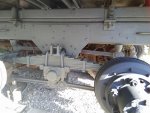
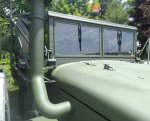
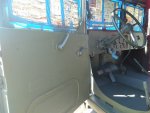
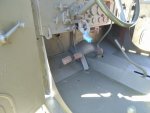
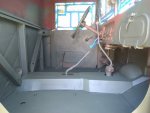
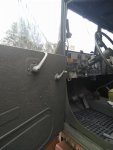
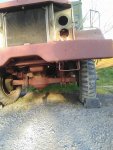
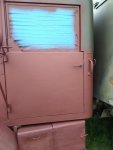
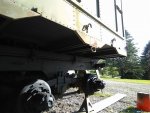
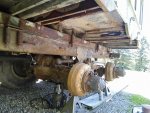
oh, and i agree with others comments on rust. May as well deal with it now. I tried to get by with partial fixes twice and ended up tearing everything out twice. And the windows are a pain, i found a good deal on NOS windows so i replaced them.... now they are a bigger pain than the original ones. Everything was custom fit it seems back then, not much is quite a simple bolt on. Keep it simple, do it right and dont assume the military design of the blasted vanbox is thebest way to go.
Thank you for the feedback Peashooter. I was reading about your build and the ground faults and the rust is def something I want to address first. Save me time later on.
 

muthkw25

Well-known member
Steel Soldiers Supporter
415
446
63
Location
Sayre, PA
I applied multiple light coats because the weather in northern pa has not been the most cooperative. After painting dad and I took the seats apart and installed Monroe shocks. The orginial Gabriel ones were completely bad. These fit in with some elbow grease and slight grinding on the edge. The shocks are approx 1" or so shorter but they were able to fit and function the same. What a difference! I bought two seat cushions. I bought a vinyl cushion to match the seats and it ended up not being the correct one on *bay. Modified the seat to make it work and then bought another canvas cushion from kublos. Just having new cushions and new shocks makes such a difference. I'll be excited to drive it and see how it does on the road.

I then sanded and primed the seat bases before assembly and placed everything back in the truck. I bought stainless steel hardware for the dataplates and took some horse mats from tractor supply with holes and cut some Mats to fit. These are nice because if water gets in the cab it can evaporate. The solid rubber mats allow moisture and condensation to build up.

I bought a bunch of stickers to replace the broken and torn old ones for the dash. Installed the new turn signal indicator and installed the shifter and transfer case boots.
 

Attachments

muthkw25

Well-known member
Steel Soldiers Supporter
415
446
63
Location
Sayre, PA
After all the interior work I started working on the outside. Got the mushroom cleaned up and primed and painted it and got it placed on the snorkel. Got a 90 degree 4" elbow from Napa and boom, a cheap but affordable snorkel tube. Just to keep rain and snow out of the intake.

Then I started working on the passenger side door. Sanded it down and primed it. I scuffed the passenger side fender and battery box and step and primed them as well. The fender and battery box and step are getting herculiner bedliner. I like the texture and look and helps protect the surfaces. I put herculiner on my other trucks fender and bumper and helps in slippery weather conditions. Very happy with how It turned out.

Next was working on the front bumper, front suspension and front axle. Used a wire wheel to scruff them up and remove the flaky paint and rust. Cleaned both surfaces and primed them.
Complete driverside fender as well with scuffing and priming.

The hood I almost took down to bare metal because the brush strokes were so thick. In the end the hood turned out gorgeous. Photos don't do it justice. Hoping on Memorial Day ( my birthday) I should have everything painted if the weather holds out.
 

Attachments

fpchief

Well-known member
1,041
218
63
Location
South Alabama
After all the interior work I started working on the outside. Got the mushroom cleaned up and primed and painted it and got it placed on the snorkel. Got a 90 degree 4" elbow from Napa and boom, a cheap but affordable snorkel tube. Just to keep rain and snow out of the intake.

Then I started working on the passenger side door. Sanded it down and primed it. I scuffed the passenger side fender and battery box and step and primed them as well. The fender and battery box and step are getting herculiner bedliner. I like the texture and look and helps protect the surfaces. I put herculiner on my other trucks fender and bumper and helps in slippery weather conditions. Very happy with how It turned out.

Next was working on the front bumper, front suspension and front axle. Used a wire wheel to scruff them up and remove the flaky paint and rust. Cleaned both surfaces and primed them.
Complete driverside fender as well with scuffing and priming.

The hood I almost took down to bare metal because the brush strokes were so thick. In the end the hood turned out gorgeous. Photos don't do it justice. Hoping on Memorial Day ( my birthday) I should have everything painted if the weather holds out.
You are doing a lot of excellent work!!! Wish I had the time you have.....and the energy.
 

muthkw25

Well-known member
Steel Soldiers Supporter
415
446
63
Location
Sayre, PA
You are doing a lot of excellent work!!! Wish I had the time you have.....and the energy.
Thank you fpchief. I just keep plugging away when I have the time and break it up into parts. If I had a shop I could get alot more done but we all work with what we have.
 

muthkw25

Well-known member
Steel Soldiers Supporter
415
446
63
Location
Sayre, PA
Today I managed to prime the driverside door and tool box and step. Installed the locking door handles. Doors look brand new after hours of sanding. Hoping to have the exterior cab painted by Tuesday afternoon pending weather. Then it's onto the box.
 

Attachments

muthkw25

Well-known member
Steel Soldiers Supporter
415
446
63
Location
Sayre, PA
Well today I got the surfaces prepped for herculiner. Applied to the battery box, tool box, both steps, fenders, bumper and front face of the truck. Sanded down the engine side panels, primed and painted them. Painted the trucklite led turn signals and led blackout light from trucklite.

I also decided that the truck will need a nice cup holder so I took a 50 cal ammo can and ordered a 3 3/4" hole saw. Cut two holes in the lid and took some caulk/epoxy and sealed in two brass cup holders. Ammo can is painted marine corps lusterless green like the truck. This will go between the seats in the cab. Going to secure the ammo can with some magnets so it can be removed if necessary. Turned out excellent. The brass gives a nice contrast imo.
 

Attachments

muthkw25

Well-known member
Steel Soldiers Supporter
415
446
63
Location
Sayre, PA
Well today made alot more progress. Purchased a Wagner paint sprayer from Lowe's. Up to this point I always used air to spray the trucks. This was a new experience. I had to really dial back the power on this gun. Got the hang of it and went to town on the cab exterior. 1 gallon of paint later and the entire cab is finished. It was then a matter of reassembly. After the paint dried I reinstalled the engine panels and mounted the new trucklite led headlights and blackout light. Installed the turn signals but didn't hook them up just yet. Headlights and blackout light work great. Painted my brand new mirrors and got them up in place. Need to finish positioning them. The m109a3 is starting to look like a truck again.
 

Attachments

montaillou

Well-known member
Steel Soldiers Supporter
790
788
93
Location
W.WA
what type of fire extinguisher do you run
I got a 5lb carbon dioxide extinguisher. A carbon dioxide extinguisher is designed for electrical/fuel fires, what I figured I'd likely get from the engine. Also, carbon dioxide will evaporate and if you intend to salvage the engine this is the way to go. The downside are they're so much more expensive than the type of extinguisher you see in homes. I also went with 5 lb because of the size of the engine bay.
Haven't placed mine yet, though I did buy a metal rack for it - wanted something that was designed for quick release but could also hold it firmly in the truck. I'm still deciding on my cab layout, but depending on your set up, maybe behind/under the passenger bench or below the passenger side of the dash. Where ever you do put it, make sure it's not blocked behind anything, you may need to tell a stranger where it is at.
 

muthkw25

Well-known member
Steel Soldiers Supporter
415
446
63
Location
Sayre, PA
I got a 5lb carbon dioxide extinguisher. A carbon dioxide extinguisher is designed for electrical/fuel fires, what I figured I'd likely get from the engine. Also, carbon dioxide will evaporate and if you intend to salvage the engine this is the way to go. The downside are they're so much more expensive than the type of extinguisher you see in homes. I also went with 5 lb because of the size of the engine bay.
Haven't placed mine yet, though I did buy a metal rack for it - wanted something that was designed for quick release but could also hold it firmly in the truck. I'm still deciding on my cab layout, but depending on your set up, maybe behind/under the passenger bench or below the passenger side of the dash. Where ever you do put it, make sure it's not blocked behind anything, you may need to tell a stranger where it is at.
I bought a 2.5lb abc extinguisher and mounting it next to the shifter on the right hand side. Wanted it to be easily accessible. I'm putting a larger one in the can box itself. Didn't want too large of a fire extinguisher taking up too much space.
 

muthkw25

Well-known member
Steel Soldiers Supporter
415
446
63
Location
Sayre, PA
Installed the fire extinguisher today. Used the orginial mount and used mount from new fire extinguisher to bolt in place. I also decided to remove all the components of the grill and replace all new hardware. Sanded, primed and painted the grill. Just need to reassemble grill and mount back into place. I also positioned the mirrors today. The tiny small mirror is angled upward to view the sides of the box when backing up or clearing obstacles.
 

Attachments

muthkw25

Well-known member
Steel Soldiers Supporter
415
446
63
Location
Sayre, PA
I was able to assemble the grill with new stainless steel hardware over the last couple days and repaint everything after the grill was assembled. Decided it was time to replace the hood latches and ordered some new ones. Installed grill today. Looks brand new again. Also sanded, primed and painted the shackles. It's starting to look like a truck again.
 

Attachments

muthkw25

Well-known member
Steel Soldiers Supporter
415
446
63
Location
Sayre, PA
Ended up removing passenger and driverside wheels and sanding and priming both. Used a Rust-Oleum spray on bedliner for the fenders. Used high temp black paint for exhaust and used herculiner roll.on bedliner for the frame. Painted the frames green. Sanded and primed and painted both brake drums. And painted the passenger side suspension. Installed the boost gauge. Hooked up the led turn signals. Turn signals paint matched.
 

Attachments

muthkw25

Well-known member
Steel Soldiers Supporter
415
446
63
Location
Sayre, PA
Installed new lockout hubs. I was able to sand and grind the entire driverside rear frame. Primed it and applied spray on bedliner on bottom side of box and herculiner bedliner on the frame. Painted everything green. Looks brand new again. Included is the before picture
 

Attachments

Last edited:

fpchief

Well-known member
1,041
218
63
Location
South Alabama
Installed new lockout hubs. I was able to sand and grind the entire driverside rear frame. Primed it and applied spray on bedliner on bottom side of box and herculiner bedliner on the frame. Painted everything green. Looks brand new again. Included is the before picture
Your work and your energy is impressive...
 

muthkw25

Well-known member
Steel Soldiers Supporter
415
446
63
Location
Sayre, PA
Finished the passenger side sanding and priming and painting. Found out when I went to lightly sand the fuel tank I found rust holes appear out of no where. 😡 
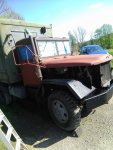
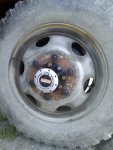
So I just bought a new fuel tank for the truck. Should cover me for the next 50 years. And better to find out now then on a long trip away from home. Also means the fuel system will be squeaky clean. New tires are coming to the house so should have new shoes on the m109 soon!
 

Attachments

muthkw25

Well-known member
Steel Soldiers Supporter
415
446
63
Location
Sayre, PA
Installed the brakelights and painted them up. Also installed new wiper blades. These are Anco 4101 wiper arms and bought some tricor classic 12" wiper blades. Will get photos tomorrow but I can tell the spring tension is much greater than the military setup and the wiper blade is larger covering more of the glass. Painted them green very pleased with the look and function. Will post pics tomorrow.

The photo is what the blades look like on the cargo truck I own.
 

Attachments

Last edited:
Top
AdBlock Detected

We get it, advertisements are annoying!

Sure, ad-blocking software does a great job at blocking ads, but it also blocks useful features of our website like our supporting vendors. Their ads help keep Steel Soldiers going. Please consider disabling your ad blockers for the site. Thanks!

I've Disabled AdBlock
No Thanks