• Steel Soldiers now has a few new forums, read more about it at: New Munitions Forums!

  • Microsoft MSN, Live, Hotmail, Outlook email users may not be receiving emails. We are working to resolve this issue. Please add support@steelsoldiers.com to your trusted contacts.

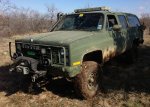
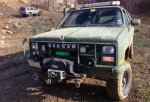
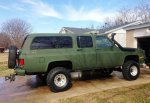
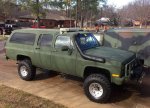
My 1984 Chevrolet Suburban K20 4x4 3/4 ton CUCV clone #2 - AKA: M1007 or M1029

K9Vic

Active member
1,261
7
38
Location
Fort Worth, TX
Thanks Danger Ranger, glad to hear you got your horn system working and it really does come in handy.

No new updates on the Suburban, but I will be having the inside floor Bullet lined in a few weeks. It is just so much better over the carpet and I do not have to worry about water soaking the carpet.
I am also going to add the roof rack now that it is not 100 outside everyday. May try to tackle this over the weekend, but probably not until after the liner is done since I have to strip out the interior for that.


Skinny, it would be hard to sell this one, but if I ever do you can be the first person I contact.
 

Crash_AF

Active member
1,530
7
38
Location
Colorado Springs, CO
Hey K9, how are you mounting the roofrack? I have a safari rack for my Sub, but it bolts to the roof, and I'm not sure how best to secure and seal it. Any suggestions?

Nice looking rig, I hope mine looks half as good when I'm done.
 

K9Vic

Active member
1,261
7
38
Location
Fort Worth, TX
Hey K9, how are you mounting the roofrack? I have a safari rack for my Sub, but it bolts to the roof, and I'm not sure how best to secure and seal it. Any suggestions?

Nice looking rig, I hope mine looks half as good when I'm done.
I do not know yet, the roof rack original mounts are placed into rails along the roof that are really expensive. On another make of roof rack Defender they use hinges like you would see on a fence gate door. So I bought some of these hinges for like $8 each and will see about bending them, or cutting and welding them. The base I would just bolt onto the roof and seal up real well like I did with the fiberglass top on the M1009. Should work out and when I do make the endeavor I will post pictures and how I did it here.

These are the hinges, stupid expensive for bent metal that is the same as a fence door hinge.
http://www.offroadunlimited.com/orustore/pc/viewPrd.asp?idcategory=1841&idproduct=10448

Plasma cutter and welder makes fabrication easier!!
 

Warthog

Moderator
Super Moderator
Steel Soldiers Supporter
13,774
235
63
Location
OKC, OK
My suburban has a bolt on roof rack. They used some blue RTV to seal it. A better option is the sealant they sell for roof vents on RVs. It is designed to keep out the moisture. The stuff I used 7 years ago was clear and it is still holding today.
 

Danger Ranger

New member
2,253
23
0
Location
Roland, IA
RTV silicone is what we use to seal that sort of thing. I have a couple spots on my Jeep's body with that. Things like holes for lights and wires...
 

Skinny

Well-known member
2,130
491
83
Location
Portsmouth, NH
Anything marine will also work like Boatlife. Usually better rated for UV durability plus it will hold the rack in place without any bolts. I would almost go as far as sealing it from the inside as well under the headliner. After it sets up use a garden hose to test.
 

K9Vic

Active member
1,261
7
38
Location
Fort Worth, TX
I added an aluminum radiator back in October from Genesis, but I noticed that I never posted here about it. I did in the below link on the subject. I have now had it for about 45 days and the temp has not gone over 200 even with the A/C on. Been on a few long drives and has been all good.
http://www.steelsoldiers.com/showth...-cooler-lines-don-t-fit&p=1431468#post1431468

528bea71.jpg528bea7f.jpg
-

I am hopping to strip out the interior this weekend to prep it for the Bullet Liner to be added inside. Once that is done it will be quieter and easier to clean inside. If I have time I will try to install the roof rack, but the priority is to get the inside done.


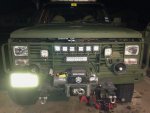
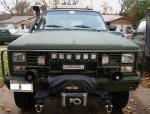
I also added more Rigid LED lights to it that were previously on my 2009 Tahoe that I just sold, the 10" spot/flood. Not a very good picture, but you get the idea. This was taken while I was replacing the steering gear box that was bad. I still have to replace the bent main tie rod as well, I 99% sure that was like that before I bought it. I have not done any off-road driving yet as I wanted my steering brace on first that will be added soon.

528be69d.jpg528be64e.jpg
 

K9Vic

Active member
1,261
7
38
Location
Fort Worth, TX
Never got to do any work on it last weekend due to the cold and rain, but this weekend was great out (11/30-12/1). I did not strip out the interior as that can wait for now. May look into that next weekend. Still have to figure out a way to mount the roof rack, but I have some good ideas that should work.


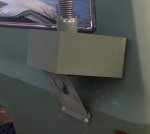
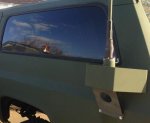
I added the second antenna bracket and guard on the driver side finally. Passenger side was already there and had never got around to installing the second one. It was real quick using my custom method I developed on the last Suburban CUCV clone.
http://www.steelsoldiers.com/showthread.php?108133-Antenna-bracket-mounting-simple-cheap-parts-from-hardware-store&p=1370750
529b8fd6.jpg529b8ee3.jpg529b8ef9.jpg


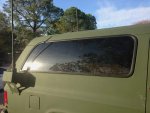
Changed out the rear window trim lock with black over the faded out chrome. Looks so my better, but I need to find a black corner lock. You can see the old trim lock on the above picture for the antenna mount.
529b8ff8.jpg529b9334.jpg

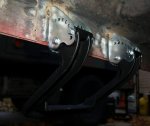
Added CARR steps to make it easier to get into it with the lift. I added a few spot welds to better hold it in place over the metal screw it used on the top part. Seems to hold well with my large frame, but I would not hang on them too long.

529b8e65.jpg529b8e9c.jpg529b8ec1.jpg

EDIT: I also added the steering gear box brace from Off-Road Design so I can finally feel safe taking it off road. With the lift and such, I did not want to do any major off road driving without the brace.
529bbcee.jpg


Better picture of the Rigid LED lights.
529b8ecf.jpg
 
Last edited:

Hollowman

Member
32
0
6
Location
Cleveland, Ohio
K9Vic,
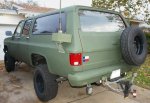
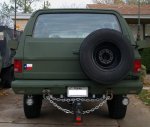
That's a really impressive build! I remember seeing the earliest posts when you brought it home and started working on it. I'm particularly interested in how you installed the rear tire rack. I have an M1009 and as I've read on this site, those outside corner mounts tend to tear up the body of the truck. Is the Burb setup differently, did you reinforce the inner structure at all, or are you relying on the tailgate bracket to keep the whole thing stable? I'm trying to figure out the best way to hang my spare outside without having to spend $500 plus on a bumper mount. Love the truck, you've really got an eye for these things.
 

K9Vic

Active member
1,261
7
38
Location
Fort Worth, TX
Hollowman, I only used what came off the K5 it came from. Nothing special in mounting it to the body and as long as you are careful with the weight it should be OK. I am not putting on a 33" spare as that adds more weight and the stock tire will get me home.

Other note on my new aluminum radiator, I should have put in a new temp sensor as it has gone bad. Radiator is full and over fill, but my light for low coolant is on. Temps is about 160-180 in this cold and heat is working well. Hopefully I can swap it out quickly and not loose too much coolant.
 

K9Vic

Active member
1,261
7
38
Location
Fort Worth, TX
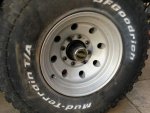
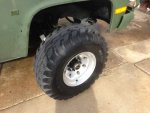
Looking at putting some new 36" military tires on over the next week and already test fit clearance on some 35" tires. They look fine and should be fine with a 4" lift, so the 36" should hopefully work as well. The image below are 16.5" wheels and my current lug nuts are the correct ones. Not sure if these will only be for when I go trailing or stay on there all the time. I had already spent allot on the current MT 33" tires and ProComp wheels, but not full price due to a deal on tw0 of them.

IMG_1369.jpgIMG_1368.jpgIMG_1367.jpg
--

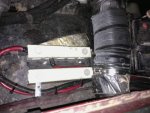
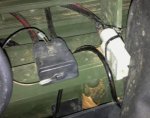
I also put to good use the aux radio power bank from a M1009 for connecting the power for my winch and 12v vehicle jumper system. This way I do not have to put all those ends on the battery and also makes for a way to add a power inverter or other stuff down later on. Like on the M1009 there is one for power and ground. It is mounted where the tire jack goes and already had a hole for the bolt making it the perfect spot. The black plug is for the 12v jumper system and white for the Badlands winch.

52c88430.jpg52c88459.jpg
--

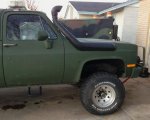
I finally took my rig to the off road park and had a great time getting dirty in the mud. Meet up with a bunch of jeep guys and trailed with them for the day and had a blast. I was not able to go on all the trails they did as it is too big for some of the trails, so I just meet them around the other side. Still a good time and survived with only scratching up my rig, a few small dings due to trees, but nothing major. I did have to remove one of the antenna brackets to clear a tree, but with my design they are easy to remove and do not spin out with the rivets holding them. That tree was resting on my rear side window and scuffed it up, also put a few small dings in the side. I know someone will ask, so the reason the snorkel is turned around to help prevent water from splashing into it. It does not affect air flow as one is driving so slow anyways. After the fun I turned it back around and put my tires back up to 50psi running they at about 20psi on the trails.

If I was worried about denting or scratching up my rig, it would not see this abuse. But I built it to use it on the trails and everyone really liked what I did with this old Suburban that saw it.

12-22-13_BOHV-06.jpg12-22-13_BOHV-01.jpg12-22-13_BOHV-09.jpg12-22-13_BOHV-10.jpg12-22-13_BOHV-02.jpg

Video with some more pictures, nothing special as I have not had time to edit the GoPro footage.

http://www.youtube.com/watch?v=Upic3qkDSd4
 
Last edited:

K9Vic

Active member
1,261
7
38
Location
Fort Worth, TX
I put some 36x12.50 R16.50 military tires on the alloy 16.50 wheels I had only to find out I had a really bad ball joint. Not sure how I missed that before, but it may have gone bad on my trip to Bridgeport as I do not recall it being that way when I did the lift. So I spent Sunday fixing the passenger side ball joints and now it is all good. I used the Harbor Freight 2wd/4wd ball joint tool with not issues of pitting the supplied adapters. Got is for about $55 from being on sale and my 25% discount, so not a bad deal. As long as you use the tool correctly and lube the screw it works well. This repair would be the same as a M1009 as it has the same axle and the larger CUCV would be similar.

Cannot upload pictures from work, but here is a video I put together to show just how bad the upper ball joint was.
(Watch in HD)
http://www.youtube.com/watch?v=596Mt9p8-YU


I will add more pictures later tonight, but was able to add these I had.

image.jpgimage.jpgimage.jpg
 
Last edited:

NMC_EXP

New member
286
12
0
Location
Raton, New Mexico
K9VIC

I like the Suburban.

I've never owned a Suburban but lately have developed a craving for one. I have an M1009 and have a love/hate thing with the 6.2L engine.

Question: have you driven Suburbans with the 350 TBI enough to come up with an opinion on how the 350 gasser compares to the 6.2L in terms of ability to pull. I'm specifically thinking of using one in the Rockies where long, steep hills are common.

Thanks

Jim
 

Skinny

Well-known member
2,130
491
83
Location
Portsmouth, NH
I'm curious as to how it pulls with a 700r4, stock diff ratios, and 36" tires. I am making a official 0-60 YouTube test run!!!
 
Top
AdBlock Detected

We get it, advertisements are annoying!

Sure, ad-blocking software does a great job at blocking ads, but it also blocks useful features of our website like our supporting vendors. Their ads help keep Steel Soldiers going. Please consider disabling your ad blockers for the site. Thanks!

I've Disabled AdBlock
No Thanks