• Steel Soldiers now has a few new forums, read more about it at: New Munitions Forums!

  • Microsoft MSN, Live, Hotmail, Outlook email users may not be receiving emails. We are working to resolve this issue. Please add support@steelsoldiers.com to your trusted contacts.

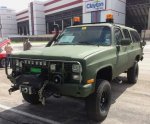
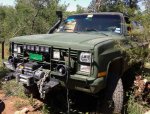
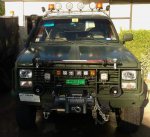
My 1984 Chevrolet Suburban K20 4x4 3/4 ton CUCV clone #2 - AKA: M1007 or M1029

K9Vic

Active member
1,261
7
38
Location
Fort Worth, TX
I'm curious as to how it pulls with a 700r4, stock diff ratios, and 36" tires. I am making a official 0-60 YouTube test run!!!
I went back to the 33" tires as these 36" were out of balance with the wheels I had. Did not have time to get them balanced and will likely just stay with the 33" and try and sell these 36" with the wheels.


K9VIC

I like the Suburban.

I've never owned a Suburban but lately have developed a craving for one. I have an M1009 and have a love/hate thing with the 6.2L engine.

Question: have you driven Suburbans with the 350 TBI enough to come up with an opinion on how the 350 gasser compares to the 6.2L in terms of ability to pull. I'm specifically thinking of using one in the Rockies where long, steep hills are common.

Thanks

Jim
If you want a crawler you better off with a 350 or 454 for the higher horsepower and a TH400.

The combination of the 6.2L and the 700R4 is very weak when it comes to trailing off road trying to climb steep hills. It has a hard time if the terrain is rough or the incline is steep. So I would not recommend this combination for a wheelin rig, but does OK towing. My M1009 did not have the issues as the Suburban on the trails, so I miss that extra pull. The transmission should be fine, it was rebuilt at some point by the previous owner by Jasper. My Suburban would probably do allot better with a TH400, but not as good as a M1009 due to the extra weight.

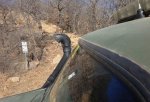
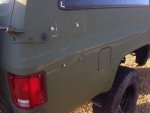
Was at Northwest OHV in Bridgeport again Saturday and scratched up my rig yet again, but had a great time. Was out there with my Cross Timbers Offroad Club with mostly Jeeps, but all rigs are welcome. I removed the antenna brackets as some of the trails are narrow and almost ripped one off last time. Glad I did as you can see what happened on the last picture. My power steering box is acting up and I likely have a defective one. So next weekend I will likely be replacing that; how fun.

52dc4f60.jpg52db0be4.jpg52db0d6c.jpg52db0d44.jpg
52db0d88.jpg52dc4f9d.jpg52db0e40.jpg52dc2896.jpg
 

K9Vic

Active member
1,261
7
38
Location
Fort Worth, TX
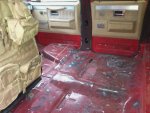
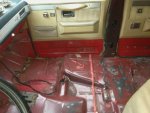
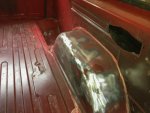
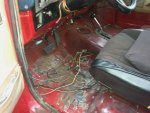
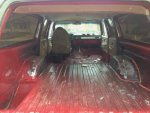
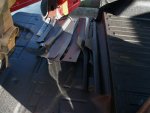
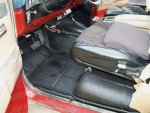
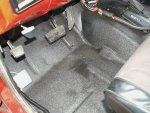
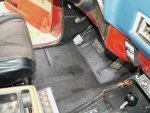
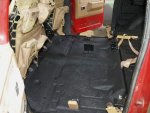
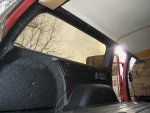
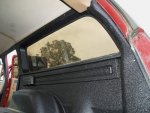
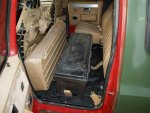
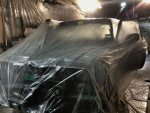
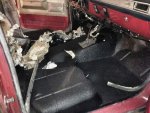
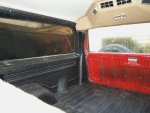
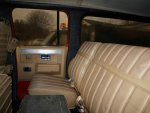
Well the weather has finally been good enough to start on stripping out the interior for the Bullet Liner that is my last major part of this project. I just about had it all done less some more stripping of the paint and glue from the carpet over the wheel wells. The Bullet liner sticks better to metal over paint and rust, so leaving bare metal is fine. After the liner is in I will finish painting the inside black to match.

I hope to have it in the shop by the weekend and be ready for my next off road adventure.

Sorry for the poor iPhone pictures.

IMG_1880.jpgIMG_1877.jpgIMG_1882.jpgIMG_1875.jpgIMG_1873.jpg
 
Last edited:

K9Vic

Active member
1,261
7
38
Location
Fort Worth, TX
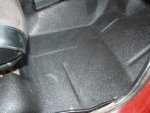
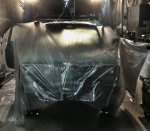
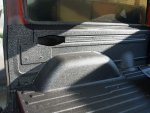
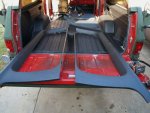
Had the Bullet Liner spayed on Friday and put everything back in today (Saturday). Started working on it about 10am and finished about 6pm with a lunch break. That was allot of work putting it all back in and seemed like it was easy getting it out. So now I have a mix of tan, black and red and looks goofy yes. However I am going to paint the red black and the tan I may change to black if I get a good price on upholstery work.

The liner really makes it allot quieter over the carpet and also makes it super easy to clean any mud out. This is the third one I have had lined, other M1009 and previous Suburban CUCV clone. I highly recommend getting this done and my average cost is about $450-600 depending on how I have it sprayed.

Here are my first set of pictures.
.
P1015669s.jpgP1015686s.jpgP1015688s.jpgP1015699s.jpgP1015697s.jpgP1015683s.jpgP1015703s.jpgP1015708s.jpgP1015706s.jpgP1015719s.jpg
 

K9Vic

Active member
1,261
7
38
Location
Fort Worth, TX
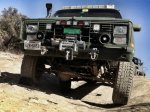
Well it has been 1 year since I owned my 1984 Chevy Suburban CUCV clone and it has been a fun year. It is about 90% completed where the only part left is to paint the inside red to black and after that all done. Truck has held up well going off roading many times this year and during that time recused many Jeeps and even a side by side. I even towed a M1008 that was broken down for a friend 50 miles, but that 6.2L is slow with no turbo. Had it at the PATE Swap Meet car corral show a few weeks ago and the next day took it off roading so it got really dirty again.
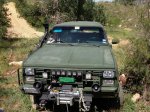
It really has been a fun truck and glad I build it. I always get positive comments on it when people see it out and about. I see people taking pictures stop lights and while driving on the streets and I even spotted a picture online of one. So I am very happy with my build and it plan to keep this one a long time.
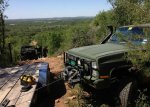

Here is a picture of someone seeing my truck and asking if it was anyone they knew on Facebook, saw it and replied.
IMG_2691.jpg
-----

Towing the M1008 for my friend, in the first picture the angle and ground made it look higher in the front rake than it really was.
IMG_2685a.jpgIMG_2690.jpg
-----

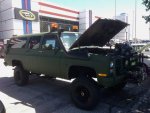
At the PATE Swap Meet 2014. That is a Tonka International CXT toy truck under the hood.

IMG_2833a.jpgIMG_2779a.jpg
-----

First three pictures are from Sunday May 4th (May the 4th be with you). I recused a CanAm side by side that broke a tie rod. I have a full set of recovery gear as you never know when you will need it.

IMG_2959a.jpgIMG_2956a.jpgIMG_2957a.jpg
-----

Pulling a Jeep out of a mud hole and I was riding in the Jeep when it got stuck. We had to go get my Suburban to recuse the Jeep.
IMG_2408a.jpg
----

Just a random picture at Northwest Offroad Park in Bridgeport Texas were I go wheelin. Pretty much how it looked the day after the PATE Swap meet after spending a few hours cleaning it up for the show.
IMG_2555a.jpg
 
Last edited:

K9Vic

Active member
1,261
7
38
Location
Fort Worth, TX
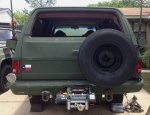
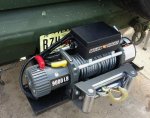
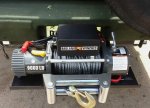
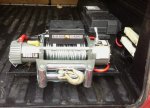
Being that my rig has been designated as the recovery vehicle in the off road & Jeep club I am in, I added a rear winch. Used another Badlands winch, but went with a 9000lb for this. Though about a 12K winch, but figured I would only be pulling Jeeps and 9000lb will be fine. Plus anything bigger I would use the front Badlands 12K winch. That one I have used almost a dozen times and has held up well to the abuse I put it through.

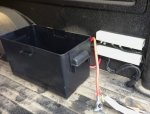
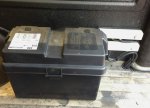
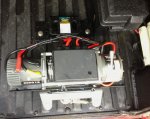
I build this with a removable receiver hitch system so I can store it away when not needed. No need to let it get exposed to weather or risk some fool crashing or backing into it. For power I used CUCV 2 gauge cable from the M1009 rear radio system. I had a few of these save over the years so was able to just put two of them together to run from the front to back. If you recall my use of the junction box under the hood, that was where I went from the front battery to power the rear winch. Now I did not want to put all that amp load on that 20ft cable run (two combined), so I added a rear group 31 battery in the back cabin. There I also used the same M1009 radio junction box for +POS & -NEG distribution. The battery is grounded to the frame in the rear and junction box and winch is grounded to that. So that amp load will go to that rear battery. Battery box if from auto parts store and bolted to the floor.

To store the winch in the rear cabin I added a receiver hitch that you would mount on a bumper. Worked out great and holds it well, but I need to add some "L" brackets on the other end to keep the winch fully stable from swaying side-to-side. Plus it will help when sliding it in and out of the back. When the winch is installed on the outside, the tailgate will fully go down, just barely clears the top box of the winch, was lucky on that.

Pictures

2 gauge cable from front to rear battery.
84-Burb-rear-winch-01.jpg
---

M1009 radio junction box for +POS & -NEG. The group 31 battery box as well.
84-Burb-rear-winch-05.jpg84-Burb-rear-winch-04.jpg84-Burb-rear-winch-03.jpg
----

Quick disconnect plug
84-Burb-rear-winch-02.jpg
----

Tailgate will fully open with the winch in place. Blocks license plate so not a good idea to drive with it installed.

84-Burb-rear-winch-06.jpg84-Burb-rear-winch-08.jpg84-Burb-rear-winch-07.jpg
----


The holder I came up with, still need to put some "L" brackets on the other side to keep it in place better.
84-Burb-rear-winch-10.jpg
84-Burb-rear-winch-09.jpg
---

Do not know if I will every use it, but it is there if needed. Just something else cool to add to my rig.
 

Recovry4x4

LLM/Member 785
Super Moderator
Steel Soldiers Supporter
34,012
1,813
113
Location
GA Mountains
Very cool. I looked across the yard at my 91 diesel burb and thought about this for a nano second then decided I'll just sell it or scrap it.
 

K9Vic

Active member
1,261
7
38
Location
Fort Worth, TX
Finally installed the roof rack today and now the military version of the Dante's Peak Suburban is complete. Not everything is the same parts wise, but it looks like a green version of that truck. :jumpin: :drool:

The roof rack maker Wilderness and others sells the mounting brackets for some stupid price of like $100. Looking at it they are pretty much just a fence door swing with a "L" bracket on them over a flat plate. So I just took the door hing, cut and bent it, than welded at the bend to strengthen it. Real simple and was under $20 for four of them, compared to $100. The roof rack I placed on backwards, as-in the KC light mounts in the rear as I am going to add a 40" LED flood lightbar. I already have enough light in the front and added the CARR lightbar as well.

Only project left is to paint the inside cabin black and hope to get that done in the next few weeks.

IMG_3704.jpgIMG_3705.jpgIMG_3706.jpg
---

The brackets I made, look just like the ones Smittybilt sells for $100 for the Defender rack.
IMG_3696a.jpgIMG_3695a.jpgIMG_3707.jpg
---

The CARR light bar, picture was before I added the roof rack a few days ago.
IMG_3668a.jpg
---

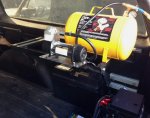
I also added last week on board air compressor and tank mounted on a M1009 radio rack. I used the antenna mounting method to hold everything in place for the rack, works great.
http://www.steelsoldiers.com/showth...unting-simple-cheap-parts-from-hardware-store

IMG_3492a.jpg
---

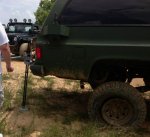
Here is my tip for the day, if you need a jack spend the extra money on a real HiLift jack. Just because that other one is a few $$ less does not mean it will work like a real HiLift Jack. I had a Smittybilt bend on me, lucky no one was hurt as we all were paying attention to how it was lifting.

IMG_3499a.jpgIMG_3497a.jpg

.
 
Last edited by a moderator:

K9Vic

Active member
1,261
7
38
Location
Fort Worth, TX
Thanks, I think the roof rack & KC bar makes it look complete and more safari over not having them.

Good luck with your build, you should start a thread on it do all here can follow he progress.
 

llong66

New member
453
3
0
Location
kokomo, In
Great build and thread!! Thanks much for taking the time to document it all!! I am curious, you said you added an additional batter in the rear, how are you charging it? Do you just have it wired in parallel to one of your others?

Thanks!
Greg
 

K9Vic

Active member
1,261
7
38
Location
Fort Worth, TX
Thank you Greg.

The rear battery details are in post #127, but some of your questions were not detailed. It is charged off the same alternator as the other batteries and is run parallel as any 12volt system would be. Since my A/C does not work very well and pretty much never us it because of that, I am removing it. I will replace that with the brackets from the CUCV on the driver side and add a second alternator to help may amp draw. I have many extra CUCV alternators to use and are 100amp. I will likely rewire all my lighting accessories to that second alternator with the rear battery on it's own system, but with an isolator between the two for load balancing. That way if I break an alternator belt on either one, I can still charge my whole system.


http://www.steelsoldiers.com/showth...007-or-M1029&p=1553247&viewfull=1#post1553247
 

K9Vic

Active member
1,261
7
38
Location
Fort Worth, TX
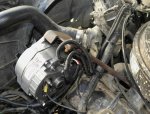
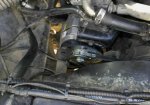
Well, might as well update since I mentioned I am adding a second alternator. Got that project done today and was not a simple task and took about 8-10 hour of work. I had to remove the A/C system and that bracket is behind the power steering brackets. So that had to come out and from there you install the CUCV driver alternator brackets and is a perfect fit up. The power steering pump has a different pulley, but it was not an issue as I just got a shorter ALT belt, 7555. After that bracket was installed I put in the alternator and from there I had to wire everything. That took the longest time to make it right and look clean. Basically I just wired everything in two systems, but both alternators will charge when running. My lights and accessories are on a separated system when the truck is off. When key is on, a 500amp isolator/relay activates and both systems into one (Like the GP relay, but 500amps). The passenger side ALT is still the same small 17SI, but I rebuilt it with a larger rectifier and is now about 120amps.

When my mechanic pulled the R134a out of the system it was only 1 pound. The whole system takes almost 4 pounds, so that is how much leaked out after a year. So it was an easy decision to remove the non-working A/C system. Just have to cap off the lines so no dirt and junk gets in there in case I ever put it back in.

So, now my 84 Suburban CUCV clone looks even more like a real CUCV under the hood with two alternators running at 12volts. The ALT bracket I bought on eBay and a week later one shows up for less with the passenger side brackets :( :x (I bought it anyways as spares). I would not have been able to finish this project next weekend if I waited as I have a off road night run in two week that this was all built out for.

Here are the pictures. I still need to paint the brackets as I am fussy about that stuff.
.
SAM_1445-sm.jpgSAM_1436-sm.jpg

SAM_1447-sm.jpgSAM_1448-sm.jpgSAM_1443-sm.jpg
 
Last edited:

srodocker

Well-known member
6,549
69
48
Location
Lacey, Washington
Will defiantly start a build thread once I get going on it. Hopefully some new shoes this upcoming weekend will be the start of it!

Did you end up spray lining your kick panels on the doors? My carpet on that is shot so I will just get rid of it and maybe spray line that as well.
 

K9Vic

Active member
1,261
7
38
Location
Fort Worth, TX
Did you end up spray lining your kick panels on the doors? My carpet on that is shot so I will just get rid of it and maybe spray line that as well.
I have not done anything with the doors and jams yet, they are still red. I will likely just paint all of that red black and do not think I even have those carpet panels anymore to even spray them.

Want to sell the A/C brackets?
Right now the plan is to hang on to them, but I will consider it.
 

K9Vic

Active member
1,261
7
38
Location
Fort Worth, TX
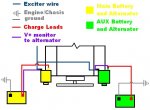
I just realized I made mistake in my wiring of the second ALT. I need to separate the volt monitor or #2 from the main system and just connect it to ALT2 main output. That way there is no direct cross voltage & amperage from main system if I turn off the isolator relay. The exciter wire can be shared, but not the volt monitor #2 from what I read. I think I will look into putting in a volt meter for ALT2, that way I can monitor it.

This diagram shows what I missed, glad I decided to confirm all was correct.

DualAlternatordiagram.jpgalt-wiring.jpg
 
Last edited:

K9Vic

Active member
1,261
7
38
Location
Fort Worth, TX
Would a diode keep it from crossing at any point?
I did read that can be done, but just as easy to do what I noted above. The exciter #1 wire turns the alternator on and can be shared, but #2 is for monitoring and should be separated. If not it can lower the battery life connected to ALT2, but my isolator on the main charging should prevent that, but best to wire it right.
 
Top
AdBlock Detected

We get it, advertisements are annoying!

Sure, ad-blocking software does a great job at blocking ads, but it also blocks useful features of our website like our supporting vendors. Their ads help keep Steel Soldiers going. Please consider disabling your ad blockers for the site. Thanks!

I've Disabled AdBlock
No Thanks