• Steel Soldiers now has a few new forums, read more about it at: New Munitions Forums!

  • Microsoft MSN, Live, Hotmail, Outlook email users may not be receiving emails. We are working to resolve this issue. Please add support@steelsoldiers.com to your trusted contacts.

MY Airpack Rebuild with Photos!

rustystud

Well-known member
9,266
2,962
113
Location
Woodinville, Washington
View attachment 650558View attachment 650559

I was going to say wow that looks as in as bad a shape as mine was! Lol. I think you'll be OK if you painted it so long as you got down to bare metal.

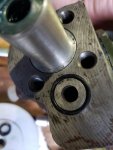
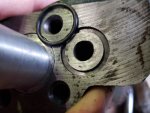
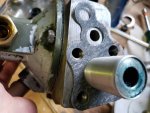
On another note I think I found the piece that's the culprit for most Airpack problems. See pics. Not sure what this piece is called but I believe its a valve that controls both the build up and release of the air in the airpack. So like my original problem with the brakes dragging this piece was stuck closed so the air wouldn't release. Just recently I had an issue where I couldn't build up the air pressure in the truck. I went crazy looking for air leaks and then took apart the Airpack and found this piece to be all corroded and suck Open which was just constantly releasing the air.

This is a great find because if your brakes are dragging or can't build up pressure, you can just unbolt this piece while the Airpack is still on the truck. That way you don't have to do a full rebuild to fix your problem!

Well that can be a problem but the most common is the shaft seal leaking into the air-chamber. There is also the problem with the control piston. This is the actual device that controls the air pressure to the booster. It can stick in it's bore due to rust and corrosion.
 

ygmir

New member
300
0
0
Location
northern CA
Thanks for this great thread!
I just pulled my airpack, and got a kit from Erik.
Hoping I can do it right, and thanks to this thread, I have a better chance!
It does appear, though, that the PO of my "new" M35a2 purged the brakes of DOT5 and replaced with DOT3. What issues do I face? if any?
Thanks!
 

77 AMG

Active member
403
62
28
Location
Owingsville, KY
Thanks for all of the pictures and figuring out the seal "interchange" issue! This is one of the projects tonight. (M/C is another one)
 

cattlerepairman

Well-known member
Steel Soldiers Supporter
3,250
3,340
113
Location
NORTH (Canada)
Thanks for this useful thread. I finally rebuilt the defective airpack that I had sitting on the shelf for 10 years. The air can was good (I honed it anyway) and I tore the paper seal for the air can lid. This seal is too tight...I had oiled/greased it to make it supple, but it still tore. Gasketmaker saved the day.

Now I have a spare airpack on the shelf that I can actually use!

Also of help were TacticalRepair's videos on youtube where he disassembles and reassembles the airpack.
 

DeucesWild11

Active member
1,265
12
38
Location
Putnam County, NY
Thanks for this useful thread. I finally rebuilt the defective airpack that I had sitting on the shelf for 10 years. The air can was good (I honed it anyway) and I tore the paper seal for the air can lid. This seal is too tight...I had oiled/greased it to make it supple, but it still tore. Gasketmaker saved the day.

Now I have a spare airpack on the shelf that I can actually use!

Also of help were TacticalRepair's videos on youtube where he disassembles and reassembles the airpack.
Nice! Don't worry, just about everyone tears the seal they just don't fit.
 

M37M35

Well-known member
Steel Soldiers Supporter
572
648
93
Location
East Central Oklahoma
Thanks everyone for this very helpful thread!

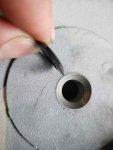
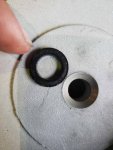
I'm rebuilding a couple airpacks and have run into a little issue. The rebuild kit seems to be short 3 O-rings...
A - The one that goes around the push-rod, between the two halves of the air piston.
B - The one that goes in the machined groove around the air passage between the air chamber and the body.
C - #3 in this screenshot of the TM.

This post in this thread mentions A and B, and the solution was to buy the appropriate size O-rings to go there. That's what I plan to do, but does anyone know why these aren't in the rebuild kit?

What about C?
Does gasket #2 in the TM replace B and C?

Anyone else who encountered this, what did you do?


Edit: Forgot to say, A and B were there when I took it apart. C was not.

A:


20200603_200601.jpg20200603_200612.jpg


B:

20200603_200630.jpg20200603_200838.jpg

C:

Screenshot_20200603-200735_Drive.jpg


Is this gasket supposed to replace O-rings B and C?


20200603_201000.jpg


Thanks!
 
Last edited:

cattlerepairman

Well-known member
Steel Soldiers Supporter
3,250
3,340
113
Location
NORTH (Canada)
My kit had one o-ring missing, the one from the groove between air chamber and body. I took one from my O-ring supply kit and did not think much of it. Seems to be sloppy QC.
 

M37M35

Well-known member
Steel Soldiers Supporter
572
648
93
Location
East Central Oklahoma
My kit had one o-ring missing, the one from the groove between air chamber and body. I took one from my O-ring supply kit and did not think much of it. Seems to be sloppy QC.
Thanks!

Did your kit have O-ring #3 in the TM screenshot?

I have two kits and they're both the same, neither kit has those O-rings. And it's interesting that the TM doesn't agree with what's in the kit. I wonder if there's newer and older kits, or a revision to the TM? Maybe that would explain it.
Either way, I guess I'll just use O-rings from my supply.
 
Top