• Steel Soldiers now has a few new forums, read more about it at: New Munitions Forums!

  • Microsoft MSN, Live, Hotmail, Outlook email users may not be receiving emails. We are working to resolve this issue. Please add support@steelsoldiers.com to your trusted contacts.


My BIG M925A2 Project Truck Is Home

steelsoldiers

Administrator
Staff member
Administrator
5,246
3,933
113
Location
Charleston, WV
WOW, it was looking good but the difference the sides and tailgate make is amazing. Lookin good man :)
Thanks! Now I can test drive it without worrying about losing all the stuff sitting on the bed :oops:

That spray-on bed liner will need to be stripped off of the entire bed. There is rust forming anywhere it was cut or gouged. I need to figure out a more efficient way of stripping it off. Cutting it into sections and then peeling it off works OK, but man it would be tedious to do a whole be like that! Maybe I'll just take the bed off of the truck and set fire to it! :twisted: My carbon footprint would be screwed for life after that. LOL
 

steelsoldiers

Administrator
Staff member
Administrator
5,246
3,933
113
Location
Charleston, WV
Thanks Bruce!

I had a productive day at John's today. My goal was to get all of the lights working, get the mirrors installed, and anything else I could lay my hands on. I got some Grote LED marker lights from Santa and have really been looking forward to putting those on.

I started out by installing the bracket on the front bumper that the hood prop hooks to. At least I don't have to use a ratchet strap to hold it up now. Then, I moved on to installing 2 ground wires between the frame and the front clip. My turn signals and blackout lights were doing some weird stuff last time I tried them. The new ground wires fixed that issue. All marker, blackout, and turn lights on the front clip are working now.

Once that was done, I started installing the side marker lights. The Grote lights installed quickly because you don't have to remove the lens covers to bolt them on. I used all new hardware with star washers to ensure a good ground. I put the 4 amber LED lights on and then swapped the incandescent lamps from the front clip to the back and put on some red lenses. I'll get some red LED lights at a later date. I planning on using LED tail and turn lights too, but they are too $$$ for now.

After the lights were done, I moved on to installing the power steering ram stone shield. It was a pain to get everything lined up because the brackets got tweaked when the previous shield was destroyed by the fork lift operator. It took some beating with the mini sledge and creative bottle jack usage to make it fit. I just need to bolt the transmission cooler to the shield to finish that project. I ran out of nuts and bolts or I would have finished it today.

The last project of the day was installing the mirrors. I thought ahead and soaked the hinge pins with Kroil earlier in the day. That made it a lot easier to knock them out. I assembled the west coast mounts and installed them on the hinges and cowl with new hardware. I will put on some new mirror heads next time. It sure is nice to back the truck up without having to hang out the window to see where I am going!

Next time, I am hoping to get the new soft top installed, the passenger seat installed, and a leaking spring brake can swapped out. I also need to install new wiper motors and all new rubber lines to power them. I am getting so close to driving it home. Hopefully, Gulfway will come through with my insurance next week so I can do a longer test drive without worrying about being uninsured.
 

Attachments

onegmjack

New member
1,080
8
0
Location
Kingsport TN
A little at a time will pay off in the long run.You are coming a long great,looks like a differant truck all together.Dwight
 
Last edited:

peecook

New member
342
1
0
Location
Richmond VA
Chris, had a chance to stop at Winslows today, the truck looks amazing. I dont know how you got all that work done in the weather they've been getting down there. Cant wait to see that thing on the road.
 

steelsoldiers

Administrator
Staff member
Administrator
5,246
3,933
113
Location
Charleston, WV
Thanks Dwight!

Jason, glad you got a chance to see it again. Hopefully I'll be able to take you for a spin before too long!

Kevin, those boxes are definitely a better fit in the bed of a 5-ton. Too bad they are so dang heavy we had to use a Bobcat to load them [thumbzup]

I am hoping to go back this weekend sometime. It looks like we are going to get blasted with some more snow and sleet so the weather should be perfect :lol: I'll have to take my kero heater to warm up the soft top in a connex so it will be pliable enough to install it!
 

steelsoldiers

Administrator
Staff member
Administrator
5,246
3,933
113
Location
Charleston, WV
Right on, Neil!

I had a little time last night to work on the hydraulic motor that powers the winch. I messed with it the other day getting the bent and broken hydraulic hose fittings off of it. I couldn't spin the shaft by hand and it was very hard to turn even with a strap wrench.

I downloaded the manual from the Eaton website so I would have some clue as to disassembly and reassembly. See it here: http://hydraulics.eaton.com/products/pdfs/07-118.pdf

First thing I needed to do was get the motor nice and clean. I put it in the parts washer (kitchen sink) and covered it with Purple Power. I let that soak for a few minutes and then scrubbed it with a wire brush. I used some good, hot water to clean all of the muck off and then dried it off on my work bench (kitchen counter).

Once it was clean I removed the 4 5/8" bolts that were keeping everything together. Once they were out, I removed the valve housing, valve drive, valve plate, the Geroler, the drive shaft, and then finally the front mounting flange. I was looking for any signs of rust or damage that could make this thing so hard to turn. There was one roller in the Geroler that had some rust on it and it looked like it was significant enough to jam it. I removed that and cleaned it up really nice. I tried to turn the shaft with the Geroler removed and it still didn't budge. Dang! The shaft and main bearing are all one unit so if either part needs replacing, then you have to buy the whole thing. I sprayed a little Kroil in the bearing and then put some muscle to it. I finally got it free enough to spin by hand.

I think the motor got just a little water in it after the lines were snapped off and the water settled to the bottom where it rusted one roller in the Geroler and one roller in the front bearing. I put everything back together last night to get it off of the kitchen counter, but I will probably take it apart one more time to polish the roller some more.

I am going to try the motor this weekend using the hydraulic system to see if it will work at all. I don't have my winch adapter yet so I can't bolt it to the winch, but at least I will know if it works before going through the trouble. If it was a motor that ran all of the time, then I would be more worried about the rust I found on the roller surface. I need to spool a whole roll of cable onto my winch drum from the old winch ASAP. We'll see how it does with that. I may pull it after that and order some new parts from Eaton to do it right.
 

Attachments

Bill W

Well-known member
1,985
42
48
Location
Brooks,Ga
**** Chris
I look at a pile of coal and see ash, you look at the same pile and see diamonds.
Great work
Pat yourself on the back for me will ya
 

steelsoldiers

Administrator
Staff member
Administrator
5,246
3,933
113
Location
Charleston, WV
Thanks Bill!

I had a good work day yesterday. There was around 6-8" of snow and ice on the ground, but thankfully the sun was out and it warmed up into the 30's pretty quickly.

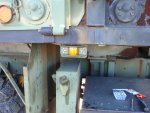
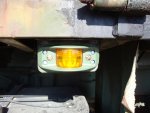
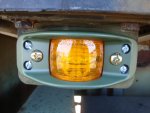
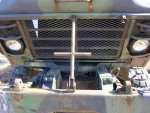
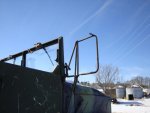
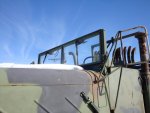
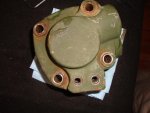
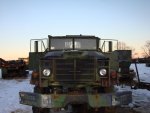
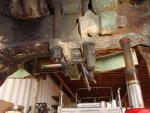
I focused on a lot of little projects to make it road legal/safe. First thing I did was install longer 1/4" bolts in the door hinges. I tried 3" last time, but didn't have enough threads on the top hinge with all of the mirror brackets. I used 1/4x3.5" and those were perfect. Then, I had to install a new center pivot bolt on the right side mirror assembly. The nuts were rusted and seized on the old one so I located a good used bolt and installed it. Once that was done, I put on the new mirror heads. They are the most recent heads with the built-in convex spot on the bottom of the head. I won't need to install the big convex spots on the center pivot with that type. I aimed the heads and tightened down the bolts. At least I will be able to back up the truck now without worrying about crushing my Excursion.

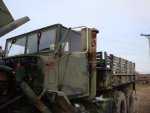
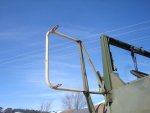
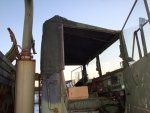
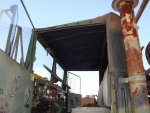
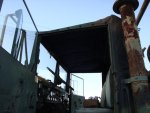
I also stripped off the old soft top and rusty top frame in preparation for the new to me top/frame. It felt good to toss that nasty sucker to the ground. I laid out the new top in the sun to get it pliable for installation.

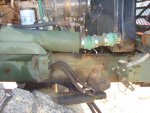
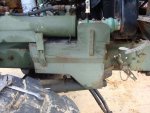
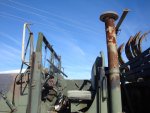
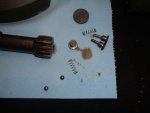
I also finished up some wiring issues. I shrank all of my heat-shrink tubing on the headlight harness. Then, I spliced some wires back together on the low-air-pressure sensor harness. I also swapped out the warning light cluster for a less crusty used piece and installed a good head on the air filter monitor.

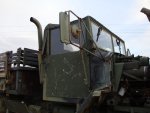
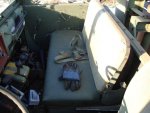
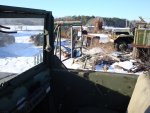
The next big project that almost killed me was installing the passenger seat unit. I had to hoist that cumbersome mother up into the cab. Just when I thought I had it balanced so I could get a new grip on it, it slipped and peeled about an inch of skin off of my left index finger. I paused to give it a cussin' and make a homemade band-aid out of a piece of blue shop towel and some electric tape. Once that was on, I finished sliding the big *&!@ in place without shorting out the batteries. That was only half the fun because I then had to slip 6 little #10 bolts through the hinge plate into the compartment and start some nuts on them without the seat dropping on my arm and chopping it off like a guillotine. I finally managed to get them started and tightened down. Woo-hoo. Comfy seating for the Mrs. I'm sure she's excited :lol:

Last thing for the day was installing the soft top. The sun was going down by that point so it was cold and stiff again. I carried it into John's office to warm up for a bit while I installed the new frame. Once the frame was on, Pete stopped what he was doing on a bob-truck to help me wrestle the top in place. Between the two of us we got it battened down and latched.

I just had to take it for a test drive in the snow after that. I used my new rear view mirrors to watch the super-singles kick up mighty clouds of slushy goodness. That was a blast. I also got to test the braking performance of the truck in snow and ice as I skidded right past John's driveway :mrgreen: The good news is it skids nice and straight so I didn't have top correct any fishtails. I never drove my 923A2 with ABS in the snow so I can't comment on how different the two of them are.

Of course I have pics, but you will have to wait until tonight to see them!!
 

steelsoldiers

Administrator
Staff member
Administrator
5,246
3,933
113
Location
Charleston, WV
Pics as promised! The first few are of my hydraulic motor rebuild. I took it all apart again in order to replace all of the o-rings and lubricate it with petroleum jelly as directed. It is a good thing I did because the check valves had water contaminated oil in them and were pretty gunked up. I then reassembled it timing the Geroter and valve assemblies as specified in the manual. Let's hope it works!

The rest of the photos are of yesterday's festivities. Enjoy!
 

Attachments

onegmjack

New member
1,080
8
0
Location
Kingsport TN
Great job, only a real Steel Soldier would work in weather like that.Your truck looks great and the dedication you putting in it is priceless.
 

duncan

Member
550
1
18
Location
None
Shaping up every time you post pictures!

That picture with the warning labels made me wonder, why cant you push/pull start it?
 

steelsoldiers

Administrator
Staff member
Administrator
5,246
3,933
113
Location
Charleston, WV
Thanks Dwight. I feel like the US Postal Service of old. "Neither rain, nor snow, nor sleet, nor hail shall keep me from my appointed 5-ton work session." :) I actually

Duncan, it's an automatic so pushing or pulling with it in gear could do significant internal damage to the tranny. I took the photo to show the "new" warning light cluster. It has a light for high beams, front axle lock, over temp, spring brake override, parking brake on, and low air. The over temp light is actually for the earlier trucks with the NHC-250 Cummins, but I will find a use for it.
 

steelsoldiers

Administrator
Staff member
Administrator
5,246
3,933
113
Location
Charleston, WV
I got some more work done at Winslow's yesterday. I got there around 7:20 and immediately went to work stripping a few more parts off of the donor truck. I was waiting on Joe CrashAF and his buddy to show up. I was going to help Joe pull some parts off of the donor for his 936A2 wrecker project.

I was able to pull off the complete fuel burning heater kit, a mud flap, and a few other bits by the time Joe got there. Once Joe and his pal Mike got there we went to work on getting the parts off that he needed. We removed the steering box, the steering shaft/wheel, a spare tire/wheel, a brake valve, air compressor, and power steering pump.

Once we got everything off we had to get it loaded in the truck. Everything was easy except the spare tire. We wrestled it a little bit and then decided a new tact was needed. I drove up the hill to get the 925A2. We hooked up the chain hoist to the davit boom and used it to haul the tire up in the air to the level of the tailgate. It was easy to roll it into the bed after that. We also used the davit to load my spare into the tire carrier on the 925A2.

Joe and Mike hit the road after we finished. They had a long drive back to SC ahead of them. After they left, my first goal was to pull a good u-bolt from the donor truck to replace to broken one on my truck. It was a royal PITA to get off of the truck. I had to remove all 4 nuts and lock washers, knock the lower spring plate off, and then jack up on the truck underneath the spring to create enough clearance to get the bolt out.

After I got the bolt out, I headed up the hill to move my truck to John's shop. I used the air tools to make it easier get the u-bolt swapped. I repeated the process I used on the parts truck to replace my broken bolt. Upon closer inspection, it looked like the old bolt had been cut with a torch. I have no idea why they would do that, but nothing surprises me at this point. I finally got everything bolted back together and got the truck back on the ground. I definitely feel better knowing that the u-bolts are in good shape.

Progress, progress, progress. I see a road trip in my not too distant future!
 

Attachments

Top
AdBlock Detected

We get it, advertisements are annoying!

Sure, ad-blocking software does a great job at blocking ads, but it also blocks useful features of our website like our supporting vendors. Their ads help keep Steel Soldiers going. Please consider disabling your ad blockers for the site. Thanks!

I've Disabled AdBlock
No Thanks