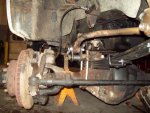
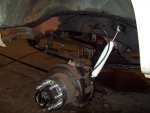
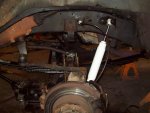
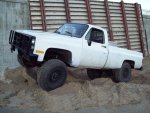
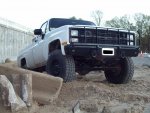
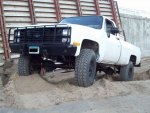
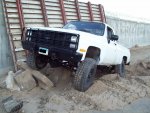
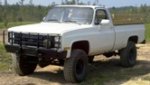
So I finally got all of my parts in and got around to installing everything. I ordered my tires from MILITARYOFFROADTIRES.NET - We're declaring war on high tire prices!. They are 37" x 12.5" x 16.5" HMMWV Goodyear Wrangler MT's on 12-bolt HMMWV bead-lock wheels with the rubber run-flat inserts. The lift is a 4" basic kit from Offroad Design - Fullsize Chevy GM 4x4 Suspensions, Parts and Performance with the addition of the swaybar correction/disconnect kit. It included new Easy Ride HD front springs from Tuff Country, Dana 60 U-bolt kit, new brake lines, drop Pitman arm from Skyjacker, new shocks from TC, and a rear shackle flip kit. I still plan to add Crossover steering at some point and a bolt-on steering box brace as soon as possible. Competition bump-stops are also on the list as well as a dedicated tranny cooler. The shock boots are in the mail right now. I'm running 2" backspace adapters up front and plan to add another set to the rear when time and budget allow.
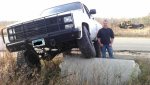
Overall the install went really smooth except at the very end when we realized that the stock lug nuts would not fit into the holes in the spacer. This meant that I had to drive around for a day with 37" rear tires and 31" front tires. I felt absolutely ridiculous, but I was able to find the right ones the next day and get the project wrapped up. I'm VERY impressed with just how capable this truck is now. I did some mild off-roading (don't want to get too crazy with it until I brace the steering box, get new bump-stops, and get the shock boots on) and this thing really performs! Great flex and articulation up front with the swaybar disconnected. TOO much actually! I still had to trim the front fenders back. Even now with the swaybar off I rub the inner fender when turned hard. Not too bad though.
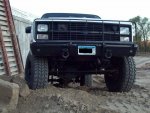
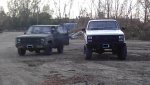
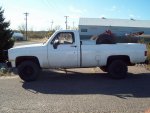
This thing REALLY gets noticed going down the road now. I'm getting the thumbs up quite a bit. I had a little run-in with Minnesota's Finest 3 days after the project was wrapped up. Said he had an issue with my bumper height (29"). Said legal limit is 25". Also, no light on the rear license plate. Good thing he didn't peek under the truck and see my DIY exhaust work (Sawzall just in front of the mufflers with some 45 degree elbows pointing at the ground). So my next project which we just measured up for will be to weld up a bolt-on drop bumper that I can (somewhat) easily remove before going off pavement. Pics to follow on that project.
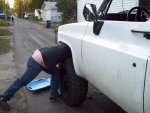
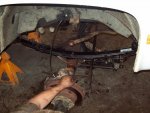
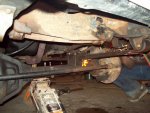
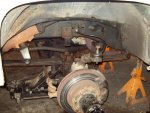
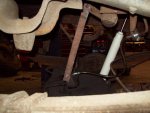
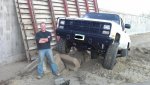
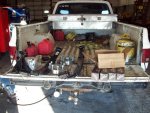
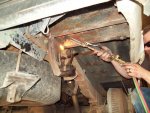
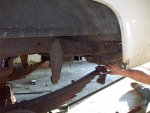
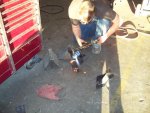
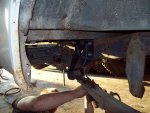
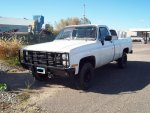
I thought you guys would like to see some pics, so here ya go! This includes some before, during, and after pics. We had to notch the rear shackle mounts to clear my tow kit. We also had to fab up a longer arm for the rear brake proportioning valve and tack on some washers to hold it on. The guy in most of these pics is my friend who did most of the work, so no, that's not my huge butt crack. I was taking most of the pics. The ones with me standing next to the truck IS me. Enjoy!
Overall the install went really smooth except at the very end when we realized that the stock lug nuts would not fit into the holes in the spacer. This meant that I had to drive around for a day with 37" rear tires and 31" front tires. I felt absolutely ridiculous, but I was able to find the right ones the next day and get the project wrapped up. I'm VERY impressed with just how capable this truck is now. I did some mild off-roading (don't want to get too crazy with it until I brace the steering box, get new bump-stops, and get the shock boots on) and this thing really performs! Great flex and articulation up front with the swaybar disconnected. TOO much actually! I still had to trim the front fenders back. Even now with the swaybar off I rub the inner fender when turned hard. Not too bad though.
This thing REALLY gets noticed going down the road now. I'm getting the thumbs up quite a bit. I had a little run-in with Minnesota's Finest 3 days after the project was wrapped up. Said he had an issue with my bumper height (29"). Said legal limit is 25". Also, no light on the rear license plate. Good thing he didn't peek under the truck and see my DIY exhaust work (Sawzall just in front of the mufflers with some 45 degree elbows pointing at the ground). So my next project which we just measured up for will be to weld up a bolt-on drop bumper that I can (somewhat) easily remove before going off pavement. Pics to follow on that project.
I thought you guys would like to see some pics, so here ya go! This includes some before, during, and after pics. We had to notch the rear shackle mounts to clear my tow kit. We also had to fab up a longer arm for the rear brake proportioning valve and tack on some washers to hold it on. The guy in most of these pics is my friend who did most of the work, so no, that's not my huge butt crack. I was taking most of the pics. The ones with me standing next to the truck IS me. Enjoy!
Attachments
-
 91.7 KB Views: 225
 -
 81.2 KB Views: 251
 -
 87.4 KB Views: 260
 -
 77.2 KB Views: 236
 -
 76.2 KB Views: 263
 -
 46.8 KB Views: 246
 -
 59.9 KB Views: 259
 -
 75.2 KB Views: 252
 -
 75.7 KB Views: 281
 -
 89.4 KB Views: 280