• Steel Soldiers now has a few new forums, read more about it at: New Munitions Forums!

  • Microsoft MSN, Live, Hotmail, Outlook email users may not be receiving emails. We are working to resolve this issue. Please add support@steelsoldiers.com to your trusted contacts.


My M35A2 Project aka Big Betty

TMNT

New member
789
6
0
Location
Canton, Ga
My guard cat keeping watch over my deuce. I've never seen her climb on any vehicle before but she seems to like the view from up there.
ImageUploadedByTapatalk1369488166.326406.jpg
 

clinto

Moderator, wonderful human being & practicing Deuc
Staff member
Administrator
Super Moderator
Steel Soldiers Supporter
Supporting Vendor
12,596
1,123
113
Location
Athens, Ga.
With all the work you've had to do to that thing, whoever sold it to you ought to be ashamed of themselves.
 

TMNT

New member
789
6
0
Location
Canton, Ga
With all the work you've had to do to that thing, whoever sold it to you ought to be ashamed of themselves.
You know, that's what I was thinking but SHE probably doesn't care what we think.

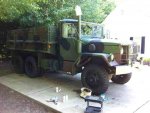
I've got it looking good though. Tell clintogf that next time, I'm buying the paint package and the extended warranty!

ImageUploadedByTapatalk1369517226.463676.jpg
 

dangeroustyz

Member
171
2
18
Location
buford ga
Scott. truck is looking good. Alittle tYme and i will have mine up and going. Looks like you gota do alittle work to get these things up to par. I got BIG planes for mine. See you soon buddy.
 

GrizzlyEater

New member
51
0
0
Location
Milaca Minnesota
WOW!!!!! TNMT very very impressive! I plan on getting my first deuce very soon and I will use your thread as a how-to guide for sure! I may not be as mechanically inclined as you however I have friends who are, and beer to labor costs go a long way! Please keep up-dating, it only took me around an hour to read the last year and a half of progress keep it coming. I have two daughters and a son, the boy is so excited with the idea of me buying a deuce and I love how pumped your son is about it too.
 

TMNT

New member
789
6
0
Location
Canton, Ga
Thanks GrizzlyEater. Your kind words are appreciated.

I've been working a lot and it seems like it has rained nearly every day, so I haven't been able to do much with the truck for 6 or 7 weeks now.

I'll post more when I'm able to make some more progress with it.
 
Last edited:

TMNT

New member
789
6
0
Location
Canton, Ga
I decided I should do at least one hub on my own before I had Clinto do the rest. I wanted the experience of doing this and hey, maybe it's easy and I can just do them all. Not.

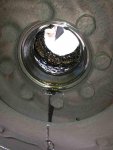
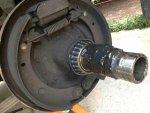
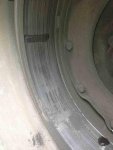
Well, the work isn't bad. I had the first hub (left rear) off in about 10-15 minutes. I found that the inner seal had leaked some 90w into the hub and washed most of the grease out of the bearings. I had no visible leaks, but the inside if the hub was a mess. The bearings look ok, but I'll have to clean them up and inspect them more carefully. The brake shoes are pretty thin and the inside of the drum has surface grooves. It looks like the credit card balance is going up again.

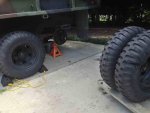
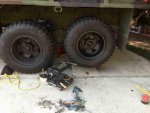
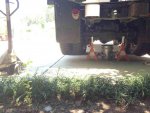
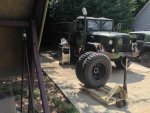
Rear axle supported on stands. Note the pallet jack on the left side. That worked really well for pulling the wheel/hub assembly.
ImageUploadedByTapatalk1375125034.950659.jpg

Inside of the hub. It's a wet, sloppy mess in there.
ImageUploadedByTapatalk1375125133.132850.jpg

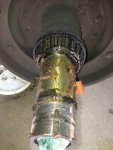
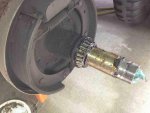
Spindle and brake assembly. Yeah, that's a mess too.
ImageUploadedByTapatalk1375125193.632760.jpg

Inside of the brake drum.
ImageUploadedByTapatalk1375125243.366570.jpg

Hub and wheel assembly sitting on the pallet jack.
ImageUploadedByTapatalk1375125279.933119.jpg

Brake assembly and spindle after two cans of brake cleaner and work with a soft bristle paint brush.
ImageUploadedByTapatalk1375125318.033041.jpg

Next, I've got to clean out the hub and drum and see how that looks. I need to take some measurements on the drum to see if it can be turned.

This is not going to be the quick and cheap job I hoped it would be.
 
Last edited:

TMNT

New member
789
6
0
Location
Canton, Ga
I got the goo cleaned up and I'm starting the reassembly. The shoes are ok and I can live with the drum condition for now. If the rest are in this condition, I'll plan a full brake job for later this year.

ImageUploadedByTapatalk1375129401.496082.jpg

ImageUploadedByTapatalk1375129416.113187.jpg

ImageUploadedByTapatalk1375129432.979719.jpg
 

TMNT

New member
789
6
0
Location
Canton, Ga
I quit working on the truck yesterday to go watch my boy ride a 4-wheeler and then join him and his "Poppa" for some dinner. Have to work this afternoon but I managed to get the right rear hub back on the truck with new seals and fresh grease this morning. I used "The Right Stuff" to plug the keyway. I have 2 worries at this point:

1. I'm not sure I have the outer seal in correctly. I installed it with the "cup" side toward the bearings. I read and re-read the TM but I didn't find any place that indicated the correct orientation. It says "as shown" but of course the diagram doesn't indicate which side goes in.

2. I'm not sure I have the preload set correctly. The TM says to tighten the adjusting nut until it binds the wheel and then back off an eighth of a turn. Well, I torqued it on there pretty good and couldn't get it to bind the wheel. I backed it off and did it again several times and finally decided that the point where the wheel no longer had any lateral movement and the sound of the wheel rolling changed (silent) is "the point." I then backed it off just enough for the locking tab to engage. The wheel rolls very smoothly, makes no noise, and has no lateral movement to be felt or heard. All I can do now is drive it and check the hub temperature to see how she does.

ImageUploadedByTapatalk1375194056.039938.jpg
So, do I have that seal in there backward?
ImageUploadedByTapatalk1375194072.451719.jpgImageUploadedByTapatalk1375194081.601505.jpg
ImageUploadedByTapatalk1375194091.901654.jpg
 

TMNT

New member
789
6
0
Location
Canton, Ga
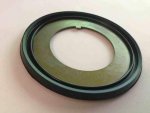
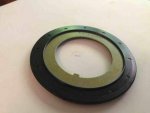
Here's a couple of photos of the outer seal.

Does this side (Side A) go toward the bearings, facing inward? (This is what I chose.)
ImageUploadedByTapatalk1375194337.351429.jpg

Or, does this side (Side B) go toward the bearings, facing inward?
ImageUploadedByTapatalk1375194376.284822.jpg

I guess I could just go ahead and open the other hub on the rear axle and look at how it is put together, but just because someone else did it, doesn't mean it's right.
 

tommys2patrick

Active member
672
199
43
Location
Livermore, Colorado
Great thread. I like your attitude. Gotta try it at least once!! definitely a lotta work though. Sure wish I had a nice flat piece of concrete to work on. Keep up the progress. Can't really say much about the seal being right side out or not. Sometimes those TM's don't have good pictures of the work in progress.
 

clinto

Moderator, wonderful human being & practicing Deuc
Staff member
Administrator
Super Moderator
Steel Soldiers Supporter
Supporting Vendor
12,596
1,123
113
Location
Athens, Ga.
Does this side (Side A) go toward the bearings, facing inward? (This is what I chose.)
View attachment 443660
You have it correct. Side A faces the bearings, side B faces the outside.


Bearing preload: I know the TM's call for the method they do, but once you've done enough bearings there's a "feel" to it. Not too loose, not too tight. Most people err on the side of too tight, which is worse. I'd rather them be a little looser.

It's hard to describe but I could show you in 30 seconds. I crank them down tight to seat the bearings, then back off, then tighten back up to where there's no rolling resistance and no movement.
 

TMNT

New member
789
6
0
Location
Canton, Ga
Thanks, Clint. I had a 50/50 shot and I guessed it right!

What you described for setting the bearing preload sounds about right for what I did. I cranked it in there pretty hard and then backed it out again. I tightened it up until I couldn't feel any lateral movement by rocking the tire back and forth by grabbing the top and pushing and pulling. At that point the wheel rolled very nicely with no noise. I backed it out until I could just pick up a little clicking feel from pushing the tire around with a pry bar. Where I set it, is in between the clicking noise and no detectable movement. I'll run it there and see how the temperatures are. If it runs warm I'll back it out a little.

This first one has taken several hours to do, but I had a lot of interruptions and I don't need to be in a hurry. I think the other side will go much faster now that I know what to expect. I might even get lucky and find a clean hub!
 
Last edited:

TMNT

New member
789
6
0
Location
Canton, Ga
Great thread. I like your attitude. Gotta try it at least once!! definitely a lotta work though. Sure wish I had a nice flat piece of concrete to work on. Keep up the progress. Can't really say much about the seal being right side out or not. Sometimes those TM's don't have good pictures of the work in progress.
If I were in a hurry, this would seem like a lot of work. As it is, I work on it for 2-3 hours and then I go do something else. That saves me from getting tired and frustrated. I'm not worried about finishing, I'm just doing.

Having a bit of concrete to use is nice. I have a bit of slope to the passenger side of the truck. Not too much, just enough to cause sockets and other round tools to roll down hill. It's sure better than climbing around in the dirt and fighting with the fire ants!

...And you're right about the "photos" in the TM's. They are mostly dark blobs of ink with a callout number.
 
Last edited:

TMNT

New member
789
6
0
Location
Canton, Ga
The rain has my driveway mechanic shop shut down. Its raining off and on with decent periods with no rain. I really want to get back to work on servicing the hubs, but I know as soon as I get the tools out and get started, it'll rain again. Blah!
 

TMNT

New member
789
6
0
Location
Canton, Ga
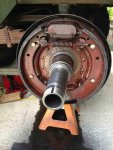
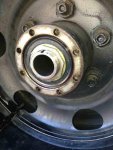
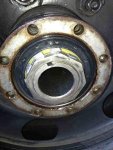
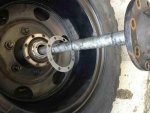
Finally getting back at it on the hub servicing. Working on the right rear now. This hub had 90w intruded into the hub as well. This one also has some water droplets. Again, there has been no external evidence of a problem. No gear lube leaking out, no heat problems, and no bad noises.

I am now convinced that the hubs should be opened, inspected and serviced at least every 6 months, even when there is no evidence of a problem. At least there are no signs of bearing, race, or spindle damage. And, in fairness, I have no idea how long it's been since these hubs were serviced. I've had the truck for a year and a half, so it's been at least 2-3 years and maybe 10,000 miles. I know, my bad. I should have done this a year and a half ago. I thought it would be more difficult than it is so I kept putting off. Other than the greasy mess, it's not a bad job to do.

ImageUploadedByTapatalk1375386185.407811.jpg
ImageUploadedByTapatalk1375386196.523489.jpg
ImageUploadedByTapatalk1375386205.756629.jpg
 

TMNT

New member
789
6
0
Location
Canton, Ga
Got the hub and bearings cleaned up and guess what? Yep, here comes the rain again!

This hub was not nearly as messy as the left rear. The intrusion of 90w was not bad, so the grease was mostly just grease and not the grease/90wt/water/peanut butter that I had on the left side.

ImageUploadedByTapatalk1375388709.716231.jpg
ImageUploadedByTapatalk1375388728.549966.jpg
 

TMNT

New member
789
6
0
Location
Canton, Ga
Finally got to finish the right rear hub. It's back on with fresh seals and fresh grease. I cleaned and checked the axle vent and adjusted the brakes on that rear axle. The diff is filled with fresh 90Wt.

Next I'm checking and servicing the trunnions and then moving on to the middle axle.
 
Top
AdBlock Detected

We get it, advertisements are annoying!

Sure, ad-blocking software does a great job at blocking ads, but it also blocks useful features of our website like our supporting vendors. Their ads help keep Steel Soldiers going. Please consider disabling your ad blockers for the site. Thanks!

I've Disabled AdBlock
No Thanks